How to Replace a Sump Pump Check Valve
Practical DIY guide to replacing a sump pump check valve. Learn when to replace, how to choose the right valve, and a safe step-by-step installation.

Learn how to replace a check valve on your sump pump to stop backflow and water hammer. This guide covers when replacement is needed, selecting the right valve, and a safe, step-by-step installation. You’ll also find maintenance tips to keep your system reliable and prevent future leaks. Included safety notes and a quick checklist.
What is a sump pump check valve and why replace it?
A sump pump check valve is designed to stop backflow from the discharge pipe into the sump pit. Its job is to keep water moving away from the house and protect the pump from reverse flow. According to Sump Pump Check, a worn or stuck check valve can fail to seal, allowing backflow that undermines basement drainage and creates water hammer. If you notice water seeping back into the basin after the pump shuts off, or if the check valve has visible corrosion or buildup, it's time to replace the valve. Replacing a check valve sump pump restores proper flow, reduces stress on the pump, and helps prevent future flooding. The process is straightforward for many DIYers, but accuracy in orientation, sealing, and pipe compatibility matters to avoid leaks. This article walks you through selecting the right valve, preparing your workspace, and executing a safe replacement that protects your basement and your investment.
Signs your check valve may need replacement
Common signs of a failing check valve include backflow into the sump basin after the pump stops, loud clicking or water hammer in the discharge line, visible leaks around the valve, or frequent clogs from debris. Sump Pump Check analysis shows that these symptoms typically indicate a valve that no longer seals reliably or has become misaligned. If your discharge line is permanently pressurized or you detect odors near the pit, these point to possible valve issues or piping leaks. Inspecting the valve orientation arrow and testing with a simple water flow check can help confirm the problem. In many homes, replacing the valve is a cost-effective upgrade compared to replacing the entire pump and can restore full function without major plumbing changes. Always ensure you follow local code requirements and safety practices during replacement.
Types of check valves and how to choose
Valve types include swing check valves and spring-loaded check valves. Swing valves are inexpensive and simple but can get stuck if debris accumulates; spring-loaded valves offer quick closure and are less prone to backflow but may require tighter tolerances. When you replace the valve, match the pipe size (commonly 1-1/2 in. or 1-1/4 in.) and confirm the orientation arrow points away from the sump pit. Consider material compatibility with your discharge pipe (PVC, CPVC, metal). For DIYers, a basic swing check valve with a secure hose clamp may be sufficient, while more complex installations might benefit from a threaded valve with appropriate adapters. Keep your pump’s warranty and local building codes in mind; some jurisdictions require specific valve types or certifications for safety and reliability. This is a good time to consider upgrading to a backflow-preventing valve if you frequently experience backflow issues.
Safety, prep, and planning
Before starting the replacement, turn off the circuit breaker feeding the sump pump and unplug the unit. Wear gloves and eye protection, and place towels or a basin to catch any residual water. Disconnect the discharge pipe from the pump and inspect nearby piping for cracks or corrosion. Plan the layout ahead: determine whether you need adapters, unions, or new pipe segments, and ensure the valve will fit the discharge line and the harness. Keep a bucket handy and have your replacement valve ready. As you work, ensure the area remains dry to reduce slip hazards and avoid accidental contact with wiring. After installing, run a test by adding water to the pit and watching the valve seal as the pump cycles. If you detect leaks, re-tighten connections and reseal as needed.
Authority Sources
For further reading on safe basement drainage and plumbing safety, consult these authoritative resources. They provide general guidance that informs DIY tasks like valve replacement, including electrical safety, proper tool use, and measures to protect your home from water damage. While they are not sump pump manuals, they help ensure you follow best practices and code requirements when performing a valve replacement.
- https://energy.gov
- https://epa.gov
- https://osha.gov
Tools & Materials
- New check valve (sump pump)(Ensure correct size for your discharge pipe (1-1/2" or 1-1/4").)
- PVC pipe segments or adapters(Needed to fit between pump outlet and discharge line, may include unions.)
- PVC primer and cement(For glued PVC connections, use approved primer and cement.)
- Pipe wrench or adjustable wrench(Used to loosen fittings and tighten clamps.)
- Teflon tape or pipe thread sealant(Seal threaded connections to prevent leaks.)
- Hacksaw or PVC cutter(Needed if you must cut piping to fit the new valve.)
- Bucket, towels, and rags(Contain and absorb water during the swap.)
- Safety gear (gloves and eye protection)(Protect hands and eyes from debris and splashes.)
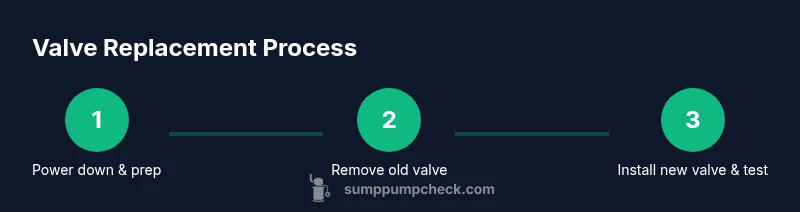
Steps
Estimated time: 60-90 minutes
- 1
Power down and prep
Turn off the sump pump at the circuit breaker and unplug the unit. Confirm there is no power to the pump before touching any wiring. This reduces the risk of electric shock while you work.
Tip: Use a non-contact voltage tester to verify the circuit is dead before you begin. - 2
Drain and disconnect discharge line
Place a bucket or towels under the discharge line and disconnect it from the pump. If water remains in the line, tip it into the bucket slowly to minimize splashing. This step prevents spills when removing the old valve.
Tip: Label hoses or use painter's tape to avoid mixing connections later. - 3
Remove the old valve
Loosen hose clamps or threaded connections and pull the old valve away from the discharge pipe. Inspect the fittings for corrosion or damage. If the valve is glued in place, score and carefully cut the joint to minimize pipe damage.
Tip: Take a quick photo of the setup before removal to reference orientation. - 4
Prepare the new valve and fittings
Compare the new valve to the old one for size and orientation. If you use glue, apply primer and cement as directed and let joints cure. If you use mechanical fittings, ensure clamps, adapters, and gaskets are ready before installation.
Tip: Double-check valve orientation arrow points away from the sump pit. - 5
Install the new valve
Attach the new valve using hose clamps or threaded fittings, ensuring a snug but not overtightened connection. Apply Teflon tape to threaded connections if required and center the valve so it clears obstacles in the discharge path.
Tip: Leave a small amount of slack in hoses to accommodate vibration. - 6
Reconnect discharge line and power
Reconnect the discharge line and restore power to the pump. Run a small amount of water into the sump to test the valve seal as the pump cycles. Watch for leaks and confirm water is moving away from the home.
Tip: If leaks occur, re-tighten or reseal connections and re-test. - 7
Final checks and cleanup
Wipe any spilled water and secure all tools. Recheck all connections after the system has run for a few minutes. If everything looks dry and seals hold, you’ve completed the replacement successfully.
Tip: Keep a maintenance log and schedule periodic checks every season.
FAQ
What is a sump pump check valve and why replace it?
A check valve prevents backflow from the discharge line into the sump pit, protecting the pump and home from flooding. Replace it when it leaks, sticks, or no longer seals properly.
A check valve stops backflow and keeps water moving away from your basement. If it leaks or sticks, replace it to protect your home.
How do I know if my check valve is failing?
Look for backflow into the sump pit, unusual water hammer, debris buildup, or a valve that is hard to operate or noisy. All these indicate replacement may be needed.
Backflow or loud hammering are common signs of a failing check valve.
Can I replace the valve without replacing the sump pump?
Yes. Replacing just the valve is common when the pump and motor are in good condition. Ensure the new valve matches the pipe size and arrangement.
In many cases you can replace only the valve if the pump is still solid.
Are there different valve types?
Yes. Common types include swing check valves and spring-loaded check valves. Choose one with proper flow direction and compatible fittings for your discharge pipe.
There are several valve types; pick one that matches your pipe and direction.
Do I need professional help to replace a check valve?
Many homeowners can replace a valve themselves. If you’re unsure about electrical safety or pipe work, hire a plumber or HVAC technician for peace of mind.
If you’re unsure about plumbing or electricity, consider a professional.
How long does valve replacement take?
Time varies with setup, but plan for a window of one to two hours. Keep water ready for draining and have tools prepared in advance.
Most replacements take a bit of time; set aside a couple of hours.
Watch Video
Top Takeaways
- Plan and measure before you start
- Install valve with correct orientation away from the sump pit
- Test thoroughly for leaks and proper flow
- Maintain a simple maintenance schedule to prevent backflow