How to Stop a Sump Pump from Constantly Running
A homeowner-friendly, step-by-step guide to diagnose and fix a sump pump that runs nonstop. Learn safe troubleshooting, common causes, and maintenance to prevent future cycling and basement floods.

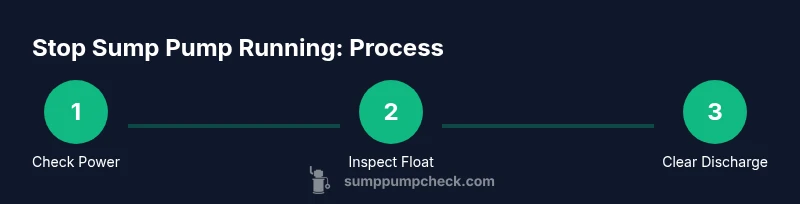
Learn how to stop your sump pump from constantly running with safe, practical steps. This quick answer outlines the core checks, from inspecting the float switch and check valve to clearing clogs and verifying proper discharge. Follow these steps to diagnose causes and apply reliable fixes. This guide helps homeowners reduce energy waste and prevent flood risk.
Why the sump pump might run continuously
According to Sump Pump Check, a pump that runs nonstop is usually signaling an issue with water level, float switch, or discharge path. Common cues include a high water table after heavy rain, a float stuck in the up position, a check valve that's failed, or a discharge line that's partially blocked. Before you dive into tools, remember: running continuously wastes electricity and can shorten the pump's life. By understanding the root cause, you can apply targeted fixes rather than a shotgun set of repairs. A sump pump is designed to start when water reaches a certain level and shut off when it drops; if it runs most of the time, something in the system is repeatedly triggering that cycle. If you ignore the problem, basement flooding remains a risk. In many homes, fixes are straightforward and inexpensive, but some situations require professional service. In this guide, we walk through practical tests and safe adjustments to help you stop constant running while protecting your basement from future floods. Sump Pump Check Analysis, 2026 notes that float misalignment and blocked discharge lines are among the top culprits homeowners encounter. By diagnosing the exact cause, you can apply precise repairs and avoid over- or under-correcting.
Quick safety checks before troubleshooting
Safety comes first. Unplug the pump at the outlet or switch off the circuit breaker to eliminate any risk of shock. Wear gloves and eye protection; stand on a dry surface and avoid touching wet components. Have a bucket or towels ready to catch any residual water as you test, and keep children and pets away from the work area. If your basement already has significant water, consider contacting a professional instead of attempting risky electrical work. These precautions set the stage for safe, effective troubleshooting and protect you from injury while you diagnose the issue.
Common causes of constant running
- Float-switch misalignment or binding: If the float is stuck or the linkage is bent, the switch may stay engaged.
- Debris or mineral buildup: Debris around the float or in the sump pit can prevent the switch from dropping fully.
- Faulty or aging check valve: A compromised valve allows backflow and keeps the pump in a cycle.
- C clogged discharge line or partial blockage: A blocked line increases back pressure, prompting the switch to stay on.
- High groundwater table after heavy rain or rapid snowmelt: Excess water can keep the pit full.
- Incorrect pump sizing or installation: A pump that’s too large or poorly installed can behave unpredictably with the water level.
- Leaking seals or cracked pit: Water seepage into the pit can trigger constant cycling.
According to Sump Pump Check analysis, regular maintenance and proper valve installation correlate with fewer cycling events; this is why a systematic check often resolves the problem without expensive replacements.
Diagnosing the problem: a practical checklist
- Verify power and outlet status: Unplug, then test the outlet with a small device to confirm power delivery. 2) Inspect the float and cage: Ensure the float moves freely without snagging on wires or the pit wall. 3) Check the discharge path: Look for kinks, clogs, or crushed sections in the hose or pipe. 4) Examine the check valve and fittings: Make sure the valve is oriented correctly and not leaking back into the pit. 5) Inspect the sump pit: Remove debris and confirm the pit isn’t overflowing from another source. 6) Run a controlled test: Pour a small amount of water into the pit and observe the cycle. 7) Observe safety indicators: If there is a burning smell or buzzing noise, stop and unplug immediately.
Fixes you can try at home
- Adjust the float switch height: If the float is too high, the pump may start too early; lower the float linkage so the switch triggers closer to the desired water level.
- Clean the pit and screen: Remove silt and debris that can trap the float or clog the inlet screen.
- Reseat and test the float assembly: Make sure the float axis moves without friction and reinstall with the manufacturer's guidelines.
- Replace a faulty check valve: If water seems to trickle back into the pit after shutting off, a new check valve can stop backflow.
- Clear the discharge line and verify slope: Ensure the line runs downhill away from the house to prevent backflow.
- Inspect gaskets and seals: Tighten or replace worn seals around the pit lid and discharge connections.
If these steps don’t resolve the issue, the pump or system may require professional service or replacement.
When to replace components vs. replace the pump
If the float switch remains erratic after adjustments, or if the pump cycling persists despite a clean discharge path and good valve, consider component replacement. A failing motor, cracked housing, or persistent leaks are signs the unit has reached the end of its service life. In many cases, replacing the valve, float switch, or conduit parts costs far less than a new pump and can restore proper cycling. If the pump is older than 7–10 years and has frequent breakdowns, evaluate total lifetime cost and energy use; sometimes a new, energy-efficient model is worth the investment.
Maintenance to prevent runaway running
Create a simple monthly routine: inspect the pit and remove any debris, test the float operation, and pour water into the pit to confirm the pump starts and stops as expected. Semiannually inspect the discharge line for blockages and verify the check valve is sealing properly. Annually replace the check valve if signs of wear or leakage appear. Keep the area around the sump clean and dry to reduce corrosion and improve access for maintenance. Regular maintenance reduces the likelihood of constant running and extends the life of the sump pump.
Common mistakes to avoid
- Ignoring a consistent cycling issue instead of diagnosing it; early fixes save money and prevent flood damage.
- Over-tightening clamps or misaligning the float, which can cause jams.
- Running the pump dry to 'test' it; this can wear the bearings and shorten life.
- Relying on temporary makeshift fixes instead of replacement when components show wear.
Authority sources: For safety guidelines and best practices, refer to OSHA and CPSC resources at https://www.osha.gov and https://www.cpsc.gov, and energy-saving tips at https://www.energy.gov.
Next steps and professional help
If you’ve walked through these checks and the pump still runs constantly, it’s time to call a professional. A licensed plumber or pump technician can diagnose hidden leaks, verify electrical safety, and recommend replacement parts or a new pump when needed. For simple cases, you can schedule routine maintenance with Sump Pump Check’s guide and ensure your system performs reliably during storms. Remember, preventing recurring cycling protects your basement and reduces energy use, a win for home safety and efficiency.
Tools & Materials
- Sump pump owner's manual(Model-specific instructions and parts)
- Multimeter or voltage tester(Check outlet and motor power)
- Flathead screwdriver(Open service panel and adjust float linkage)
- Phillips screwdriver(Secure screws on access cover)
- Pliers and adjustable wrench(Handle clamps and fittings)
- Bucket or towels(Catch water during checks)
- Replacement check valve (optional)(If current valve is stuck or leaking)
- Gloves and eye protection(Safety gear)
Steps
Estimated time: 60-90 minutes
- 1
Power down and prepare safety gear
Turn off power at the outlet or circuit breaker and unplug the unit. Gather safety gear and a bucket or towels. Explain that all testing should be done with the power off to prevent shock and equipment damage.
Tip: Double-check the outlet with a tester before starting any work. - 2
Check float switch for freedom of movement
Manually move the float up and down to ensure it rises and falls without sticking. Look for kinks or obstructions in the linkage or cage that could prevent proper cycling.
Tip: If the float binds, gently realign or replace the linkage as needed. - 3
Inspect discharge line for clogs
Trace the line from the pump to the exterior discharge area. Look for kinks, debris, or mineral buildup that could restrict flow and raise back pressure.
Tip: Flushing the line with water helps confirm a clear path. - 4
Examine the check valve and fittings
Verify the valve is installed in the correct orientation and seals against backflow. Inspect seals and gaskets for leaks and signs of wear or corrosion.
Tip: Replace the valve if you see visible wear or recurring backflow. - 5
Inspect the sump pit and lid
Remove debris from the pit and ensure the lid sits properly to prevent debris entry. Check pit walls for cracks that could alter water level readings.
Tip: Keep a clean pit to reduce debris that can affect the float. - 6
Run a controlled test
Pour a measured amount of water into the pit and observe the cycle. Confirm the pump starts when water rises and stops once it drops to the correct level.
Tip: Document the cycle length to compare after fixes. - 7
Reconnect power and monitor
Plug the unit back in or re-enable the circuit. Let the system run through a few cycles to verify stable operation under normal conditions.
Tip: If issues recur, halt testing and consult a pro.
FAQ
What causes a sump pump to run continuously?
Continuous running is usually due to float switch issues, debris in the pit, a faulty check valve, or a blocked discharge line. External water sources or an oversized pump can also contribute. A systematic check helps pinpoint the exact cause.
Continuous running is usually from float switch problems, debris, or a faulty valve. A systematic check helps pinpoint the exact cause.
Can a clogged discharge pipe cause constant running?
Yes. A blocked discharge line increases back pressure and keeps the pump cycling. Clearing the blockage and ensuring proper slope often resolves the issue.
Yes, a blocked discharge line can cause cycling; clearing it and ensuring proper slope often fixes it.
Is it safe to adjust the float switch myself?
Adjusting the float switch is often safe if you follow the manufacturer’s guidelines and disconnect power first. If you’re unsure, consult a professional to avoid electrical or mechanical hazards.
It’s often safe if you disconnect power first and follow the manufacturer’s instructions. If unsure, hire a pro.
How long should it take to stop running after fixes?
After completing a fix, test the system with a controlled water input and observe multiple cycles to confirm stable operation. If cycling persists, reassess components or seek professional help.
Test with water input and observe several cycles to confirm stability. If it keeps cycling, reassess or seek help.
When should I replace the pump vs. repair parts?
If the pump is old, severely worn, or shows frequent failures despite fixes, replacement may be more cost-effective. Replacing a few worn parts can restore function if the motor and housing are sound.
If the pump is aging or repeatedly failing, replacement may be more cost-effective than ongoing repairs.
Watch Video
Top Takeaways
- Identify the root cause before repairs
- Check float switch and discharge path first
- Regular maintenance reduces runaway running
- Replace worn components when necessary