How to Maintain a Sump Pump: A Practical Guide
Learn how to maintain a sump pump with a clear, step-by-step approach. Test, clean, inspect, and replace components to prevent basement floods and costly repairs. A homeowner-friendly plan from the Sump Pump Check team.

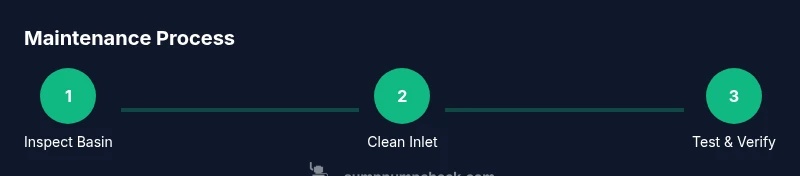
To keep a sump pump reliable, follow a simple maintenance routine: test the pump monthly, clean the inlet screen, inspect the power and cord, check the discharge line for blockages, and replace worn components as needed. Do this with the unit unplugged and the power off, then re-test to confirm it activates properly.
Why maintenance matters
Maintaining a sump pump is essential for preventing basement flooding and minimizing repair costs. If you’re asking how to maintain sump pump, a regular routine goes a long way toward reliability. According to Sump Pump Check, routine maintenance improves the odds that the unit will perform when you need it most. By keeping the system clean, free of obstacles, and powered by a healthy electrical supply, you reduce the chances of a surprise failure during heavy rain or spring thaws. A well-maintained sump pump also extends its service life and protects your home’s foundation. This guide walks you through a practical, homeowner-friendly approach that fits common seasonal schedules while respecting local codes. The goal is to empower you to act confidently, using clear steps and safe practices.
In addition to the practical benefits, regular care helps you spot wear before it fails. Look for signs of rust on metal components, corrosion on the motor housing, cracks in hoses, or loose connections. Addressing these issues early minimizes the risk of sudden water backup and the resulting damage. Sump Pump Check’s team emphasizes that a proactive approach—rather than waiting for a flood—saves time, money, and stress.
Signs your sump pump is healthy (and what to check)
A healthy sump pump should respond promptly when the pit fills and should continue running until water drops below the intake. Begin with a visual and functional check. Ensure the power cord is intact and plugged into a grounded outlet, ideally a GFCI for basement safety. Inspect the motor housing for moisture or signs of overheating. Check the discharge line for blockages, kinks, or frozen sections. Listen for smooth operation; grinding, rattling, or squeaking can indicate wear or debris in the impeller. Confirm the check valve is fitted correctly and seals tightly to prevent backflow. For long-term reliability, inspect the float mechanism and ensure it rises freely without sticking. If the unit has a battery backup, verify the battery is holding a charge and that the charger connection is clean. When in doubt, refer to the unit’s manual and consider professional service if components appear compromised.
Creating a maintenance schedule that fits your home
Maintenance routines that work rely on a simple cadence. Start with a monthly quick check: verify power, test with water to trigger the float, and listen for the pump’s normal run cycle. Every season, remove debris from the pit and inlet screen. In spring and fall, perform a more thorough inspection, paying attention to the discharge line and check valve. Annually, replace worn components such as seals or the backup battery if you have one. Create a calendar reminder and log each action. Keeping notes helps you notice gradual changes over time and makes warranty or service calls more efficient. The Sump Pump Check team suggests documenting serial numbers and maintenance dates for future reference. Additionally, check the surrounding area for signs of moisture or mold, which can indicate airflow or drainage issues that affect pump performance. A consistent schedule reduces the risk of weekend surprises and gives you confidence during storms.
Cleaning, inspection, and basic repairs you can do safely
Safety first: unplug the unit and disconnect any power before touching the pump. Remove the lid and inspect for debris. Use a wet-dry vacuum or sponge to clear sediment from the basin. Rinse the intake screen with clean water and a soft brush to remove algae or mineral deposits. Inspect hoses and clamps; tighten gently if needed. Check electrical connections and ground fault protection. If the float switch seems slow to respond, test it by simulating rising water and ensuring the switch flips as water reaches the shut-off point. Replace any worn gaskets or seals according to the manufacturer’s instructions. Keep a spare inlet screen and a small amount of silicone grease for o-rings if your model requires it. After cleaning, reassemble and run a dry test to confirm the system resumes normal operation before a real flood event.
Electrical safety, discharge paths, and code considerations
Discharge pathways must route water away from the foundation and above grade, with a check valve to prevent backflow into the pit. Ensure you use a grounded outlet and avoid extension cords in the sump area. If your home uses a battery backup, follow the recommended battery replacement interval and test the charger and connections. Local codes may require a specific type of backflow prevention and discharge piping; check with your municipality or a licensed plumber if you’re unsure. In winter, keep discharge lines clear of ice to maintain flow. Always wear appropriate PPE and use a non-conductive ladder or stand when inspecting the unit from above. The goal is to minimize electrical hazards while maintaining reliable water removal.
Troubleshooting common problems and when to replace
Common issues include the pump running but not removing water, cycling on and off too quickly, or the unit failing to start at all. Start by confirming power, fuses, and the GFCI. If water remains in the pit after a test, examine the float and switch alignment, and check for leaks around seals. A grinding or rattling noise often signals debris or worn bearings; turn off power first and clean the impeller area. If the pump struggles during a heavy rain event, consider whether the pit size, inlet obstruction, or discharge capacity is limiting performance. Replacement is often more cost-effective when the motor shows signs of overheating, repeated failure, or significant rust. In these cases, evaluate the pump’s age, warranty terms, and the availability of compatible parts. Sump Pump Check recommends consulting a pro if the problem involves electrical wiring or structural drainage changes.
Authority sources and further reading
This topic intersects with safety, building codes, and flood preparedness. For general safety and construction considerations, consult authoritative resources from FEMA, OSHA, and the American Society of Civil Engineers. These sites provide guidance on durable basements, safe electrical practices, and drainage best practices. See: - https://www.fema.gov/ - https://www.osha.gov/ - https://www.asce.org/
],
toolsMaterials
items:[{
Tools & Materials
- Sump pump manual(Model-specific instructions to avoid damage or misalignment)
- Protective gloves(To handle wet components and debris safely)
- Screwdrivers (Phillips and flat-head)(For removing covers, clamps, or adjusting wiring terminals)
- Bucket and sponge(To collect sediment and wipe surfaces clean)
- Old toothbrush or stiff brush(Scrub inlet screen and tight spaces without scratching surfaces)
- Flashlight(Bright, focused light for dark basins and corners)
- Replacement check valve or seals(Keep on hand if you notice leaks or poor seals)
- Battery tester or replacement battery (if using a backup)(Checks backup readiness and life)
Steps
Estimated time: 30-45 minutes
- 1
Power down and prepare
Unplug the sump pump and, if applicable, disconnect the float switch wiring. Confirm there is no power at the outlet using a tester. This keeps you safe while you inspect and clean the unit.
Tip: Always test power with a meter before touching wiring. - 2
Access the sump basin and remove debris
Remove the lid carefully and scoop out debris from the basin. A clear pit allows the impeller and float to move freely, reducing the risk of jams during a flood.
Tip: Keep debris in a bucket to prevent it from falling back into the pit. - 3
Check discharge line and clear blockages
Inspect the discharge hose or PVC line for kinks, cracks, or clogs. Clear any obstruction that could slow water flow away from the house foundation.
Tip: Use a long flexible brush to loosen buildup inside pipes. - 4
Inspect the check valve and seals
Ensure the check valve is installed correctly and seals tightly to prevent backflow into the pit. Replace worn seals if you notice seepage.
Tip: Test valve orientation by briefly flushing water through the line. - 5
Inspect the float switch and activation
Verify the float rises freely and the switch activates at the intended water level. Clean any debris around the pivot point that could impede motion.
Tip: Lightly lubricate the pivot with manufacturer-approved lubricant if recommended. - 6
Clean inlet screen and basin surfaces
Rinse the inlet screen with clean water and scrub away mineral deposits or algae. Wipe down the basin walls and remove any remaining sediment.
Tip: Avoid blasting with high-pressure water that could loosen seals. - 7
Reconnect, power up, and run a test
Reconnect wiring, restore power, and perform a controlled water test to confirm the pump activates and then shuts off when water level drops.
Tip: Record the test results and watch for abnormal sounds or vibration. - 8
Create a maintenance calendar
Document the date of service, parts inspected, and any replacements. Set reminders for monthly tests and annual part checks.
Tip: Keep a small maintenance log near the sump area for quick reference.
FAQ
How often should I test my sump pump?
Test the pump monthly and after major rainfall events to ensure it activates and removes water properly. Use a controlled water test to verify the float and switch operate as expected.
Test monthly and after heavy rain to ensure the pump operates when needed.
What are warning signs my sump pump needs replacement?
If the pump runs continuously, fails to remove water, makes grinding noises, or shows visible rust and leaks, it’s time to evaluate replacement options.
Listen for unusual noises and watch for leaks—these often mean replacement is necessary.
Can I install or service a sump pump myself?
Basic installation and maintenance can be done by homeowners who follow the manufacturer’s instructions and local codes. For electrical work or drainage changes, consult a licensed professional.
You can do basic maintenance, but for wiring or drainage changes, call a pro.
How can I prevent backflow and flooding?
Install a properly oriented check valve and ensure discharge piping directs water away from the foundation above ground level. Regularly inspect for leaks.
Make sure the check valve is in place and the discharge goes away from your home.
What about a battery backup sump pump?
Battery backups require periodic battery checks and replacements per the manufacturer’s guidelines. Test the backup system to confirm it engages during a power outage.
Check and test your backup battery every few months to ensure it’s ready when needed.
Are chemical cleaners safe in a sump pit?
Avoid harsh chemicals in the sump pit; they can damage seals and pumps and contaminate water. Use only manufacturer-approved cleaners if cleaning is needed.
Don’t use strong cleaners in the sump pit—they can harm the pump and seals.
Watch Video
Top Takeaways
- Test monthly and after heavy rains
- Keep the discharge path clear and check valve functional
- Inspect electrical safety features and GFCI protection
- Log maintenance actions for future reference
- Replace worn components before failures occur