How to Get a Sump Pump to Kick On
Learn how to troubleshoot and ensure your sump pump kicks on reliably. Power checks, float and switch inspection, discharge path testing, and maintenance tips from Sump Pump Check.

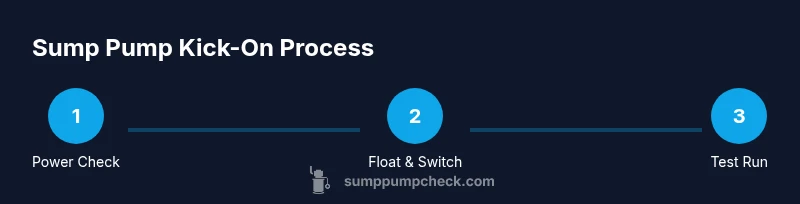
By the end of this guide, you will learn how to get a sump pump to kick on reliably. You’ll verify power, switch, float, and discharge components, then perform a safe, step‑by‑step test to confirm operation. This process helps identify the most common startup problems before basement flooding can occur.
Assessing the Symptoms of a Non-Starting Sump Pump
A sump pump that refuses to kick on presents several telltale signals: the unit remains silent when water rises in the pit, there is no hum or buzzing from the motor, or it only runs briefly before shutting down. The most important step is to observe the three central subsystems: power supply, the float switch, and the pump’s starting mechanism. According to Sump Pump Check, many startup issues begin with simple electrical checks and float malfunctions. Begin by noting when water levels rise and whether the pit fill triggers the float. If you notice the float stuck at a high or low position, the pump may fail to start at the correct water level. Writing down symptoms helps you narrow down the causes and guides your tests. Next, confirm that the sump pit is free of debris and that the float moves freely without obstruction. Even a single obstruction can prevent the switch from activating the motor.
Safety First: Power, Grounding, and Water Safety
Electrical safety is paramount when dealing with sump pumps. Before touching any components, switch off the circuit breaker feeding the pump and unplug the unit if you can access the cord safely. If the pump is wired directly or sits in a wet area, use a battery-powered flashlight and dry hands to minimize shock risk. Never work in standing water or on a wet surface without proper rubber-soled shoes. Use a non-contact voltage tester to verify that power is truly off at the outlet and any cords you touch. If you must test while the pump is wet, keep dry towels in place and avoid touching metal parts. After work, recheck the GFCI outlets and ensure the breaker remains in the OFF position until you’re ready to resume with dry hands.
Understanding System Components and How They Interact
A sump system relies on a few key components working in concert: the power source, the float switch that detects rising water, the motor that starts when the switch closes, and the discharge piping that carries water away from your home. When any piece malfunctions, the entire sequence can fail. A healthy setup should show a clean path for current, an unobstructed float arm, and a motor that responds promptly when the float threshold is reached. This section helps you connect the dots between symptoms and causes, so you can test each subsystem methodically.
Verifying the Power Source and Outlet
Start with the simplest checks: confirm the sump pump’s outlet is live and that the circuit breaker hasn’t tripped. If you have a GFCI outlet, press the reset button and test with a small, dry load (like a lamp) to verify the receptacle is functioning. Inspect the power cord for signs of wear, cracking, or exposed conductors. If the outlet shows signs of moisture, dry the area and consider replacing the GFCI if it trips frequently. Remember that even a healthy motor won’t start if the power supply is interrupted.
Inspecting the Float Switch and Float Assembly
The float switch is the trigger that tells the pump to start. Obstructions in the sump basin or debris on the float rod can prevent movement. Manually move the float up and down to feel for smooth operation; if the float sticks or catches on the basin sidewall, clear the obstruction and test again. If the switch feels loose or wobbly, it may be time to replace it. A failed float is a common reason a pump won’t kick on, and replacing the switch is usually straightforward.
Testing the Motor with Safe Procedures
With power confirmed off, remove the cover and inspect internal connections to the motor. Reconnect power and perform a controlled test by briefly flooding the sump to raise water to the float level. If the motor hums but does not spin, the start capacitor or wiring could be faulty. Consult your manual for capacitor testing procedures and use a multimeter to verify continuity on the motor windings. If the motor refuses to start after these checks, the unit may be near the end of its life.
Checking the Discharge Path and Check Valve
A blocked discharge line or a failed check valve can prevent the pump from evacuating water, causing the float to remain at a high level and the motor to stall. Inspect the discharge pipe for kinks, clogs, or ice. The check valve should be installed correctly to prevent backflow; test by piggybacking a short piece of hose from the discharge and observing water movement. Clear any obstruction and re-test the startup sequence to ensure proper flow.
Common Causes and Replacement Guidelines
If you’ve tested power, float, and discharge with no success, consider common fault culprits: a worn-out motor, a faulty switch, or a degraded capacitor. Even with proper maintenance, sump pumps wear down. If individual components cannot be repaired or replaced cost-effectively, replacement may be the most economical option in the long run. Keeping a maintenance log helps you spot patterns and plan ahead.
Maintenance and Proactive Steps to Keep It Ready
Establish a simple maintenance routine: test the pump monthly, clean the sump pit quarterly, and inspect the discharge line for blockages after heavy rains. Replace worn components before they fail, and keep spare parts like a float switch on hand. A proactive approach minimizes the risk of sudden failures during storms and keeps your basement dry.
Tools & Materials
- Multimeter or voltage tester(Digital preferred; ensure it can test AC circuits and continuity)
- Non-contact voltage tester(Quick live-wire checks without contact)
- Screwdriver set (Phillips and flathead)(For accessing the sump cover and wiring terminals)
- Flashlight (dry)(Insufficient lighting makes diagnostics harder)
- Gloves and eye protection(Personal safety while working around water and metal)
- Bucket and towels(Contain spills during testing)
- Replacement float switch or grommet seal(Keep on hand in case of wear or leakage)
- Pliers and adjustable wrench(Loose fittings or clamps may need adjustment)
Steps
Estimated time: 30-60 minutes
- 1
Power down and unplug the sump pump
Switch off the circuit breaker feeding the pump and unplug the unit if accessible. This ensures no live current while you inspect components. If the installer used hardwiring, use the main disconnect and only work when dry.
Tip: Always verify power off with a non-contact tester before touching any wires. - 2
Confirm outlet and circuit status
Inspect the outlet for moisture and test it with a dry load or a tester. If the GFCI trips, reset and re-test. Check the breaker label and confirm it corresponds to the sump pump circuit.
Tip: If the outlet trips repeatedly, there may be a short or moisture intrusion near the plug. - 3
Open the sump pit and inspect the float path
Carefully remove the cover and visually inspect for debris around the float and arm. Clear any obstructions that could restrict movement. Ensure the float moves freely through its full range.
Tip: Do a visual check for slime or sediment that can gum up the float mechanism. - 4
Manually test float movement
With power still off, manually raise and lower the float to see if the switch engages. Listen for a click, and observe if the motor would start when you simulate a high-water condition.
Tip: Mark the float position so you can return it to the correct level if needed. - 5
Test the switch with a multimeter
With power off, access the switch terminals and check continuity when the float is raised. If continuity is inconsistent, replace the switch or the whole control assembly.
Tip: Follow the manufacturer’s wiring diagram to identify the correct terminals. - 6
Inspect motor power connections
Check all connections from the switch to the motor and from the plug or wiring harness into the motor. Look for loose screws, corroded terminals, or damaged insulation.
Tip: Tighten connections securely and cover exposed conductors to prevent shocks. - 7
Check the discharge line and valve
Inspect for blockages, kinks, or ice buildup in the discharge pipe. Confirm the check valve is oriented correctly to prevent backflow. Clear any blockage and retest the pump.
Tip: Gently shake and inspect piping to detect hidden clogs beyond visible sections. - 8
Reconnect and perform a full test
Reassemble the pit cover, restore power, and fill the sump with water to trigger the float. Confirm the pump starts and water is discharged away from the home.
Tip: Run the test in dry weather first to confirm proper operation before storm season.
FAQ
Why won't my sump pump kick on even when water is rising?
Common causes include power supply issues, a stuck or faulty float, a failed switch, or a blocked discharge. Systematically test each part to identify the culprit.
Common causes are power, float, switch, or discharge blockages. Test each part to find the culprit.
What role does the float switch play in startup?
The float detects rising water and signals the motor to start. If it sticks or fails to rise, the pump won’t start even with water present.
The float tells the pump when to start. If it sticks, the pump may not kick on.
How can I test the outlet safely without shocking myself?
Use a non-contact voltage tester to confirm power is off, then test the outlet with a dry load or tester after power is restored. Keep hands dry and avoid wet surfaces.
Test for power with a voltage tester, then re-test with a dry load after power is back on.
Should I replace a sump pump that won’t start?
If multiple components show wear or failure and repairs aren’t cost-effective, replacement is often the best long-term option.
If repairs are frequent or costly, replacement is usually best.
Can a misplaced check valve affect startup?
A faulty check valve can cause backflow, increasing the load on the motor and hindering startup. Inspect and replace if needed.
Backflow from a bad check valve can stop the pump from starting properly.
How often should I perform maintenance on my sump pump?
Perform a quick monthly functional test and a more thorough inspection quarterly or after heavy rainfall. Regular checks catch issues early.
Test monthly and inspect more thoroughly every few months.
Watch Video
Top Takeaways
- Verify power first; most startups fail due to electrical issues.
- Float switch and path must operate freely for startup.
- Discharge path must be clear and backflow prevented.
- Regular maintenance reduces the chance of surprise failures.