How to Fix Sump Pump Pipe Outside: DIY Guide
Learn how to fix a sump pump pipe outside with a clear, step-by-step DIY guide. Troubleshoot leaks, freezing, and improper routing, then seal and maintain the exterior discharge to protect your basement.

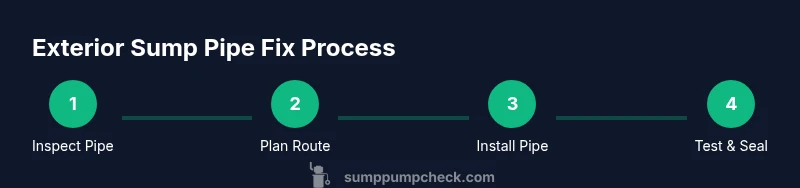
To fix a sump pump pipe outside, inspect the exterior discharge for cracks or leaks, check for blockages or freezing, and replace damaged sections with PVC tubing. Resecure joints with PVC cement and hose clamps, then test the run to ensure water drains away from the foundation. Gather basic PVC tools, sealant, and safety gear before you start.
What this guide covers and why the exterior discharge pipe matters
how to fix sump pump pipe outside is a common DIY task for homeowners. In this guide we cover step-by-step techniques to diagnose and repair an exterior discharge run. According to Sump Pump Check, exterior discharge problems are often caused by freezing, leaks, and improper slope that allow water to back up toward the foundation. By following these steps you can restore reliable drainage and protect your basement. This article uses practical demonstrations and safety-first guidance to help you work confidently.
Safety first: planning and PPE before you start
Before you touch any part of the sump pump system, shut off power to the pump at the circuit breaker and verify the unit cannot start unexpectedly. Wear safety glasses, work gloves, and long sleeves to protect from sharp edges and PVC dust. Keep a nearby bucket and towels to catch any residual water and prevent overspray onto electrical outlets. Planning also means checking local codes for discharge requirements and ensuring the area around the outlet is dry and accessible. A properly prepared workspace reduces the risk of injury and makes the repair smoother.
Common exterior discharge failures you may encounter
Exterior sump pump pipes can fail in several ways that impact drainage and home safety. Cracks or holes in the PVC run allow water to escape near the foundation, potentially eroding soil and inviting moisture intrusion. Blockages from debris, sediment, or ice can back up the line and cause the pump to run continuously or overflow. Improper slope or routing toward a foundation wall can bring water back toward the house. In some cases, the discharge point is too close to vents, windows, or walkways, creating ice or water hazards during thaw periods.
Diagnosing exterior discharge problems: a practical checklist
Start by inspecting the pipe outside for visible cracks, leaks, or broken fittings. Look for signs of staining or damp soil around the discharge point, which indicates a leak. Trace the run from the pump outlet to the end point, noting any sections that appear kinked or crushed. If ice forms near the outlet in winter, the pipe may be freezing; this is a sign to insulate or relocate the run. Finally, confirm that the end of the pipe discharges away from the foundation and does not spray water toward walls or under the deck.
Replacing or re-routing the exterior pipe: a careful approach
If you find damaged sections, plan to replace only the affected portions to minimize work. Measure the diameter and length of the existing pipe to choose compatible PVC pieces. Cut the damaged segment cleanly with a saw, dry-fit the new piece, and then glue with PVC primer and cement. Use appropriate couplings or elbows to re-route the discharge away from the home’s foundation, and secure it with brackets or clamps to prevent movement during heavy runoff.
Sealing joints and sealing the exterior connections against weather
After assembling the new pipe, seal all joints with exterior-grade PVC cement and allow proper curing time. Apply silicone sealant or exterior caulk around any wall penetrations where the pipe passes through to prevent water intrusion. Ensure that all access points are weatherproofed, especially where animals or ice can interfere with the discharge. Proper sealing minimizes future leaks and helps keep the soil around the foundation dry.
Preventing freezing, evaporation, and clogs in the long term
Insulate exposed pipe sections with foam sleeves or heat tape in regions with freezing temperatures. Elevate or reposition the discharge to ensure it drains away from walkways, vents, and stairs. Regularly clear debris from the outlet end and inspect for signs of ice buildup during cold months. Consider adding a backflow check valve and a secondary back-up discharge path to improve reliability during heavy rain or rapid thaw cycles.
Maintenance routine: how to keep exterior discharge healthy year-round
Create a seasonal maintenance checklist that includes inspecting the pipe for cracks, testing the pump periodically, and flushing the line to remove sediment. Record inspection dates and changes to the discharge path so you can monitor performance over time. A proactive approach reduces emergency repairs and helps maintain basement dryness. Regular maintenance is part of a broader sump pump maintenance plan that protects your home.
Safety, codes, and when to call a pro
Always verify that exterior fixes comply with local codes for drainage, water disposal, and foundation protection. If the pipe run passes under a deck or near wiring or gas lines, hire a licensed professional. For complex rerouting, significant leaks, or uncertain safety concerns, consult a pro. The goal is to ensure a durable, code-compliant discharge that protects your basement without creating new hazards.
Tools & Materials
- PVC pipe sections (matching exterior discharge)(Typically 1-1/4)
- PVC pipe sections (matching exterior discharge)(Diameter depends on existing line; measure current pipe before purchasing.)
- PVC primer and cement(Use exterior-rated primer and cement for durable joints.)
- PVC couplings and elbows(Select fittings to route the discharge away from the foundation.)
- Silicone exterior-grade sealant(Seal around wall penetrations and joints to weatherproof.)
- Safety gear (gloves, safety glasses)(Protect hands and eyes from PVC edges and solvents.)
- Hose clamps or pipe clamps(Secure flexible outlets or hoses if used for final discharge.)
- Tape measure(Accurate measurements for length and slope.)
- Pipe cutter or handsaw(Make clean, straight cuts on PVC pipe.)
Steps
Estimated time: 60-120 minutes
- 1
Power down and prep
Shut off power to the sump pump at the breaker and unplug if possible. Verify no water is actively discharging before you work. Wear safety gear and clear the area of obstacles to prevent trips or slips.
Tip: Tag the breaker off and use a flashlight to inspect the pump housing safely. - 2
Inspect exterior discharge
Walk to the outside outlet and visually inspect the discharge pipe for cracks, leaks, or misaligned joints. Note any sections that appear damaged or blocked by debris. Check that the end point is free of ice and adequately away from the foundation.
Tip: Take photos of problem areas to guide replacement and for future maintenance. - 3
Measure and plan layout
Measure the diameter of the existing pipe and the total run length you need. Decide if you will replace in place or reroute the discharge to a safer place away from the house. Draft a quick plan showing where couplings and elbows will go.
Tip: Plan extra length for adjustments and avoid tight bends that reduce flow. - 4
Cut and dry-fit new segments
Carefully cut the new PVC sections to match the measured lengths. Dry-fit the pieces with couplings to confirm alignment before applying adhesive. Ensure each joint will be accessible for cleaning in the future.
Tip: Use a square to ensure straight cuts; mark cut lines clearly. - 5
Prime, cement, and assemble
Apply PVC primer to the pipe ends and fittings, then press on cement evenly. Assemble joints promptly and hold for a few seconds to ensure a solid bond. Re-check alignment as solvents cure.
Tip: Work in a well-ventilated area and avoid over-application of cement. - 6
Secure and route the discharge
Secure the pipe with brackets or straps to prevent movement during heavy runoff. If rerouting, ensure the path directs flow away from the foundation, toward an approved drainage area.
Tip: Avoid routing discharge toward walkways or vents where ice can form. - 7
Seal exterior penetrations
Apply exterior-grade sealant around any wall penetration points where the pipe passes through to prevent water intrusion and pest entry. Let sealant cure according to product instructions.
Tip: Clean the surface before sealing to maximize adhesion. - 8
Test the system
Reconnect power temporarily and run water through the system to verify drainage. Look for leaks at all joints and confirm the water exits away from the home. If leaks exist, re-secure joints or reapply cement/sealant as needed.
Tip: Test with a controlled water flow to avoid overloading the system. - 9
Insulate and finalize
Install foam sleeves or heat tape on exposed pipes in freezing climates. Add brackets or supports to reduce vibration and movement in windy or stormy conditions. Perform a final visual check after the first heavy rain.
Tip: Keep a maintenance log with inspection dates and any replacements.
FAQ
What is the first sign that exterior sump pipe is failing?
Look for puddling near the foundation, damp soil, or noticeable ice buildup at the discharge point. Leaks or cracks along the exterior run indicate the pipe needs replacement or reseating. Regular inspection helps catch issues early.
Look for puddles or damp soil near your foundation, or ice at the discharge point. Cracks mean it’s time to replace or reseat the pipe.
Can I redirect the discharge pipe to a rain barrel or garden area?
Redirecting is possible if you can route the discharge to a suitable drainage area that won’t flood walkways or foundations. Ensure the path complies with local codes and does not cause runoff onto neighboring property.
Yes, you can redirect the discharge to a proper drainage area, just be sure it follows local rules and won’t flood your walkways or neighbors’ property.
Should I replace the pump if the exterior pipe leaks?
A leaking exterior pipe usually means a joint or section failure, not necessarily the pump itself. Inspect the discharge path, replace damaged sections, and reseal joints before deciding on pump replacement.
Leaks are typically from the pipe, not the pump itself. Check and fix the pipe first, and only replace the pump if it shows signs of failure.
Is it safe to use duct tape on an exterior PVC discharge pipe?
Duct tape offers only a temporary fix and does not provide a durable seal for exterior PVC. Use proper PVC cement, primer, and exterior sealant for long-lasting results.
Duct tape isn’t a reliable fix for exterior PVC. Use PVC cement and sealant for a durable repair.
What if the discharge point is near a foundation or walkway?
Relocate the discharge path so water exits away from the foundation and does not pool near walkways. This may involve rerouting with elbows or extra length, and should meet local drainage codes.
Move the discharge so it drains away from the foundation and any walkways to prevent pooling and ice.
How often should I inspect exterior discharge pipes?
Perform at least one exterior discharge inspection before winter and after heavy rains. Document any wear and plan replacements as part of a maintenance routine.
Check the exterior discharge before winter and after heavy rains to catch issues early.
Watch Video
Top Takeaways
- Inspect exterior discharge regularly for cracks and leaks
- Use correct PVC components and exterior-rated cement
- Route discharge away from the foundation and protect from freezing
- Test after each repair and maintain a seasonal checklist