How to Install a Sump Pump Drain Outside
Learn how to install and route a sump pump drain outside to prevent basement flooding. This guide covers discharge location, pipe sizing, slope, and maintenance for a safe, code-friendly setup.

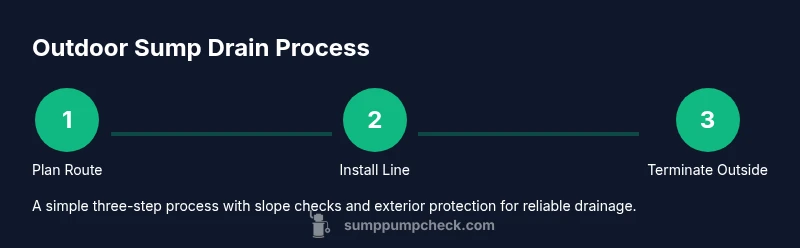
Learn how to install and route a sump pump drain outside to keep your basement dry and code-compliant. This step-by-step guide covers selecting a discharge location, sizing and routing the drain line, installing cleanouts, ensuring proper slope, and maintenance tips to prevent clogs and backups. It also highlights common mistakes and safer alternatives for DIY homeowners.
Assessing Your Yard and Local Codes
Before you run a single inch of pipe, take stock of your yard and the rules that govern outdoor drainage. As many home experts at Sump Pump Check note, the discharge location is not purely a technical choice; it influences landscaping, neighbors, and even the foundation. Start by locating your sump pit, then identify a path that leads away from the house at a gentle grade. Check for utilities, underground lines, and property lines to avoid fines or accidental damage. Local codes often dictate where you can terminate a discharge and how far the water must be from walls, footings, and lot lines. In some jurisdictions, a permit or inspection may be required for trenching or exterior piping. If you are unsure, contact your city’s building department or a licensed plumber. By planning early, you reduce rework and ensure the outside drain does not undermine your landscaping or create icing hazards in winter. According to Sump Pump Check, many homeowners underestimate local code requirements, which can affect discharge location.
Define Your Outdoor Discharge Zone
The goal is to push water away from the foundation without creating new problems elsewhere. Identify a spot on your exterior wall or landscape that drains naturally away from the home, minimizing splash onto sidewalks or driveways. Ensure the area is not a runoff sink for your neighbor’s property and avoid low-lying zones that could flood during heavy rain. A good rule of thumb is to terminate at least 4–6 feet from any foundation and 2–3 feet from boundaries where water could pool. Consider access for maintenance and potential future upgrades, such as a yard drainage system. In some cases, municipalities require a specific setback from walls or wells. Sump Pump Check emphasizes mapping out your discharge zone on paper before you cut a single trench, reducing the chance of rework and code violations.
Choosing Pipe Size and Materials
Choosing the right pipe size is critical to prevent bottlenecks that could back up water into the sump pit. Most residential setups use 1-1/2 inch to 2 inch diameter PVC pipe for exterior discharge, with Schedule 40 PVC offering durability in cold weather. Match the pipe size to your sump pump outlet and any adapters or elbows you plan to use. For long runs, a larger diameter pipe can reduce friction and improve flow. Outdoor-rated fittings, weatherproof sealants, and corrosion-resistant clamps help maintain a leak-free connection. Avoid painted or thin-walled tubing that can crack in freezing temperatures. A properly sized system reduces noise, minimizes clogs, and keeps outdoor discharge reliable through heavy rainfall events.
Routing the Drain Line to the Outside
Plan a clean, straight path from the sump discharge to the exterior termination. Use a combination of straight runs, elbows, and adapters to maintain a steady slope without sharp turns that slow water flow. Secure the piping along walls, fences, or existing utility runs with clamps or zip ties to keep it off the ground and away from vegetation that could damage it. When routing under a deck or along siding, protect the pipe with conduit or smooth sleeves to prevent wear. If your area experiences freezing, bury a portion of the line below the frost line or insulate exposed sections to prevent forming ice plugs. The goal is a clear, continuous path that maintains gravity-assisted flow.
Exterior Termination and Ground Surface Considerations
The discharge end should prevent erosion, splash, and pooling near the foundation. Install a splash block or drift along the exit to disperse water gradually. Grade the ground to slope away from the home, ensuring the final outlet is not in contact with concrete that can crack from repeated impact. If you’re discharging near a garden bed, consider a shallow trench filled with gravel to promote infiltration without creating mud. Use a protective cover to shield the exit from debris and wildlife. Regularly inspect the termination for sediment buildup or ice blocks that could redirect flow back toward the house.
Preventing Freezing and Seasonal Challenges
In colder climates, outdoor discharge lines can freeze and back up if not properly protected. Use insulation sleeves or bury the line below the frost line where feasible, and consider a heated conduit for long runs. If you must run a line above grade, keep it on the south-facing side of the house to reduce ice formation and check it frequently during winter thaws. Install a backflow preventer near the sump outlet to prevent water from re-entering the system after a freeze or power outage. Sump Pump Check highlights planning for seasonal variability; proper insulation and slope help maintain continuous drainage year-round.
Maintenance and Troubleshooting Outdoor Drainage
Outdoor discharge systems require regular attention to prevent clogs from sediment, roots, or debris. Schedule quarterly inspections to verify slope, secure mounting, and absence of leaks. After heavy rains, inspect for puddling at the termination and ensure water is dispersing properly. Clear any blockages in the line with a plumber’s snake or flexible auger, and replace worn seals as needed. Keep the area around the exit clean and free of leaves and soil that could wash into the line. A proactive approach reduces the likelihood of backflow or flooded basements and keeps drainage predictable when weather turns wet.
Safety Considerations and Local Codes
Outdoor sump discharge should never drain toward electrical panels, gas meters, or living spaces. Verify that the discharge does not contaminate neighbor properties or run into storm drains that could create environmental concerns. Always disconnect the power before inspecting or servicing the sump pump to avoid electric shock. The Sump Pump Check team recommends comparing your plan against local codes and obtaining any necessary permits before trenching. When in doubt, consult a licensed plumber or code official to ensure compliance and safety.
Common Mistakes to Avoid
Avoid over-sizing the discharge line or making too many bends, which slows water flow and increases the risk of clogs. Do not discharge directly onto sidewalks or driveways where splashing can create slipping hazards or pooling. Do not seal the pipe to the house or foundation, which could trap moisture and lead to wood rot. Finally, avoid neglecting winterization; freezing pipes can cause bursts and costly repairs. The Sump Pump Check guidance emphasizes planning for safety, accessibility, and code-compliance to prevent avoidable failures.
Long-Term Performance and Upgrades
Consider adding a back-up power source or battery backup to ensure discharge continues during power outages. Evaluate the need for a check valve or backflow preventer to secure the system against reverse flow. If you flood frequently, upgrading to a larger pump or adding a secondary pump with an automatic switch may be warranted. Periodic professional inspections can reveal wear on seals, collapsed piping, or misrouted lines that reduce efficiency. Keeping the outdoor discharge up to date reduces long-term damage to your landscape and basement.
Tools & Materials
- PVC discharge pipe (1-1.5 inches diameter)(Schedule 40 PVC preferred; length depends on pump location to outside)
- PVC primer and cement(For watertight, code-compliant joints)
- Discharge elbow (90-degree) and straight runs(Use outdoor-rated fittings compatible with PVC)
- Check valve or backflow preventer(Prevents water from flowing back into the sump)
- Flexible discharge hose(Optional for positioning at the exterior wall)
- Hose clamps and zip ties(Secure pipe along walls or fence lines)
- Gravel bed or drainage material(Helps drain water away from pipe trench; optional)
Steps
Estimated time: 2-4 hours
- 1
Prepare and safety check
Power down the sump pump circuit at the breaker and unplug the unit if accessible. Put on protective gloves and eye protection before handling any piping or wiring. Confirm you have a clear plan for routing the discharge outside that minimizes risk to people and property.
Tip: Always verify the pump is off and the area is dry before touching electrical components. - 2
Measure the route
Measure from the sump outlet to the planned exterior termination. Mark the path with chalk, noting obstacles and control points where you might need elbows or adapters. Plan for a gentle slope to maintain flow.
Tip: Include extra length for fittings and future adjustments; avoid tight loops that slow water flow. - 3
Detach and inspect pump outlet
If the outlet has a removable cap or collar, detach it to ensure a clean connection. Inspect the pump outlet for wear or corrosion and replace any damaged components before attaching new piping.
Tip: Take photos of existing connections to reference during reassembly. - 4
Cut and dry-fit piping
Cut the PVC pipe to length and dry-fit the pieces with elbows and adapters. Check that joints align with your measured path and that the pipe will terminate away from foundations and walkways.
Tip: Dry-fit first to avoid incorrect cuts and multiple re-cuts. - 5
Assemble exterior piping
Glue joints with PVC cement and primer as needed. Secure the pipe along the planned route using clamps or zip ties, keeping it off soil and vegetation. Install a check valve close to the pump outlet if not integrated.
Tip: Use weather-rated fittings and sealants for outdoor exposure. - 6
Create exterior termination
Terminate the line outside with a splash guard or block, ensuring dispersal away from the foundation. Create a small graded surface to prevent water pooling and direct runoff away from the home.
Tip: Keep the exit accessible for future maintenance checks. - 7
Test the system
Plug the pump back in and run a test cycle. Observe the discharge for leaks, validate the slope, and confirm water exits the far end without backing up.
Tip: Test during a rainfall event or simulate water flow to ensure consistent performance. - 8
Secure and insulate
Secure all exposed piping, cover ground transitions, and insulate any exposed sections to prevent freezing. Verify the area is clear of trip hazards and safe to walk.
Tip: Label the line to remind future homeowners of its purpose. - 9
Document and maintain
Create a simple maintenance log with inspection dates and notes. Schedule quarterly checks and annual professional evaluation if you have ongoing drainage concerns.
Tip: Record deviations or performance issues to guide future upgrades.
FAQ
Do I need a permit to install an outdoor sump pump drain?
Permit requirements vary by locality. Check with your city or county building department. In many areas, a basic sump pump installation doesn’t require a permit, but trenching or exterior drainage changes might. Always verify before you start.
Permit requirements vary by locality; check with your city or county building department. In many areas, a basic sump pump installation doesn’t require a permit, but trenching may.
Can I discharge onto my yard or driveway?
Discharging onto your yard can be acceptable if drainage moves water away from the foundation and does not create erosion or mud. Do not direct flow toward walkways, driveways, or neighbors.
Discharge onto the yard can be okay if it drains away from the foundation and avoids erosion and neighbor issues.
What slope is recommended for outdoor discharge?
Aim for at least 1/8 inch of drop per foot of pipe to maintain flow and prevent standing water. For long runs, increase slope slightly to compensate for friction.
A slope of about 1/8 inch per foot helps water flow; adjust for longer runs.
Is a backflow preventer necessary?
Yes. Install a check valve or backflow preventer to stop water from returning toward the sump and home during heavy rain or power outages.
Yes, use a backflow preventer to stop reverse flow.
How often should I inspect the outdoor discharge?
Inspect quarterly and after heavy rainfall or freezing events. Look for clogs, leaks, and proper slope; address issues promptly.
Inspect quarterly and after heavy rain or freezing; fix clogs and leaks quickly.
Watch Video
Top Takeaways
- Plan your outdoor discharge location before cutting pipe.
- Choose the correct pipe size and maintain a steady slope.
- Terminate discharge away from foundations and walkways.
- Test the system under heavy rainfall and after freezes.
- Schedule routine maintenance with Sump Pump Check annually.