How to Tell If Your Sump Pump Is Working: Quick Troubleshooting Guide
Learn how to tell if your sump pump is working with practical tests, quick checks, and a clear diagnostic flow to prevent basement flooding during heavy rain.

To tell if your sump pump is working, listen for the hum when powered on and verify water is discharged through the line. Observe the float rising smoothly, and perform a quick test using the test switch or a controlled bucket fill. If there’s no flow or the float sticks, follow the diagnostic flow below.
How to Tell If Your Sump Pump Is Working\n\nHow to tell if your sump pump is working is a question homeowners ask when the basement water alarm goes off or when a heavy rain hits. In this guide, we’ll walk through practical checks you can perform quickly and safely. According to Sump Pump Check, the simplest tests give you fast, actionable feedback without climbing into the pit. The goal is to confirm power, flow, and float operation, and to spot red flags before a flood develops. This article uses plain-spoken steps so you can act fast, protect your basement, and avoid costly repairs. If you’re preparing for rain season, this guide helps you establish a quick routine you can repeat every few months.
Audible and Visual Cues That Signal Normal Operation\n\nWhen a sump pump is working, you usually hear a consistent hum from the motor as it starts and stops with the water level. You should see water flow through the discharge line during operation and feel steady vibration in the unit itself during test cycles. The float mechanism should rise smoothly with the water and halt the pump when the float reaches its high limit. If you notice a lack of sound, no water movement, or a rough, irregular float motion, the unit may not be functioning correctly. Regular checks help you catch issues before flooding and give you confidence during storms.
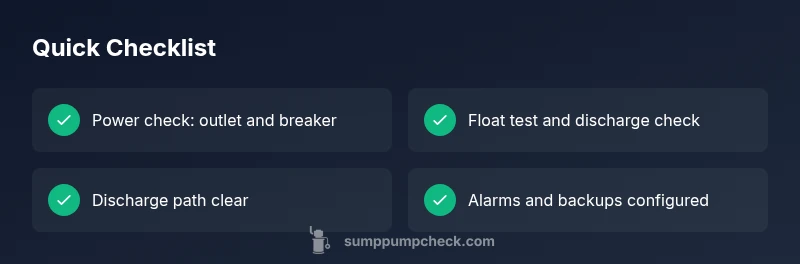
Quick In-Place Tests You Can Do Safely\n\nA quick, safe test requires minimal tools and no disassembly. Start by checking the power outlet and the circuit breaker; reset if the GFCI has tripped. Then locate the float switch and verify it moves freely—gently lift the float to see if the pump engages. If your unit has a test switch, use it to trigger a pump cycle while watching for water being discharged. For a bucket test, slowly fill the sump basin with water until the float rises and the pump runs, ensuring the discharge line carries water away.
Troubleshooting Common Scenarios\n\nIf the pump runs but no water is discharged, inspect the discharge path for a clog or a closed valve. Debris in the intake or a blocked impeller can reduce flow, while a stuck float keeps the pump from starting or causes rapid cycling. A pump that runs constantly may indicate overflow conditions, a failing check valve, or an undersized system. If you smell burning plastic, watch for a burning odor—this is a serious sign and requires immediate attention.
Maintenance to Prevent Future Failures\n\nAfter confirming basic operation, commit to a simple maintenance routine: clean the inlet screen, remove debris from the sump pit, test the float monthly, and inspect the power source and cords for wear. Periodic professional inspections, especially after a flood or heavy rainfall, can extend the life of the pump and protect your home. Keep an emergency kit and a backup pumping option ready for worst-case scenarios.
Safety Considerations and Quick Checks\n\nSump pump work involves electricity and water—treat every inspection as a potential risk. Always unplug the unit before handling the internals and never work in a flooded pit without proper PPE. If you’re unsure about wiring or electrical connections, stop and call a licensed electrician or sump pump technician. Regular testing with a checklist can prevent disasters and help you sleep better during storms.
Steps
Estimated time: 60-90 minutes
- 1
Safety and initial checks
Power off and unplug the sump pump. Put on gloves and goggles. Check the outlet with a basic voltage tester to confirm power is present, then look for tripped breakers or GFCI resets.
Tip: Always start with power supply before touching any pump components. - 2
Verify power and outlet integrity
Confirm the outlet is live by plugging in a known good device. If you’re using a surge protector, bypass it to eliminate interference. Reset breakers and test the circuit with a simple device.
Tip: Keep a spare outlet tester in your toolbox. - 3
Inspect the float and switch mechanism
Manually move the float up and down to ensure it rises freely and engages the switch. If the float is stuck, identify obstructions or misalignment and correct them carefully.
Tip: Do not force the float; gentle movement is enough. - 4
Test pump operation with water
Pour water into the sump basin until the float activates the pump. Observe whether the pump engages and if water is discharged through the hose. Stop the test if anything smells burnt or there is smoke.
Tip: Use a bucket and a friend to help watch the discharge. - 5
Check discharge path and valve
Trace the discharge line to the exterior; look for kinks, clogs, or a closed valve. If you have a check valve, confirm it’s sealing and not leaking back.
Tip: Always ensure the exterior outlet is clear of snow or debris. - 6
Final functional test and reset plan
Run a full cycle once more and confirm consistent operation. Reconnect power, document findings, and set a maintenance reminder for monthly checks.
Tip: Set a calendar reminder for monthly self-checks.
Diagnosis: Sump pump not starting, no discharge, or abnormal cycling
Possible Causes
- highPower issue (tripped breaker, unplugged, outlet fault)
- highFloat switch jammed or mechanized sticking
- mediumClogged intake or damaged impeller
- lowBlocked discharge line or failed check valve
Fixes
- easyCheck outlet and reset GFCI; replace fuses or reset breaker if needed
- easyInspect float assembly and free any obstructions; replace float if damaged
- mediumClean inlet screen and remove debris; check impeller for damage
- hardUnblock discharge line, clear valves, or replace faulty check valve
FAQ
Why is my sump pump running but not pumping water?
This usually indicates a clogged intake, a stuck impeller, or a blocked discharge path. Check the inlet, remove debris, and inspect the discharge line for blockages before testing again.
If your sump pump runs without pumping water, check for clogs and discharge blockages, then test again.
How often should I test my sump pump?
Perform a basic test monthly and a full diagnostic at least twice a year, especially before rainy seasons. Keeping a log helps you notice weakness early.
Test it monthly, and do a full check seasonally while keeping a log.
What does it mean if the float switch won’t move?
A float that won’t move often indicates obstruction or misalignment. Clean and free the float, check the linkage, and replace if damaged.
If the float won’t move, clean it or replace it as needed.
When should I replace my sump pump?
If the unit is frequently failing, making unusual noises, or unable to keep up during heavy rain, plan a replacement rather than repeated repairs.
If it keeps failing under rain, replacement is wiser than constant fixes.
Is a backup battery worth it?
A battery backup provides protection during power outages, but ensure it’s compatible with your pump and tested regularly.
A backup battery helps during outages, but test it regularly.
What safety steps should I take during testing?
Always unplug power before inspecting. Wear gloves, and avoid contact with damp wiring. If unsure, hire a pro.
Unplug power, wear gloves, and avoid wet wiring—call a pro if unsure.
Watch Video
Top Takeaways
- Test power, flow, and float regularly.
- Address clogs and electrical issues promptly.
- Do not ignore persistent cycling or no discharge.
- Maintain a routine that includes safety checks.