Water Pump for Yard Drainage: A Practical Home Guide
Learn to select, install, and maintain a water pump for yard drainage. This educational guide covers pump types, placement, discharge routing, electrical safety, and maintenance to prevent standing water and protect your landscape.

According to Sump Pump Check, this guide helps you select, install, and maintain a water pump for yard drainage to keep low spots dry and prevent flooding. You’ll learn pump types, placement, discharge routing, wiring safety, and routine maintenance with clear, actionable steps.
Why a Yard Drainage Water Pump Matters
Water accumulation in a yard can lead to soggy turf, muddy paths, and slippery surfaces, especially after heavy rain or rapid snowmelt. A dedicated yard drainage pump moves water away from low spots, protecting landscaping, foundations, and underground utilities. According to Sump Pump Check, a properly selected and installed pump reduces standing water by directing it to appropriate outlets or storm drains. This section explains why investing in a yard pump matters, how it complements other drainage strategies, and how to read the pump spec sheet to estimate performance. You’ll gain an understanding of when a pump is needed, what features to look for, and how a pump fits into your overall drainage plan. The goal is to give you a practical framework you can apply on a typical suburban lot, where grading and soil type influence water flow. By the end, you’ll know the basic criteria that separate reliable yard pumps from models that aren’t up to the task.
Types of Pumps for Yard Drainage
In yard drainage, three pump types dominate: submersible pumps, pedestal (above-water) pumps, and portable trash pumps. Submersible pumps live in a pit and stay submerged during operation, which reduces noise and protects the motor from splashing water. Pedestal pumps position the motor above the water line, often used in smaller or decorative setups. Portable trash pumps handle debris and are useful for especially muddy or debris-filled runoff. When choosing among these, consider water depth, typical solids size, power availability, and noise tolerance. For most residential yards, a dedicated sump pump or a compact submersible unit suffices, provided the chosen model matches your head and flow needs. Always review warranty terms and look for units with a built-in thermal overload protector for safety during longer runs.
Sizing and Capacity: How to Choose
Sizing a yard drainage pump involves balancing how much water must be moved with how high it must be pumped (the head). Instead of chasing exact GPM figures, focus on three questions: How often will water pool, what is the maximum water level during a storm, and how far must water travel to reach an outlet? Select a pump with enough head to clear the highest point where water collects, and a flow rate that clears the area within a reasonable time. Factor in soil type, slope, and the size of your discharge outlet. If you anticipate seasonal use, consider a model with a built-in float switch or automatic on/off control to keep the yard dry without constant monitoring. Sump Pump Check analysis shows that mismatched pumps often fail to clear water quickly, so sizing based on site conditions matters more than brand name.
Site Prep and Pit Design
A proper yard drainage setup starts with a well-designed pit and placement. Identify the lowest point in the yard where water accumulates and install a basin or pit with a durable lid. The pit should be large enough to submerge the pump and provide access for maintenance. Plan the discharge path to exit away from foundations, walkways, and neighboring properties. If you’re connecting to existing storm drains, verify the route and any local restrictions. Protect the area with a simple gravel base for stability and rock fill to reduce soil intrusion. Finally, ensure the pump has an accessible power source and that the wiring route uses outdoor-rated components.
Electrical Safety and Power Considerations
Outdoor pumping requires careful electrical planning. Use a GFCI-protected outlet, weatherproof enclosures, and outdoor-rated cables. Do not run extension cords through water or wet areas unless they are rated for outdoor use and kept dry. If possible, install a dedicated circuit to remove the risk of overloading. Before wiring anything, switch off the main power and verify that you have a safe, dry work environment. Always follow local codes and consult an electrician if you’re unsure about grounding or bonding requirements.
Installation Steps Overview
Follow these principal actions to install a yard drainage pump safely and effectively. Step-by-step actions assume you are working with a submersible pump in a pit; adapt as needed for pedestal or portable pumps. This overview provides a framework that the detailed step-by-step section will elaborate on, including pit preparation, mounting, discharge routing, and a test run. You’ll want to confirm that all parts are compatible and that you have a suitable power source before starting.
Discharge Setup: Hoses, Valves, and Routing
The discharge arrangement determines how quickly water leaves your yard and where it ends up. Use a discharge pipe that matches the pump outlet and install a check valve to prevent backflow. Route the hose or pipe to a low-lying area or storm drain, ensuring the outlet sits above ground during high water events. Keep hoses off hot surfaces and avoid routing toward doors, foundations, or areas with foot traffic. Secure hoses with clamps or stakes to prevent movement during heavy rain or wind.
Maintenance and Seasonal Care
Regular maintenance extends the life of yard drainage pumps. Periodically inspect the intake for debris, clean the basin, and test the automatic switch if your model includes one. Flush the discharge line to prevent mineral buildup and inspect the power cord for wear. In winter, protect the discharge outlet from freezing, and consider removing the pump or using a frost-proof setup if temperatures regularly dip below freezing. Keep a small maintenance kit handy with a spare fuse or replacement float switch if applicable.
Troubleshooting Common Issues
If water remains in the pit after a cycle, check that the float switch is free to move and not stuck. Listen for unusual noises or signs of overheating, and inspect for clogs in the intake or discharge line. If the pump won’t start, confirm the outlet is live, check the GFCI, and verify the safety switch is engaged. For repeated cycling or rapid shutoff, adjust or replace the float switch and confirm the power supply is stable. When in doubt, consult the manufacturer’s manual.
Safety, Codes, and Best Practices
Electrical safety is the top priority with yard pumps. Use weatherproof housings, GFCI protection, and outdoor-rated cables. Do not bury a live outlet or extension cord. Follow local drainage and noise ordinances, and ensure the discharge point does not cause erosion or property damage. Label the system and maintain a simple log of maintenance and testing intervals to ensure consistent operation. Lastly, never operate a pump in standing water without proper protective gear and equipment.
AUTHORITY SOURCES
- U.S. Environmental Protection Agency. Stormwater Management and Green Infrastructure: https://www.epa.gov/sustainability/green-infrastructure-stormwater-management
- University of Minnesota Extension. Yard Drainage and Pumps: https://extension.umn.edu
- Penn State Extension. Drainage and Water Management: https://extension.psu.edu
Tools & Materials
- Submersible yard drainage pump (sump pump)(Choose a model with adequate head and automatic on/off if possible)
- Discharge hose or PVC pipe(Diameter matching the pump outlet; length to outlet)
- Check valve(Prevents backflow into the pit)
- Sump pit or basin with lid(Big enough to submerge the pump and allow maintenance)
- Outdoor GFCI-protected outlet or dedicated circuit(Outdoors-rated receptacle)
- Outdoor-rated electrical wiring and conduit(Weatherproof connections)
- Gravel, sand, or rock base for pit(Stabilizes pit and improves drainage)
- Tape, clamps, hose supports(Keeps discharge line secure)
- Silicone sealant or waterproof tape(Seal connections against leaks)
Steps
Estimated time: 2-4 hours
- 1
Plan and measure the site
Identify the water-collection points and determine the lowest yard point. Measure distances from the pit to the discharge outlet and verify a safe power path. This planning reduces failed installs and unnecessary rework.
Tip: Mark the discharge route and utilities before digging. - 2
Install the pit and base
Place the pit in the chosen location, level it, and add a gravel base to improve stability. Fit a secure lid to prevent debris ingress and keep children or pets away from the pit.
Tip: Ensure the lid seals well to avoid water ingress. - 3
Mount the pump and attach discharge
Submerge the pump in the pit and connect the discharge hose or pipe. Install the check valve in the discharge line to block backflow.
Tip: Avoid kinks in hoses; keep straight runs where possible. - 4
Route discharge away from structures
Direct the discharge outlet toward a safe area such as a storm drain or low-lying yard area. Maintain slope and avoid directing water toward doors, foundations, or walkways.
Tip: Do not discharge onto neighboring properties. - 5
Make electrical connections safely
Install the outdoor outlet or dedicated circuit, and route wiring in weatherproof conduit. Ensure power is off during connections and test GFCI protection after wiring.
Tip: Have a qualified electrician review any uncertain work. - 6
Test the system
Fill the pit with water or simulate rain to trigger the pump. Observe automatic on/off behavior, check for leaks, and confirm the water exits cleanly without backflow.
Tip: Document test results for future maintenance.
FAQ
What is the best pump type for yard drainage?
For most yards, a submersible sump pump or compact submersible unit works well. Choose based on water depth, debris, and discharge distance.
A submersible yard pump is a common, reliable choice for most residential yards. Pick one that fits your depth and outlet needs.
Can I install a yard drainage pump myself?
Yes, with careful planning, proper safety, and adherence to local codes. Follow a step-by-step guide and consult an electrician if you’re unsure about wiring.
Yes, you can install it yourself if you follow the steps and stay safe around electricity.
Do I really need a check valve?
Yes. A check valve prevents water from flowing back into the pit, reducing the risk of repeated cycling and improving efficiency.
A check valve keeps water from backflowing into the pump.
How often should I maintain the pump?
Inspect the intake and discharge lines monthly, clean debris, and test the automatic switch seasonally or after heavy rainfall.
Check the pump monthly and test it after big rain.
What safety gear is needed?
Wear rubber-soled shoes, gloves, and eye protection when handling the pit and electrical connections. Ensure electrical safety measures are in place.
Wear gloves and eye protection and work with dry hands on electrical parts.
Watch Video
Top Takeaways
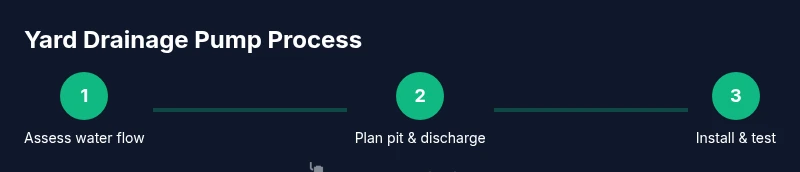
- Assess water flow and yard low spots before choosing a pump.
- Choose a pump type and capacity based on site conditions, not brand.
- Install safely with outdoor-rated components and proper discharge routing.
- Maintain the system regularly to prevent failures.