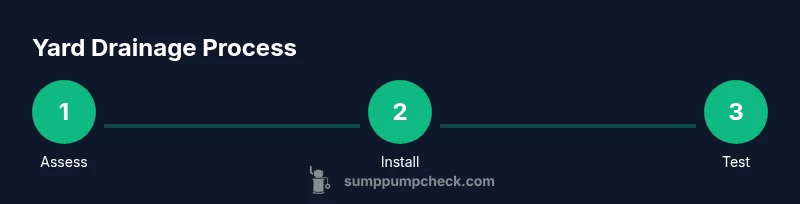
How to Pump to Drain Water from Yard
Learn to safely pump water from your yard with a sump pump and proper drainage. This comprehensive how-to covers planning, equipment, setup, safety, maintenance, and troubleshooting for homeowners and DIY enthusiasts.

You can safely move excess yard water away from your home by selecting the right pump, setting up a clear discharge path, and following a simple step-by-step installation. This guide shows you how to pump to drain water from yard, including planning, safety, and maintenance to keep your drainage effective during heavy rain.
Understanding Yard Drainage and the Role of a Pump
Pumping water out of a yard during heavy rainfall requires more than a hose and a bucket; a purpose-built solution like a sump pump or submersible pump can move water from a low spot to a safe discharge area. In practice, the goal is to pump to drain water from yard efficiently, directing water away from foundations, sidewalks, and entryways. According to Sump Pump Check, choosing the right pump, hose, and discharge path is critical. The combination of gravity and mechanical pumping helps you manage standing water, reduce erosion, and protect landscaping. Before you buy equipment, take a moment to map your yard's low points, potential outlets, and any frost lines that could affect discharge. With a solid plan, you'll reduce flood risk and simplify maintenance over time.
Assessing Yard Drainage: Key Factors
Effective yard drainage begins with understanding how water behaves after rain. Consider slope, soil type, existing drainage paths, and the location of your home’s foundation. Identify natural low spots and test how long water sits in those areas. Discharge location matters: aim to direct water away from walls, crawl spaces, and utility lines. Freezing cycles can affect discharge routes, so plan for seasonal changes. A simple drainage map can save you time during a heavy rain event and help you choose the right pump and hose size.
Equipment Options: Sump Pumps, Pumps and Hoses
There are multiple equipment choices to fit different yard scenarios. Submersible sump pumps are common for yard drainage due to their robustness and ability to operate in damp environments. Pedestal pumps can work outdoors when kept dry and accessible for maintenance. Pair the pump with a discharge hose that matches the outlet size and a check valve to prevent backflow. Durable hoses with clamps reduce leaks, and a backup pump or generator adds resilience during power outages. If your yard has clay or compacted soil, you may need a larger pump and longer hose to reach an appropriate outlet.
Wiring, Power, and Safety Essentials
Outdoor electrical safety is crucial when pumping yard water. Use a GFCI-protected outlet and weather-rated extension cords, with connections kept off wet ground. Avoid running cords across driveways or through puddles, and never touch electrical equipment with wet hands. Keep the pump and cord protected from the elements, and consider a weatherproof enclosure for the outlet. Regularly inspect plugs, cords, and the pump housing for signs of wear and corrosion.
Planning the Setup: Where to Place the Pump and Discharge
Place the pump in a low spot or sump where water collects most. The discharge hose should route to a designated, lawful drainage area that won’t flood walkways or neighbors’ property. Ensure the hose is clear of kinks and rests on a stable surface to prevent sagging. If you need an underground route, a shallow trench with appropriate protection can keep the hose in place. Label discharge points so you can locate them quickly during emergencies.
Common Pitfalls and How to Avoid Them
Common mistakes include choosing a pump that’s too small, using an extension cord not rated for outdoors, or discharging too close to the house. Another pitfall is failing to secure the discharge hose, which can cause leaks or hose movement during operation. Backflow can occur if a check valve isn’t installed or fails; install a proper backflow preventer where feasible. Finally, neglecting winterization can leave hoses and pumps susceptible to freeze damage; plan for off-season storage and maintenance.
Maintenance, Winterizing, and Troubleshooting
Regular maintenance keeps your yard drainage system reliable. Clean debris from the pump intake and check valve, verify hose connections, and test operation monthly during wet seasons. In winter, drain hoses, remove the pump if possible, and store components to prevent freezing. If the pump stalls, check for clogs, air locks, or a clogged discharge path. For intermittent beeping or alarms, consult the manufacturer guidance and inspect electrical connections for moisture.
Cost Considerations and DIY vs Pro Help
Costs vary with pump capacity, hose length, and whether you install in-ground components or rely on above-ground routes. DIY installations are common for standard yard drainage setups, but complex layouts or critical foundations may benefit from professional assessment. Consider long-term maintenance costs, the availability of a backup system, and the reliability of your discharge route when weighing options. Always prioritize safety and code compliance when budgeting for any installation.
Real-World Scenarios and Next Steps
If your yard floods only after intense storms, a modest submersible pump with a 25–50 ft discharge hose may suffice. For frequent, heavy rainfall or large landscapes, a larger pump, a longer hose, and a reinforced discharge path might be warranted. After planning, you’ll want to document your drainage route, test the system under controlled conditions, and create a simple maintenance schedule. The next steps include gathering tools, assessing the site, and following the step-by-step guide to ensure a smooth setup.
Tools & Materials
- Sump pump (submersible or pedestal)(Choose one rated for outdoor use and compatible with a discharge hose)
- Discharge hose (3-1/2 to 1-1/2 inches)(Long enough to reach a safe drainage area; ensure it won’t kink)
- GFCI outdoor extension cord(Weather-rated, 15-20 ft length)
- Shovel or trenching tool(For trenching a route if necessary)
- Duct tape or hose clamps(For securing hose connections)
- Safety goggles and gloves(Personal protection)
- Battery-powered backup pump or generator(Optional for power outages)
- PVC adapters and check valve(To prevent backflow and maintain flow direction)
Steps
Estimated time: 60-90 minutes
- 1
Assess the site and plan discharge
Walk the yard to identify low spots that collect water after rain. Map a discharge route that leads away from foundations and indoors, and choose a safe outlet where water can be discharged without creating hazards.
Tip: Choose a slope of at least 1-2% away from the house to ensure proper water flow. - 2
Select the right pump and hose
Pick a pump sized for the expected water volume and a hose long enough to reach the desired outlet. A check valve helps prevent backflow when the pump stops.
Tip: Prefer submersible pumps for outdoor use and quieter operation. - 3
Set up a safe power source
Plug the pump into a GFCI-protected outdoor outlet using a weather-rated extension cord. Keep all connections above ground and away from standing water.
Tip: Never run power cords across wet ground or through puddles. - 4
Position and connect the discharge line
Place the pump in the low spot or sump, connect the discharge hose, and secure it to minimize leaks. Run the hose to your chosen drain area and seal any joints.
Tip: Allow for spare length at the outlet to avoid kinks. - 5
Test the system before rain
Fill the sump area with water to test the pump’s startup and pumping rate. Confirm no leaks and that water drains as intended.
Tip: Adjust hose clamps to reduce leaks and ensure stable flow. - 6
Observe during initial operation
Run the system for 15-30 minutes and watch for air locks, hose kinks, or pump overheating. Stop if you notice any abnormal noise or heat.
Tip: Keep children and pets away during testing. - 7
Plan for winter and outages
Winterize by draining the hose and storing components; consider a backup pump or generator for power interruptions.
Tip: Label the discharge area to keep it accessible in winter.
FAQ
Do I need a permit to install a yard pump?
Most residential yard pump projects do not require a permit in many areas, but rules vary by locality. Check with your city or county building department for drainage and electrical requirements.
Check local codes with your city or county building department for drainage and electrical rules before starting.
What kind of pump is best for yard drainage?
A submersible sump pump is common for yard drainage because it handles submerged operation well. A pedestal pump can work outdoors if kept dry and accessible for maintenance.
Most DIYers choose a submersible sump pump for yard drainage; ensure it fits your discharge path.
Can I discharge yard water into the street or storm drain?
Discharge policies vary by location. Generally, water should remain on your property and avoid public drainage systems unless permitted by local rules.
Discharge should stay on your property and avoid public storm drains unless allowed.
How often should I maintain a yard drainage pump?
Check the pump and hose before and during the wet season. Clean debris, test operation, and inspect power connections monthly.
Test and inspect monthly during the rainy season.
What safety precautions should I take with outdoor electrical tools?
Use GFCI outlets, weather-rated cords, and keep connections dry. Store components properly after use and never handle electrical gear with wet hands.
Always use a GFCI outlet and weather-rated cords for outdoor work.
Watch Video
Top Takeaways
- Plan the discharge path before starting
- Choose the right pump and hose size
- Test the system before heavy rain
- Protect electrical connections outdoors
- Winterize to prevent freeze damage