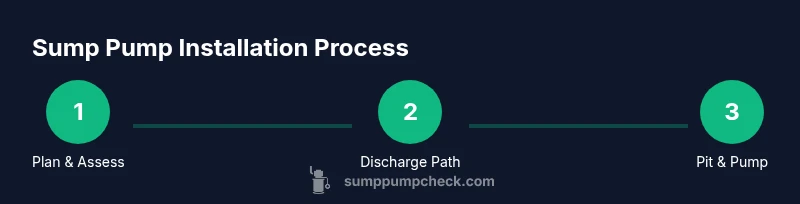
Sump Pump Installation in the Basement: Step-by-Step Guide
Learn how to install a sump pump in your basement with a practical, step-by-step approach. This guide covers sizing, discharge planning, wiring, backup options, and maintenance to protect your home from basement flooding.

Why a Basement Sump Pump Is Essential
According to Sump Pump Check, a basement sump pump helps prevent flood damage by actively removing groundwater. In many homes, the basement is the lowest point in the structure, and even modest seepage can lead to damp walls, mold, and ruined belongings. A properly installed sump system creates a controlled path for water to exit away from the foundation, reducing hydrostatic pressure and protecting structural integrity. When you plan a sump pump installation basement, you’re investing in long-term reliability rather than quick fixes. This overview explains typical basement conditions, signs you may need a pump, and the core components you will work with: the sump pit, the pump itself, a discharge line, and a backup option. You’ll learn how to distinguish between submersible and pedestal models, and how to balance capacity with maintenance needs. The goal is to set expectations for a safe, efficient, and durable installation that minimizes future headaches.
Assessing Your Basement Conditions
Before you buy tools or pick a model, assess the specific conditions of your basement. Look for signs of chronic dampness, efflorescence on concrete, musty odors, or water stains after rainstorms. Measure how high groundwater rises during wet seasons, and note the slope of the basement floor toward walls—this affects how water travels toward the sump pit. Check existing drainage systems, including floor drains, weep holes, or French drains, to determine where water currently flows. Understanding your climate, soil type, and the age of the foundation helps you plan an appropriate pit size and pump capacity. If you’re uncertain, a basic site survey by a licensed contractor or university extension service can prevent oversizing or undersizing. Remember, a well-planned installation that accommodates future rainfall variability will save you effort and money over the life of the system.
Sizing and Choosing a Pump
Choose a pump with enough capacity to move water away from the home during peak flows without cycling excessively. In general, look at the sump pump’s flow rate (gallons per minute) and its ability to lift water to the discharge point, considering vertical height (lift). Homeowners commonly select a 1/3 to 1/2 horsepower pump for average basements, but very damp or higher water table conditions may require more. Consider factors such as flow duration, power availability, noise tolerance, and the space around the pit for maintenance. If your basement has future expansion plans or a history of flooding, plan for a slightly larger unit or consider two pump configurations (primary plus backup). Note that submersible models tend to be quieter and better for sealed pits, while pedestal pumps can be easier to service. The key is matching pump capacity to real needs, not just price.
Planning the Discharge Path
Discharge planning is critical to prevent re-entry of water into the basement. Identify a reliable exterior outlet or drainage point that’s at a safe distance from the foundation and away from sidewalks or doors. Install a check valve on the discharge line to prevent backflow when the pump stops. Use rigid PVC or licensed-grade piping with proper slope to keep water moving away from the house. If your discharge runs through a living area, consider a covered trench or weatherproof coupling to guard against freezing in winter. Keep the line clear of debris and use a cleanout access for future maintenance. Finally, ensure you have a licensed electrician install appropriate wiring and GFCI protection if the outlet is indoors, reducing electrical hazards.
Sump Pit and Sealing Considerations
Pit size and seal integrity determine how smoothly the pump operates. A typical sump pit is 18 inches in diameter and at least 24 inches deep, but check local recommendations and the space available in your basement. Line the pit edges with a shim or foam seal to prevent soil infiltration and reduce vibrations. If rising groundwater is aggressive, consider a larger pit or a double-pit arrangement. Install a durable lid with a gasket to minimize odors and keep debris out. Before you install piping, remove any loose concrete, dust, or rubble from the pit to ensure a tight seal. A well-sealed pit lowers the risk of air leaks, keeps debris out of the pump basket, and prolongs the unit’s life.
Installing the Pump
Position the sump pump securely in the pit with the discharge outlet aligned toward the planned pipe path. Make sure the unit sits level and that the intake strainer is clean before connecting hoses. Attach the discharge pipe using primer and cement, ensuring airtight joints that won’t leak under pressure. Install a check valve above the pit to prevent backflow, and cap any unused ports. If your model uses a separate float assembly, install it at the correct height per the manufacturer’s instructions. Take care to avoid overtightening fittings, which can crack PVC. Mount or cradle the unit away from high-traffic areas to reduce vibration and noise inside the living space.
Wiring, Floats, and Alarms
Electrical work should prioritize safety and code compliance. If you’re not comfortable with wiring, hire a licensed electrician. Run a dedicated circuit to the sump pit and protect it with a GFCI outlet in living spaces or a weatherproof box in unconditioned spaces. Attach the float switch so it moves freely without snagging on pipes or debris; test its range by slowly filling the pit with water. Many homeowners add a high-water alarm or water sensor for early warning, which can alert you and your family to pump failure. Keep the wiring neat, secured, and protected from dampness with appropriate conduit. Regularly inspect connections for corrosion or loose fittings.
Battery Backup and Power Considerations
Having a battery backup is a smart hedge against power outages during storms. A backup system provides several hours of pumping when the primary power is out, preserving your basement’s dryness. Choose a backup capable of handling the same lift and flow as the primary unit. Position the backup battery in a dry, ventilated location and check it periodically for charge status. Keep replacement batteries on hand and replace them according to manufacturer recommendations. A well-integrated backup reduces the risk of basement flooding even when the main pump loses power.
Testing and Troubleshooting
After installation, test the system with a controlled water fill and observe the pump’s response. Listen for unusual noises, watch for leaks, and verify that water is clearing the discharge line correctly. Check that the alarm and float switch operate smoothly through the full fill cycle. If water does not drain, recheck the discharge path, check valve orientation, and ensure the pit is clean. Document any issues during testing, and consult the manufacturer’s guide for troubleshooting steps. Regular testing helps prevent catastrophic failures during heavy rainfall.
Maintenance and Long-Term Care
Create a simple maintenance schedule to inspect the pump, check valves, seals, and the discharge line every few months. Clean the sump pit basket to prevent debris buildup, and remove sediment from the bottom of the pit as needed. Replace worn gaskets and seals promptly to maintain a tight seal. Yearly professional checkups can catch problems early and extend service life. Store spare parts such as o-rings and replacement gaskets in a dry place. A proactive maintenance routine reduces the chance of unexpected outages and prolongs the life of your sump pump installation basement.
Costs, Permits, and Common Pitfalls
Costs for a DIY sump pump installation basement vary with pump size, materials, and whether you need professional help. Expect basic components like the pump, discharge pipe, and check valve to form the bulk of expenses, with higher costs for battery backups and labor if you hire a pro. Many regions require permits for excavations or electrical work; check local building codes before starting. Common pitfalls include undersizing the pump, improper discharge routing, and skipping a functional backup. Inadequate sealing and failing to test the system thoroughly are frequent causes of failures after installation. Planning ahead and following manufacturer guidelines reduces risk and improves reliability.
Authority Sources
Authority sources help ensure your installation aligns with best practices and safety standards. For practical, regionally relevant guidance, you can consult university extensions and safety organizations. These resources offer detailed maintenance schedules, code considerations, and troubleshooting tips that homeowners can apply when installing a sump pump in a basement. Remember to corroborate any advice with your local building department and follow manufacturer instructions for your specific model.