Easy Sump Pump Installation: A DIY Guide
A practical, beginner-friendly guide to installing a sump pump. Learn planning, sizing, wiring, piping, testing, and maintenance for a reliable basement drainage system.

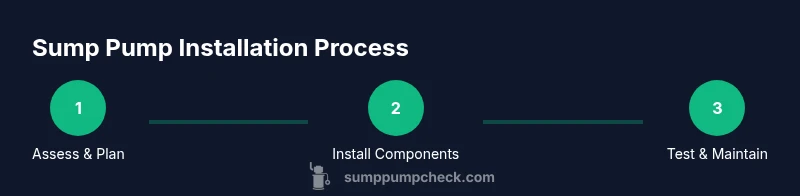
Learn how to complete an easy sump pump installation with a clear, step-by-step approach. This practical guide covers planning, sizing, placement, discharge options, electrical connections, plumbing basics, and essential safety checks. By following these steps, homeowners and DIY enthusiasts can install a reliable sump pump that helps protect basements from flood damage.
Assessing Your Basement and Requirements
According to Sump Pump Check, the first step in an easy sump pump installation is a thorough assessment of the space and the home’s drainage needs. Start by inspecting the basement for existing water intrusion patterns, checking the sump pit dimensions, and noting any nearby utilities or obstacles. Confirm the pit is clean and dry before you begin, and review local codes or HOA rules regarding discharge locations and electrical requirements. This planning phase helps you choose the right pump size, elevation, and pipe routing to prevent backflow and ensure reliable operation during heavy rainfall. As you evaluate, consider future maintenance accessibility and the ease of accessing the outlet for service. By laying a solid planning foundation, you set yourself up for a smoother install and a more dependable drainage solution.
Planning for Placement and Sizing
Next, determine optimal sump pump placement. The pump should sit low in the pit, with the inlet fully submerged and the float switch able to trigger without obstruction. A typical home sump pump is rated in horsepower; most basements can be protected with a 1/3 to 1/2 HP unit, but exact sizing depends on pit size, discharge distance, and local rainfall patterns. Measure the pit and plan the discharge route to an exterior area that won’t flood. Consider a check valve on the discharge line to prevent backflow, and decide whether you’ll use a gravity drain or mechanical pump with an automatic float switch. Document your measurements and planned routing to guide the installation and any future upgrades.
Electrical, Drainage, and Safety Essentials
Electrical safety is non-negotiable in sump pump installation. Ensure you have a dedicated GFCI-protected outlet within a safe distance from the sump pit. Do not run power cords across the floor; instead, hardwire or install a sealed, weatherproof connection if local codes permit. Assess the drainage zone around the discharge point to prevent water from pooling near doors or windows. Plan for regular inspection of wiring, outlet condition, and the presence of a grounded metal outlet box. Keep a clear path to the pit and maintain proper clearance to avoid heat buildup or mechanical interference. Following these safety practices reduces shock risk and helps your sump pump perform reliably when storms hit.
Selecting and Preparing Pump Components
With sizing in mind, select a sump pump model that includes a robust float switch and compatible discharge fittings. A check valve on the discharge line is essential to stop backflow after the pump turns off. Gather PVC piping, elbows, couplers, and appropriate sealants for a secure, leak-free connection. If your system uses a battery backup, confirm compatibility with your primary pump. Prepare a clean, dry work area and have a trash bag handy for debris removal. Preparing components ahead of time minimizes on-site improvisation and helps you complete the install more efficiently.
Installation: Installing the Pump, Piping, and Connections
Begin by placing the pump into the pit, ensuring the inlet is unobstructed and the float switch has room to move. Attach the discharge piping with a check valve and routed away from living spaces, using secure fittings and proper slope for gravity drainage. Seal any gaps around the pit with cement or sealant to reduce drafts and moisture intrusion. Route the electrical supply safely, using a GFCI outlet or a dedicated circuit, and test the connection for secure power. Install a pump lid or cover if provided to reduce debris entry and prevent accidental contact with moving parts. Tighten connections gradually and check that all components are aligned and supported to minimize vibration.
Testing, Commissioning, and Maintenance
After assembly, perform a dry run to confirm the unit powers on and the float activates. Add water to the pit to test automatic operation and observe the pump’s cycle; listen for unusual noises that may indicate bearing wear or misalignment. Check for leaks along the discharge line and ensure water exits away from the foundation. Schedule a routine maintenance plan: clean filters, inspect the check valve, verify the GFCI outlet, and test the backup battery if you have one. Document maintenance dates and keep spare parts handy for faster service.
Common Mistakes to Avoid and Troubleshooting Tips
Avoid common mistakes such as oversizing the discharge route, blocking the vent or check valve, or wiring the pump to an improperly protected outlet. If the pump runs continuously or fails to start, re-check the float switch alignment, electrical connections, and the pilot water level in the pit. Regular inspections help prevent basement flooding and prolong the life of the system. For many households, a quick troubleshooting checklist can save long downtime during heavy rain.
Final Thoughts: Why a Safe, Well-Planned Installation Pays Off
A well-executed install minimizes flood risk and reduces anxiety during storms. By following a structured process—from planning and sizing to secure piping and electrical safety—you create a resilient solution that protects your home’s value and comfort. Keep the system simple, opt for quality components, and commit to a regular maintenance schedule. This approach makes the idea of easy sump pump installation both approachable and reliable.
Tools & Materials
- Sump pump (submersible or pedestal)(Choose 1/3 to 1/2 HP for typical basements; ensure compatibility with float switch.)
- Discharge piping (PVC 1-1/2(Include elbows and couplers; plan for exterior routing.)
- Check valve for discharge line(Prevents backflow after pump stops.)
- GFCI-protected power outlet or dedicated circuit(Avoid extension cords; prefer permanent installation.)
- Float switch (if not built-in)(Ensure smooth movement and proper mounting.)
- Sealant or plumber’s putty(For sealing joints and pit rim.)
- PVC cement and primer(For secure pipe connections.)
- PVC pipe fittings (elbows, couplers)(Match pipe size and slope.)
- Measuring tape and marker(Accurate measurements; mark cut lines.)
- Adjustable wrench and screwdriver set(Tighten fittings without stripping.)
- Utility knife(For trimming insulation or lines as needed.)
- Lid or cover for sump pit(Prevents debris entry and accidental contact.)
Steps
Estimated time: 2 hours
- 1
Verify local codes and plan the space
Check local regulations for discharge locations and electrical requirements. Measure the pit, note pit depth, and identify a clear path for piping away from foundations. Create a quick sketch to guide the install.
Tip: Double-check that the chosen discharge location remains dry during storms. - 2
Prepare the pit and area
Clear debris from the sump pit, clean the surface, and ensure you have unobstructed access. Remove any old fittings or corroded components. Ensure the pit rim is dry before sealing joints.
Tip: Keep a small tray to catch drips during disassembly. - 3
Size and select the pump
Choose a pump that matches pit size and expected water inflow. Confirm compatibility with float switch and discharge fittings. Prepare fittings and check valve in advance.
Tip: Err on the side of slightly larger capacity if you expect heavy use. - 4
Install discharge piping with check valve
Attach the check valve to the discharge pipe and route it away from the foundation. Use PVC cement where required and ensure slope toward exterior, not horizontally. Seal joints with appropriate sealant.
Tip: Keep pipe runs straight to minimize resistance and noise. - 5
Place and secure the pump
Set the pump in the pit, ensuring the intake is unobstructed and the float switch can move freely. Secure the unit to prevent tipping. Connect the discharge line to the pump outlet and verify alignment.
Tip: Avoid placing the pump on loose debris; set on a stable surface. - 6
Wire safely to power
Connect the pump to a GFCI-protected outlet or use a dedicated circuit per code. Keep wiring away from moisture and use protective conduits if needed. Do not use an extension cord for permanent installs.
Tip: Route the power cord with strain relief and avoid pinching. - 7
Install lid and inspect for leaks
If your pit has a lid, place it securely to reduce debris ingress. Run the pump and observe for leaks along joints. Confirm that the valve remains tight and that the discharge line clears the pathway.
Tip: Wait for joints to cure if adhesives were used before testing. - 8
Test run and set maintenance
Fill the pit with water to trigger the float switch and observe cycling. Note any abnormal noises or vibrations and adjust as needed. Schedule regular maintenance checks every 6–12 months.
Tip: Document test results and maintenance dates for reference.
FAQ
Do I need a professional to install a sump pump?
For most straightforward installations, a confident DIYer can install a sump pump, following local codes and safety precautions. If your home has unusual piping, limited electrical access, or uncertain codes, consider professional help.
For simple setups, a confident DIYer can handle it, but consult a pro if you’re unsure about electrical or plumbing requirements.
What size sump pump is right for a typical basement?
A typical basement uses a 1/3 to 1/2 horsepower pump. If you experience frequent, high-volume inflows, you may need a larger unit. Always size based on pit capacity and expected inflow.
Most basements do well with a 1/3 to 1/2 HP pump; bigger inflows may need more capacity.
What is the difference between a submersible and a pedestal pump?
Submersible pumps sit in the pit and are generally quieter and more compact; pedestal pumps stand above the pit with exposed motors. Submersibles are often preferred for home basements due to compactness and protection from debris.
Submersible pumps sit in the pit and are quiet; pedestal pumps stand above the pit with the motor exposed.
Is a battery backup system necessary?
A battery backup is highly recommended in areas prone to power outages or heavy storms. It provides a failsafe so the sump pump can operate during outages, protecting your basement even when the power is off.
A battery backup is highly recommended to keep pumping during outages.
How long does installation take?
A typical install takes about 1.5 to 2 hours for a standard setup, depending on pit condition, piping routing, and electrical access. Complex layouts can take longer.
Most standard installs take around 1.5 to 2 hours.
Can I reuse an existing sump pit?
Reusing an existing pit is common if it’s clean and appropriately sized for the new pump. Ensure the pit’s dimensions and seal integrity meet manufacturer recommendations.
You can reuse an existing pit if it’s clean and appropriately sized.
Watch Video
Top Takeaways
- Plan the space and sizing before buying parts.
- Use a check valve and correct discharge routing.
- Ensure a GFCI-protected, accessible electrical connection.
- Test operation thoroughly and schedule maintenance.
- Document the steps and keep spare parts on hand.