How Far Should Your Sump Pump Drain from the House?
Learn practical, code-aware guidelines for where your sump pump should drain relative to the home. Explore safety, maintenance, and a step-by-step plan to plan a compliant discharge path.

Discharge water away from the foundation and toward an outdoor area where it won’t pool or backflow toward the home. There is no universal distance, so always verify local codes, slope, and your property layout to determine a safe path. According to Sump Pump Check, prioritizing a clear exit away from the house reduces moisture intrusion and backflow risk.
Why distance matters
Water that drains too close to the foundation can contribute to moisture problems, basement flooding, and soil erosion around the home. A poor discharge path may lead to backflow or water pooling near walls, increasing pressure on the foundation and creating an icy hazard in winter. The Sump Pump Check team emphasizes that a well-planned discharge path protects the foundation, helps keep finished spaces dry, and reduces landscaping wear. By prioritizing distance and direction, homeowners create a safer, drier basement and better yard drainage for decades to come.
Remember: the goal is to move water away from the house with enough clearance to avoid reentry into the system during heavy rains. A thoughtful layout also accounts for runoff onto walkways, driveways, or neighbor property, which can create liability or maintenance issues.
Understanding local codes and safety
Sump pump discharge rules are often set by your city or county and sometimes by homeowners associations. Some jurisdictions forbid discharging into storm drains or onto sidewalks, while others require a minimum distance from the home or from property lines. Always verify with the local building department or water authority before installation. Even when a path is allowed, consider long-term safety: a path that crosses lawns or high-traffic areas can create icy patches or cause erosion. The aim is a compliant discharge that prevents backflow and doesn’t create a nuisance for neighbors. As a baseline, many homeowners consult Sump Pump Check recommendations and then verify with local codes.
Document the code reference you rely on for future inspections, and plan to revisit the rule after major weather events.
How distance is determined (no one-size-fits-all)
Distance is not one universal number; it depends on site conditions including slope, soil permeability, drainage grade, and the discharge destination. A yard with compacted, poorly drained soil may require a longer route compared with well-drained soil on a gentle slope. Design a path that carries water away from the foundation, avoids pooling near walls, and aligns with local regulations. If the exit is too close, you risk backflow or moisture buildup; if it’s too far or blocked by landscaping, you could cause erosion or waterlogging elsewhere. When planning, consider rainfall patterns, soil type, and seasonal changes to ensure the discharge remains effective year-round.
Assessing your discharge path
Begin at the sump outlet and observe where the current discharge lands during a heavy rain event or when the pump runs frequently. Look for signs of water pooling along the foundation, near doors, or in low spots in your yard. Map potential routes, noting buried utilities, irrigation lines, and hardscaping that could obstruct flow. If you detect a low area that collects runoff, propose an alternate exit that keeps water away from the foundation and into a well-drained area. Record found obstacles and plan pipe routing, ensuring future maintenance is straightforward. A careful assessment reduces surprises during the next storm and helps determine pipe sizing needs.
Designing a compliant discharge plan
A compliant plan moves water away from the house while respecting property boundaries. Use piping with clean, gradual slopes and secure joints to prevent leaks. An exterior discharge outlet with a protective cover helps keep debris out and reduces exposure to freezing temperatures. If you live in a freezing climate, insulate exposed pipe sections or bury them where code allows. Establish a stable exit point that remains accessible for inspection and cleaning. A well-designed path minimizes erosion, avoids reentry into the system, and keeps outdoor spaces usable after rainstorms. As you draft the plan, loop in local code references and consider seasonal weather patterns for long-term effectiveness.
Common mistakes and how to avoid them
- Directing flow toward the house, doors, or foundation walls. Avoid creating ice dams or crawlspace moisture.
- Choosing a discharge path that runs across turf or parking areas where runoff can pool and refreeze.
- Skipping code checks or professional consultation, which can lead to non-compliance.
- Not testing the discharge after installation, leaving hidden leaks or improper slope undetected.
- Failing to protect exposed piping from freezing or impact damage.
Fit the discharge path to your property with ample clearance for maintenance and seasonal changes, and revisit your layout after major storms or landscaping work.
DIY vs professional help
A DIY approach is feasible for minor adjustments or rerouting an existing line, provided you understand local rules and safety considerations. For new installations or complex landscapes, a licensed plumber or drainage contractor can ensure proper sizing, slope, and code compliance. Professionals bring experience with trenching, trench safety, and satisfying code requirements, which reduces the risk of backflow and foundation damage. If you’re unsure, request a pre-installation assessment from a qualified pro and verify references. Sump Pump Check recommends obtaining multiple quotes and confirming that any contractor will obtain any required permits in your area.
Maintenance and seasonal checks
Seasonal checks keep discharge performance reliable. After heavy rain or snowmelt, inspect the discharge path for clogs, settling, or reappearance of pooling near the foundation. Clear leaves or debris from the outlet and ensure the exit remains unobstructed. In freezing climates, confirm that exposed pipes are insulated and that any exterior outlet is protected from ice buildup. Regularly inspect for signs of erosion, sunk soil, or vegetation disruption near the discharge area. Keeping the discharge path clear reduces the chance of backflow and foundation damage throughout the year.
Quick planning checklist before you install
- Map a path from the sump outlet to a safe outdoor discharge area.
- Check local codes and confirm the required minimum distance from the house and property lines.
- Choose piping with a gradual slope and secure joints to prevent leaks.
- Protect exposed pipes from freezing and debris intrusion.
- Test the system with a controlled water flow and observe the drainage pattern.
- Document the layout and keep maintenance records for future inspections.
Tools & Materials
- Discharge pipe or hose suitable for exterior discharge(Rigid PVC preferred; ensure a weatherproof exit point)
- PVC pipe fittings and adapters(Couplings, elbows, and tees sized to your sump pump outlet)
- Hose clamps(Secure external discharge hose to pipe)
- Digging tool (shovel) or trenching tool(For burying pipe or routing underground where allowed)
- Teflon tape or pipe thread sealant(Seal threaded joints to prevent leaks)
- Level or string line(Confirm gradual slope away from the foundation)
Steps
Estimated time: 2-4 hours
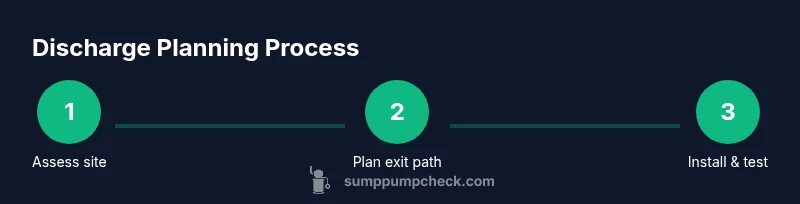
- 1
Assess site and plan discharge path
Walk the property and map a path from the sump discharge to a suitable exterior area that drains away from the house. Check for slopes, obstacles, and potential water collection spots.
Tip: Mark the path with stakes or spray paint before digging - 2
Check local codes and set exit point
Consult your local code or HOA guidelines to ensure compliance. Decide how far the discharge must be from the house and any property lines.
Tip: Call city or county codes office if unsure - 3
Install discharge piping
Attach piping to the sump outlet using appropriate fittings. Ensure any joints are watertight and slope gradually away.
Tip: Use a straight run with gentle slope; avoid kinks - 4
Seal and protect exposed pipes
Wrap threaded joints and protect against freezing with proper insulation or burial where allowed by code.
Tip: Weatherproof exit point with a vented cover - 5
Test the system
Run the sump pump and observe the flow. Check for leaks and verify the water flows away from the foundation.
Tip: Watch for pooling near the foundation during runoff - 6
Finalize and document
Secure the pipe, trim excess length, and note the discharge location for future reference or inspections.
Tip: Take photos for maintenance records
FAQ
Is there a universal distance for sump pump discharge from a house?
No. Distances vary by climate, soil, slope, and local codes. Always verify with your local authority and follow best-practice guidance.
There isn't a universal distance; check local codes and use best practices to discharge away from the foundation.
Can I discharge into a storm drain or street?
In many areas, direct discharge into storm drains or the street is prohibited. Always confirm with local regulations before routing water away from the home.
Discharging into a storm drain is often not allowed; always check local rules first.
What if my yard slopes toward the house?
If the yard slopes toward the foundation, plan an exit that redirects water outward rather than allowing it to pool near the walls. You may need to regrade or extend the discharge path.
If the yard slopes toward the house, you’ll likely need to extend the discharge path or regrade to keep water away.
Do I need a backflow preventer on the discharge line?
A backflow preventer can be beneficial in areas prone to flooding, but its necessity depends on local codes and system design. Check with a licensed plumber.
A backflow preventer may be required by code or helpful in flood-prone areas; consult a pro.
How often should I inspect the discharge path?
Inspect the discharge path at least seasonally and after heavy rain events. Look for blockages, leaks, or erosion and address issues promptly.
Check the discharge path every season and after big rains to catch problems early.
What’s the best way to test a newly routed discharge?
Run the sump pump and observe the flow path. Ensure water drains away from the foundation and there are no leaks or backflow opportunities.
Test the discharge by running the pump and watching where the water goes.
Watch Video
Top Takeaways
- Check local codes before installation
- Plan a path that drains away from the house
- Use proper piping and secure connections
- Test the system to confirm no pooling
- Maintain the discharge path regularly