How to Drain an Above Ground Pool with a Sump Pump
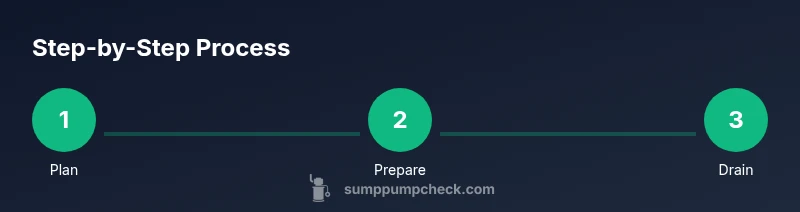
Learn how to safely drain an above ground pool using a sump pump. This step-by-step guide covers planning, discharge options, equipment selection, setup, operation, and post-drain care to protect your yard and home.

How to drain an above-ground pool safely and efficiently using a sump pump. Plan a safe discharge path away from your home, wire the pump to a GFCI outlet, and use the correct hoses. This guide covers choosing the right pump, connecting hoses, starting the pump, and monitoring the process until the pool is empty.
Understanding the drainage goal and safety basics
Drainwater from an above-ground pool must be managed with care to protect your yard, foundations, and neighbors. The goal is to remove water efficiently while avoiding erosion, flooding, or chemical concerns. Begin with a safety check: verify access to a power source, inspect for exposed wiring, and confirm the discharge path is clear of people, pets, and obstacles. According to Sump Pump Check, planning before you pump minimizes risk and speeds up the job. This foundational step sets the tone for a smooth drainage project and helps you avoid costly mistakes.
Discharge planning: where to drain the water
The discharge location matters as much as the pump itself. Do not dump water near the home foundation, into storm drains that feed back into your yard, or onto surfaces that could become slippery. Look for a route that leads water away from the house and toward a safe grassy patch, drainage ditch, or street with proper permissions. If the local rules require it, use a containment basin or filter to capture debris. Plan for slope and ensure the path remains free of rocks, toys, or hose kinks that could slow drainage or damage the hose.
Choosing the right sump pump and hoses
Pool drainage requires a pump with adequate capacity for the pool size and run distance. A pump with a built-in float switch helps prevent overextension and run-dry conditions. Match the outlet to a hose that fits securely; reinforced hoses handle long runs without collapsing. If your yard is uneven, use hose supports or stakes to keep the discharge line in place. Selecting the correct pump and hose affects flow rate, noise, and the time needed to empty the pool.
Safety considerations and electrical readiness
Outdoor electrical safety is essential. Use a GFCI-protected outlet and a weatherproof extension cord. Never operate a pump in a wet area unattended for long periods; maintain clear access to the power switch and outlet. Inspect hoses for wear, cracks, or leaks before starting, and keep the discharge area clear of bystanders. If you need to pause the operation, switch off the pump and unplug the unit to prevent shocks or short circuits.
Step-by-step setup overview
A clear setup ensures a smooth drain. First, position the pump near the pool with the discharge hose routed toward the planned outlet. Attach the hose securely, then connect power to a grounded, outdoor-rated outlet. Do a brief test run to confirm water flows through the hose and out of the designated area. This overview prepares you for the detailed step-by-step process that follows.
Running the system: monitoring flow and discharge quality
As water begins to move, watch for hose kinks, leaks, and changes in flow. Keep the hose away from areas where runoff could erode soil or threaten plants. If the water contains chemicals (e.g., after a sanitizer treatment), ensure you are discharging to a suitable area and at a rate that won’t shock nearby vegetation. Periodically check the pump’s operation and reset if it loses prime or stalls.
Troubleshooting common problems
If the pump won’t start, check the outlet, plug, and GFCI status. A kinked hose can stop flow; straighten and support the line. If you notice reduced flow, inspect the strainer and ensure the pump is still primed. For noisy operation, verify mounting stability and hose connections. Safety and consistency matter as you drain.
Aftercare: completing the drain and cleaning up
When you’ve removed all water, unplug the pump and detach the hose. Rinse the equipment with clean water to remove pool chemicals, then dry and store in a dry area. Inspect hoses for signs of wear and replace as needed. Finally, evaluate the drainage area for any soil disturbance and restore as necessary to prevent long-term erosion.
Tools & Materials
- submersible sump pump(Outdoor-rated with built-in float switch for automatic shutoff)
- discharge hose(Flexible, at least 1 inch diameter; long enough to reach the discharge area)
- hose adapter or fittings(To fit pump outlet to the discharge hose securely)
- outdoor extension cord (GFCI-protected)(Weatherproof and rated for outdoor use; ensure it reaches the pump safely)
- GFCI outlet or weatherproof power strip(Protects against electrical shock in damp conditions)
- duct tape or hose clamps(Secure hose connections to prevent leaks or disconnections)
- shovel or stakes(Prop up hose on uneven ground to maintain drainage path)
Steps
Estimated time: 60-180 minutes
- 1
Assess safety
Identify a safe discharge path, confirm power is accessible via a GFCI, and check for obstacles around the pool. This initial check reduces risk of electrical shocks and physical hazards during the drain.
Tip: Mark the discharge area with chalk to keep the path clear. - 2
Prepare pump and hoses
Set up the pump near the pool water level and attach the discharge hose. Make sure fittings are tight and free of leaks so you don’t lose suction or spray water where it’s not intended.
Tip: Test-fit hoses before plugging in to avoid spills. - 3
Position the pump
Place the pump on stable ground near the pool edge and ensure the outlet is directed toward the designated discharge route. A steady base prevents tipping or hose movement mid-drain.
Tip: Use a sandbag or board for stability if the ground is soft. - 4
Connect discharge hose
Attach the hose securely to the pump outlet and run the hose along the planned route. Keep it off hot surfaces and away from foot traffic to prevent damage.
Tip: Securely clamp the hose to prevent detachment during pumping. - 5
Route to discharge area
Lay the hose along the prepared path, avoiding sharp turns that slow flow. Use stakes or hoses supports to prevent kinks and maintain a straight flow.
Tip: Avoid discharging into areas with grass that could clog the hose. - 6
Power up and test
Plug the pump into a GFCI-protected outlet and run a quick test. Check for leaks, verify water is moving through the hose, and confirm there is no splashback near people or structures.
Tip: If the pump stalls, unplug, then recheck connections and prime the pump again. - 7
Start pumping and monitor
Begin draining and monitor water level, flow rate, and path integrity. Pause if you notice a kink or a sudden drop in flow, then address the issue before continuing.
Tip: Keep a log of time and flow to estimate total drain duration. - 8
Stop and disconnect safely
When the pool is drained, turn off the pump and unplug it. Detach the hose, rinse equipment if needed, and store it dry to prevent mold or corrosion.
Tip: Coil the hose neatly to prevent trip hazards. - 9
Inspect and store equipment
Inspect hoses, fittings, and the pump for wear. Replace any damaged parts and store all components in a dry, secure location for next use.
Tip: Check seasonal readiness (seasonal outdoor use) to extend equipment life.
FAQ
Do I need a dedicated discharge line for draining an above-ground pool?
A dedicated, protected discharge line is recommended to control where water goes and to prevent runoff issues. Use a hose routed to a safe area and ensure it won’t erode soil or damage landscaping.
Yes. Use a protected discharge line routed to a safe area to prevent runoff problems.
How long does it typically take to drain an above-ground pool with a sump pump?
Drain time varies with pool size, hose length, and water depth. It can range from about 30 minutes to several hours. Plan for a window and monitor progress.
Drain time varies; expect anywhere from half an hour to a few hours depending on setup.
Can I discharge pool water with chemicals into the yard or street?
If you’ve treated the water with chemicals, discharge to an area that won’t harm plants or wildlife and in compliance with local rules. In some cases, neutralizing the water first may be advised.
Discharge only to permitted areas; follow local guidelines for chemical content before draining.
What safety steps should I take when using a sump pump outdoors?
Use a GFCI outlet, keep electricity away from water, supervise the pump, and keep cords dry. Ensure the discharge path is clear of people and pets.
Always use a GFCI outlet and supervise the pump to stay safe.
What should I do if the pump overheats or trips the breaker?
Turn off the pump, unplug it, and inspect for clogs or air locks. Check electrical connections and attempt another start only after addressing the issue.
Turn off and check for clogs or air locks; reset only after ensuring safe conditions.
Is it okay to drain water directly onto the lawn or garden beds?
Draining onto lawns is usually okay if done gradually and away from delicate plants. Avoid plant damage by letting water flow slowly and evenly.
Yes, but drain slowly and away from sensitive plants.
Watch Video
Top Takeaways
- Plan discharge before draining to protect property
- Use a GFCI-protected outlet and outdoor-rated cord
- Securely attach and route hoses to prevent leaks
- Monitor flow and address problems promptly
- Store equipment properly after use