How to Fix Sump Pump Drainage Outside: A Practical Guide
Learn practical, code-friendly steps to fix sump pump drainage outside. Plan the discharge path, install durable piping, and maintain the system to keep water away from your foundation.

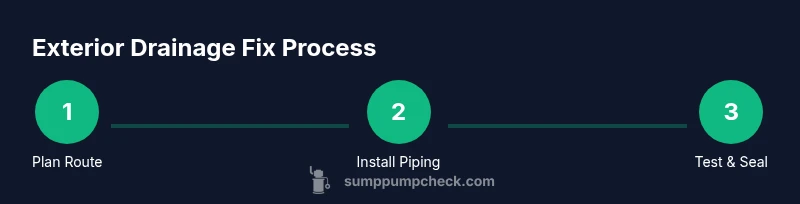
This guide shows you how to fix sump pump drainage outside by planning an exterior discharge path, clearing clogs, upgrading piping, and testing the system. You’ll learn safety steps, material choices, and maintenance tips to keep water away from your foundation. The plan also covers common mistakes and when professional help is wise.
Why exterior drainage matters
Exterior sump pump drainage is the last line of defense against basement flooding. When you fix sump pump drainage outside, you reduce the chance that groundwater or stormwater backs up into your home and you protect the foundation from erosion and cracks. For homeowners, understanding how exterior drainage works is essential for long-term water management. According to Sump Pump Check, a reliable exterior discharge path is a critical component of any basement water-management plan. In practice, the outside discharge guides the water away from walls, reduces hydrostatic pressure, and helps your pump operate more efficiently. This section explains why addressing exterior drainage today pays off tomorrow, and how to approach the work without compromising safety or building codes. You’ll learn how to evaluate your current setup, plan a proper route, and select compatible components that withstand seasonal weather and physical wear.
Common exterior drainage problems and how they start
Problems with exterior drainage usually begin with a blocked or undersized discharge line, a route that dumps water toward the foundation, or a crushed or kinked hose. Over time, yard runoff, frozen pipes, or poor soil drainage can cause backups and pooling near the footing. The consequences range from damp basement walls to mold growth and landscape erosion. Sump Pump Check's analysis shows that improper discharge is a frequent cause of basement-water issues, especially after heavy rainfall. The key is to identify accumulation points, check the slope away from the house, and note where water collects during storms. In many homes, small misalignments add up to big problems, so a planned check of the exterior path is worth doing before the next rain event.
Plan your drainage route to protect your home
Before you lift a tool, map the intended discharge path. Mark the exit point well away from doors, windows, and property lines. Check local codes for allowed discharge locations and any permit requirements. Consider the route that travels downhill, avoiding low spots where water can pool and refreeze. A good plan accounts for future landscaping, snow buildup, and potential vehicle traffic above the line. Document distances from the foundation and expected outlets to ensure the water exits the property safely. The goal is a clear, continuous path that minimizes erosion and keeps water away from the basement.
In this section, you’ll find a practical checklist to draft your route, identify obstacles, and select compatible connections that will stand up to seasonal changes. The approach you take here directly affects performance and durability, so invest time in the planning stage.
Materials and pathways: choosing pipes, valves, and outlets
Discharge piping choices include rigid PVC and reinforced flexible hose. The piping should match your pump outlet and be rated for outdoor use. Use fittings that resist UV exposure and temperature changes, and include a check valve to prevent backflow. Depending on your yard layout, you may route discharge into a splash block, dry well, or a drainage trench with a perforated outlet. Outlets should terminate above ground level and away from foot traffic. In addition, consider engineering a cleanout point so you can access and clear any blockage without digging up the entire line. The selection of materials affects longevity, ease of maintenance, and compliance with local drainage rules.
How slope, check valves, and outlets work together
A proper slope ensures water moves away from the house rather than pooling near the foundation. A check valve prevents backflow into the system during power outages or when other drains are active. Durable outlets and splash blocks reduce splash erosion and protect soil structure. Together, these components create a reliable exterior drainage system that minimizes freezing risk and keeps the discharge area accessible for inspection. After installation, test the flow by simulating runoff and watching for pooling or backflow. Small adjustments to the outlet height, slope, or valve orientation can dramatically improve performance.
Maintenance and prevention strategies
Establish a semi-annual maintenance routine to inspect exterior discharge, clear debris, and verify that the line remains free of cracks and sags. Keep the discharge area clear of leaves, sediment, and mulch that can clog the line. During fall and spring, test the pump and run water through the line to confirm steady flow. Replace worn fittings promptly and monitor for signs of freezing in winter. Refer to local codes for seasonal de-icing measures and ensure that the discharge does not pose drainage issues for neighbors or streets. Consistent upkeep reduces the likelihood of major failures and basement flooding.
Troubleshooting common installation issues
If water backs up or pools near the foundation after installation, recheck the slope and ensure the check valve is oriented correctly. Inspect for kinks, cracks, or loose connections and reseal joints as needed. If the outlet is too close to the house, relocate it to a more open area with better drainage. When in doubt, consult the brand’s guidance and cross-check with local codes—this reduces the risk of code violations. Additional steps may include replacing segments of piping or upgrading to sturdier joints and clamps to withstand weather exposure.
When to call a professional
If you encounter persistent clogs, frequent backups, or uncertain piping routes, consider a professional assessment. A licensed plumber or drainage specialist can evaluate soil conditions, determine the best discharge strategy for your property, and verify compliance with local codes. For complex installs or if you’re unsure about electrical safety around the pump, professional help accelerates the process and reduces risk. The Sump Pump Check team recommends seeking expert advice when the project involves structural changes, flood-prone zones, or uncertain plumbing layouts.
Tools & Materials
- Discharge piping (PVC or reinforced hose)(Match pump outlet diameter; include adapters if needed)
- Check valve(Prevents backflow into the sump pump and yard drain)
- PVC cement and primer(For secure outdoor joints; follow manufacturer instructions)
- Hose clamps and fittings(Secure hose connections and prevent leaks outdoors)
- Shovel or trenching spade(Dig a shallow, straight trench along the planned route)
- Measuring tape(Measure lengths and distances from the foundation)
- Spray paint or marker(Mark the planned route before digging)
- Safety gear (gloves, safety glasses)(Protect hands, eyes, and skin during digging and glue work)
- Level or slope tool(Help maintain a uniform outward slope)
- Splash block or splash pad(Direct discharge away from walls and paths)
Steps
Estimated time: 2-4 hours
- 1
Plan the exterior discharge path
Map a clear route from your sump pump outlet to a suitable exterior outlet. Check for obstacles, avoid low spots, and ensure the path ends away from the foundation. Mark the route with spray paint so you can verify line-of-sight before digging.
Tip: Use flags to visualize the route and confirm there’s no buried utility lines in the way. - 2
Shut off power and protect the area
Turn off the sump pump at the breaker and unplug if possible. This prevents accidental activation while you work and reduces electrocution risk. Keep a flashlight handy and avoid wet areas during handling of wiring.
Tip: Lockout tag the breaker to prevent accidental restoration of power while you’re working. - 3
Clear the existing discharge line
Inspect the current discharge line for clogs, kinks, or breaks. Remove debris and test for flow by running water through the line from the pump outlet. Note any transitions or fittings that require replacement.
Tip: Have a bucket handy to collect any residual water and avoid staining your concrete. - 4
Install or upgrade discharge piping
Lay out the new piping along the planned route, then cut to length and join with appropriate fittings. Use PVC cement on joints and ensure there’s a continuous outward slope away from the foundation. Secure with clamps and check for a tight seal.
Tip: Avoid sharp bends; use gradual curves to minimize flow resistance. - 5
Add a check valve and outlet protection
Install a check valve to prevent backflow, then place a splash block or protective outlet to reduce erosion and direct water away from the building. Double-check orientation and secure all fittings.
Tip: Test valve operation after installation to confirm correct flow direction. - 6
Test, adjust, and finalize
Reconnect power and run water through the system to verify steady drainage and absence of leaks. If you notice pooling, recheck slope and seals. Backfill trench and restore any disturbed soil or mulch.
Tip: Document the route and take photos for future reference.
FAQ
What is the best discharge path for exterior sump pump drainage?
The best path directs water away from the foundation, with a clear, sloped route to an appropriate outdoor outlet. Avoid discharging toward doors, windows, or neighbor properties. Always check local codes before routing water to street or storm drains.
Direct water away from your foundation along a clear, sloped path and always follow local codes.
Can I discharge sump pump water onto my lawn?
Discharging onto the lawn is generally acceptable if it won’t cause erosion or flooding and it complies with local regulations. Keep the outlet far enough from the foundation and sidewalks.
Discharge onto the lawn only if it won’t cause erosion and complies with local rules.
Should I install a check valve on the discharge line?
Yes. A check valve prevents backflow, protecting the pump and basement from reverse flow during power outages or heavy rainfall.
Yes, install a check valve to prevent backflow.
What maintenance reduces clogs in exterior drainage?
Regularly clear debris, inspect joints, and verify that the line is free of sags or kinks. Testing the system after rain helps catch issues early.
Keep the line clear and test after rain to catch problems early.
When should I call a professional for exterior drainage?
If you’re unsure about slope, encounter persistent clogs, or need to reroute drainage to comply with codes, a licensed plumber or drainage expert can help.
Call a pro if you’re unsure or run into persistent issues.
How often should exterior drainage be inspected?
Inspect at least twice a year and after major storms. Look for debris, leaks, and signs of erosion around the discharge point.
Inspect twice a year and after big storms.
Watch Video
Top Takeaways
- Plan the discharge path before digging.
- Use a durable check valve and compatible piping.
- Maintain a consistent slope away from the foundation.
- Test thoroughly and monitor for leaks after installation.
- Schedule regular maintenance to prevent future issues.