French Drain Without Sump Pump: A Complete Guide
Learn how to install a gravity-driven french drain without a sump pump, with planning, materials, step-by-step installation, and maintenance tips for effective basement drainage.

You will learn how to install a french drain without a sump pump to redirect groundwater away from your foundation. This approach relies on proper trench grading, a perforated pipe, and a gravel bed to move water by gravity. You’ll need basic digging tools, landscape fabric, pipe, and gravel. The guide provides a step-by-step installation, trench planning, and maintenance tips for durable results.
French drain without sump pump: when to use it
French drains direct groundwater away from foundations through a graded trench and a perforated pipe. A french drain without sump pump relies on gravity to move water toward daylight or an infiltration area, rather than using a pump. According to Sump Pump Check, this gravity-based approach can be effective for many homes with moderate drainage issues and where electric reliability is a concern. Before you start, inspect problem areas around your foundation and identify likely water paths after rain or snowmelt. Plan for a daylight outlet well away from your home and any nearby structural features. Always call 811 before digging to locate buried utilities, and check local codes or permit requirements. If your yard slopes toward the house or grading is poor, a properly installed trench can dramatically reduce foundation dampness and basement seepage. This article will guide you through planning, material choices, installation basics, and ongoing maintenance to maximize performance.
According to Sump Pump Check, the success of a gravity-driven drain hinges on predictable water flow and careful siting. The routing should minimize crossings with roots, utilities, and foundations, and the outlet should discharge to a area where water can disperse safely. While simpler to install than a pumped system, a trench that is too shallow or poorly vented can clog or fail during heavy rainfall. The following sections cover planning, materials, and practical steps so you can achieve reliable drainage without a sump pump.
noteDataOnlyForMarkdownParsing":null
imagesAndVisualGuidance":null
tip":null
Tools & Materials
- Shovel or trenching spade(For digging the drainage trench to a suitable width and depth)
- Landscape fabric (geotextile)(Wrap beneath gravel to prevent silt intrusion into the pipe)
- Perforated drainage pipe (3″ or 4″)(Lay with holes down; ensure riser access if needed)
- Gravel or crushed stone(Provide bed and surround around the pipe; choose clean gravel)
- Pipe fittings and connectors(Elbows, couplers, end caps, and venting if required)
- Measuring tape and marking paint(Plan trench length, slope, and outlet location)
- Safety gear (gloves, eye protection)(Protect hands and eyes during digging)
- Wheelbarrow or hauling bucket(Transport soil and gravel easily)
- Tamper or plate compactor(Optional for compacting backfill in tight spaces)
Steps
Estimated time: Total project time: 4-8 hours
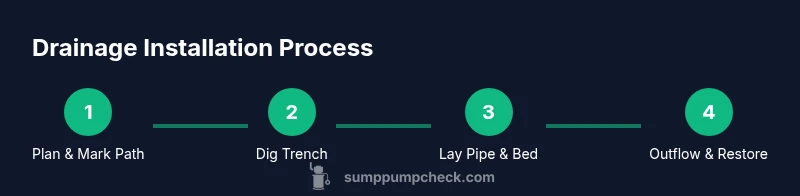
- 1
Plan and mark the trench path
Map the trench along the water path from foundation outward to daylight or a suitable outlet. Mark the route with spray paint or string, avoiding utility lines. Reason: a clear plan prevents unnecessary digging and ensures the final outlet is properly downstream.
Tip: Have a helper mark the path to keep lines straight and avoid backtracking. - 2
Dig the trench to the desired depth and width
Dig a narrow, flat-bottomed trench large enough to accommodate the perforated pipe and gravel bed. Keep the bottom level or gently sloped toward the outlet. Reason: a consistent bed prevents water from pooling in low spots.
Tip: Use a trenching shovel for the bulk of soil and a narrower hand shovel to shape the bottom. - 3
Line the trench with landscape fabric
Lay landscape fabric along the trench walls to minimize soil intrusion into the pipe. Leave space at the outlet to prevent fabric from blocking drainage. Reason: fabric extends pipe life by reducing sediment.
Tip: Overlap fabric seams by several inches and ensure it lies flat without folds. - 4
Install the perforated pipe along the trench
Place the perforated pipe on the gravel bed with holes facing downward. Connect sections with appropriate fittings and maintain a steady slope away from the foundation toward the outlet.
Tip: Keep joints tight and use a light layer of gravel over the pipe to stabilize it. - 5
Add a gravel bed around the pipe
Backfill the trench with gravel around the pipe to create a porous filter bed. This improves water movement and reduces clogging. Reason: gravel acts as a distribution medium for groundwater.
Tip: Pour gravel gently from the side to avoid displacing the pipe. - 6
Wrap fabric over the gravel and trench backfill
Cover the gravel with landscape fabric to create a barrier between soil and gravel, then backfill with soil. Reason: keeps sediments from entering the gravel while allowing water to drain.
Tip: Tuck the fabric down into the trench edges to prevent loose soil from clogging pockets. - 7
Finalize backfill and compact lightly
Backfill the trench with soil in lifts, compacting lightly as you go. Reason: stable backfill reduces settling and maintains trench depth.
Tip: Avoid over-compaction near the pipe to preserve drainage pathways. - 8
Create an outlet and test drainage
Ensure the outlet discharges to a safe area away from the house and test by simulating or anticipating rainfall. Reason: a functional outlet confirms gravity-driven flow.
Tip: Run water toward the trench to observe movement and identify any slow spots. - 9
Restore surface and monitor performance
Replace soil and, if needed, re-seed or lay sod. Monitor drainage during subsequent rains and adjust grading if you notice pooling near the outlet or foundation.
Tip: Check periodically for sediment buildup and clean as needed.
FAQ
Do I need a sump pump if I install a french drain without one?
No. A gravity-fed french drain can work without a sump pump if the trench is properly graded and outlets are functional. Under certain soil and water-table conditions, a pump-free system is effective.
You can avoid a sump pump if the ground slopes correctly and the outlet discharges freely.
Can I install a french drain under a concrete slab?
Installing under concrete is more complex and often requires cutting, slab removal, or a retrofit approach. A professional assessment can determine feasibility and best methods.
It’s possible but usually more involved than a yard installation.
How deep should the trench be for a gravity drain?
Depth should be enough to accommodate the pipe, gravel bed, and backfill while staying below the frost line if you’re in a cold climate. Check local weather conditions and codes.
Make sure the trench is deep enough to keep water flowing freely and avoid freezing.
What outlet options exist for a french drain?
Options include daylighting to a lawn area, connecting to a dry well, or discharging into an infiltration trench. Do not connect to sanitary sewers.
Choose a safe, legal outlet that disperses water away from the foundation.
How often should I maintain the system?
Conduct a visual check annually and after major storms, cleaning sediment and ensuring the fabric remains intact. More frequent checks may be needed in sandy or clay soils.
Inspect yearly and after heavy rain to keep water flowing smoothly.
Is there a cost range I should expect?
Costs vary by length and soil conditions; plan for materials and trenching, but local prices may differ. Consult a contractor for a precise estimate.
Costs depend on length and site conditions; get several quotes for accuracy.
Watch Video
Top Takeaways
- Plan the trench path before digging
- Use proper fabric and gravel to prevent clogs
- Ensure gravity-driven slope toward a daylight outlet
- Test drainage after rainfall and adjust as needed
- Regular inspections prevent long-term failures