How Big Sump Pump Do I Need: A Homeowner's Sizing Guide
Learn how to size a sump pump for your basement by assessing head, flow, pit size, rainfall, and backup options. This practical guide helps homeowners prevent flooding and protect their homes.

To size your sump pump, estimate the required flow (gallons per minute) and the maximum head (lift height) the pump must overcome. Consider basement size, rainfall, and drainage area, plus the pit volume. For most single-family homes, a 1/2 HP to 1 HP submersible pump covers typical needs; larger basements or higher head may require a bigger unit. Always consult manufacturer curves.
Why sizing matters
Sizing the sump pump to your basement and local conditions is not a luxury—it's a safety decision. How big sump pump do i need depends on several interrelated factors, including the pit size, floor level, and the worst-case water inflow you expect during heavy rainfall. According to Sump Pump Check, properly sized pumps minimize short cycling, prevent basement flooding, and extend the life of the pump by avoiding overwork. The goal is to balance reliable removal of water with energy efficiency and quiet operation. In this guide, we’ll break down the steps to determine your size, explain the key terms, and show how to verify your choice with real-world scenarios.
Core sizing concepts: head, flow, and efficiency
Sizing hinges on three core ideas: how high water must be lifted (head), how much water needs to be moved over a given time (flow), and how efficiently the pump operates at those conditions. Head increases with elevation, piping length, and friction losses; flow depends on rainfall intensity, basement area, and drainage. The most efficient setup often leaves a small margin above your calculated need, which helps prevent nuisance cycling. Sump Pump Check emphasizes that a properly sized system balances reliability, energy use, and long-term durability.
Understanding head height and discharge path
Head height is the vertical distance the water must travel from the pit to the discharge point, plus any losses along the route. A longer discharge run, sharp bends, or uphill sections raise the head and reduce the pump’s effective capacity. Plan the discharge to exit away from your foundation, with a clear slope and a properly installed check valve to prevent backflow. Local grading and drainage rules may affect placement, so consult local codes when planning installation.
Estimating required flow (GPM) for typical basements
GPM (gallons per minute) is a primary sizing input. To estimate needs, consider the basement footprint, typical rainfall intensity, and how quickly you want water removed after a heavy event. A conservative approach adds a safety margin to your calc, ensuring water is moved efficiently without overworking the pump. Sump Pump Check recommends documenting worst-case scenarios (e.g., prolonged rain) to validate your target GPM.
Reading pump curves and matching to your needs
Manufacturers publish performance curves that show how much water a pump can move at various heads. Read curves by locating your estimated head on the vertical axis and finding the corresponding GPM on the curve. Choose a model whose curve sits comfortably above your calculated needs at the target head, allowing for headroom during peak inflow. The curve also helps you compare energy usage and runtime across options.
Backup plans and safety features
A single pump protects against routine water, but outages or power failures can still leave you exposed. Consider a battery-backed sump pump or a water-powered backup, plus a dedicated circuit and an auto-switching controller. A properly configured back-up system reduces flood risk during storms. Also, ensure a reliable float switch, preferably with a failsafe design, to prevent overflows.
Discharge piping, check valves, and venting
Discharge piping should be appropriately sized and routed away from your home, with a check valve to prevent backflow. Venting and cleanout features simplify maintenance and reduce pressure buildup. Avoid discharging into a closed crawlspace, a storm drain, or a soil that cannot absorb the water. Proper piping ensures your pump operates under optimal conditions and reduces noise.
Practical sizing examples by basement size
Smaller basements with modest rainfall often do well with a standard ½ HP pump, while medium to large basements or regions with heavy rainfall may require ¾ to 1 HP models. Very large basements or high head scenarios might justify two pumps or a backup system. In all cases, corroborate your choice with pump curves and field tests.
Authority sources and next steps
For deeper dives, consult credible sources like FEMA and university extension programs. Real-world guidance from local plumbers and building codes will also influence your final choice. The goal is to arrive at a sizing decision that aligns with your home, climate, and budget. The Sump Pump Check team recommends documenting measurements and reviewing curves before purchasing a unit.
Tools & Materials
- Tape measure(Measure sump pit dimensions and clearance around the unit)
- Notebook and pencil(Record measurements, notes, and calculations)
- Calculator or sizing chart(Compute required GPM and head; cross-check with curves)
- Manufacturer pump curves (printouts or digital files)(Compare performance vs head/flow needs)
- Power source and outlet(Ensure a dedicated, properly grounded outlet for the pump)
- Local rainfall data (optional)(Helps model worst-case inflow scenarios)
Steps
Estimated time: 2-6 hours
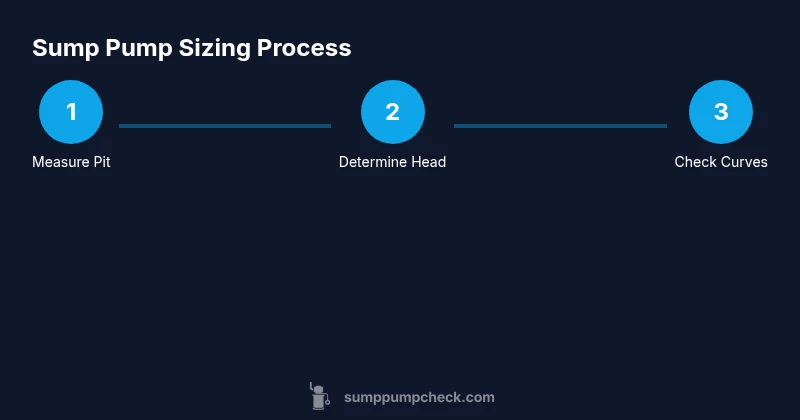
- 1
Measure pit and space
Measure the sump pit diameter and depth, and note available clearance for the pump and any backup system. Record the pit size since it constrains pump selection and intake design.
Tip: Note any obstructions or irregularities in the pit that could affect placement. - 2
Determine your head height
Estimate the vertical distance water must travel from the pit outlet to the discharge point outside. Add extra head for piping losses, bends, and potential uphill runs.
Tip: Ask a plumber for a quick head-height sketch if your discharge route is complex. - 3
Estimate your worst-case inflow
Think about your basement size, climate, and rainfall history to set a baseline inflow scenario. This helps translate room area into a rough GPM target.
Tip: Use local rain events as a reference to avoid underestimating inflow. - 4
Consult or compute GPM needs
Convert your inflow estimate into gallons per minute (GPM). A conservative approach adds a margin to address transient spikes.
Tip: Document how you derived your GPM figure for future checks. - 5
Read pump curves
Access multiple pump curves and compare their performance at your target head. Identify a model that exceeds your GPM target with comfortable headroom.
Tip: Prefer a curve that shows stable performance at your head with a margin for variation. - 6
Choose a baseline horsepower
Based on the curves, select a baseline HP. Common residential choices span from ½ HP to 1 HP, with higher head potentially requiring more capacity.
Tip: Remember that bigger isn’t always better—oversizing can waste energy and shorten battery backup life. - 7
Plan for battery back-up
If power outages are common in your area, add a battery-backed unit or an automatic transfer switch, to maintain water removal during outages.
Tip: Verify battery availability and swap schedules before installation. - 8
Check discharge routing
Design a discharge path that avoids re-entry into the home and follows local code. Include a check valve to prevent backflow.
Tip: Keep the discharge line sloped and secure to reduce vibration and noise. - 9
Assess safety and codes
Review electrical safety requirements and local codes. A licensed professional can confirm you meet all standards.
Tip: Schedule a quick code check with your local building department if you’re unsure. - 10
Estimate install effort
Estimate time, tools, and labor for installation, including any required pit adjustments or piping work.
Tip: Factor in potential remodeling or access constraints in tight basements. - 11
Plan for future needs
Consider potential increases in inflow due to aging drainage, expanded living space, or climate shifts when sizing.
Tip: Choose a pump with a modest buffer for future scenarios. - 12
Finalize selection and test
Pick the model, install, and perform a controlled test to confirm water removal meets the calculated targets under load.
Tip: Document test results and keep a maintenance log for ongoing reliability.
FAQ
What size sump pump do I need for a small basement?
For many small basements, a ½ HP pump is a common starting point. Always verify with head and GPM calculations and your local rainfall patterns.
For many small basements, start with a half horsepower pump, but confirm with your head and flow calculations.
Do I need a backup sump pump?
Yes, especially in storm-prone areas or climates with power outages. A backup system can prevent water damage when the primary pump is overwhelmed or offline.
Yes, a backup is highly recommended to cover power outages and extreme events.
How do I measure head height?
Head height is the vertical rise water must travel from the pit to discharge. Include piping losses and any uphill sections. This is key for selecting the right pump curve.
Head height is the vertical distance from the pit to the discharge exit, plus piping losses.
Can I size by basement area alone?
No. Area helps estimate potential inflow, but accurate sizing requires head, actual inflow rates, and local rainfall data.
Basement area clues you into inflow potential, but you still need head and actual inflow figures.
Should I hire a professional to size my sump pump?
If you’re unsure about head, discharge routing, or electrical safety, a licensed plumber or pump installer can ensure correct sizing and code compliance.
If you’re unsure about head, discharge, or electrical safety, a professional can help.
What about a dual-pump setup?
A dual-pump (primary plus battery or water backup) can provide redundancy during severe events, but it adds cost and complexity.
A backup plus primary pump gives redundancy, especially in flood-prone areas.
Watch Video
Top Takeaways
- Size is driven by head, flow, and margin.
- Read manufacturer curves to match your head and GPM.
- Backup power is essential for flood resilience.
- Check valve and discharge routing prevent backflow.
- Document measurements and test results for future maintenance.