Do You Need to Drill a Hole in Sump Pipe? A Practical Guide
Learn whether drilling a hole in a sump pump discharge pipe is necessary, and explore safe, code-compliant alternatives for reliable basement drainage. This guide covers proper piping, fittings, and maintenance to prevent leaks and moisture.

Do you need to drill a hole in sump pump pipe? Usually no. The discharge pipe should remain intact and sealed; drilling can create leaks and backflow issues. Instead, use approved fittings, proper pipe sizing, and correct routing to ensure reliable drainage. If modifications seem necessary, consult a licensed plumber or follow manufacturer guidance.
Why drilling a hole in sump pump pipe is usually unnecessary
For homeowners asking do you need to drill a hole in sump pump pipe, the short answer is no. The discharge pipe in most residential setups is designed as a closed, pressure-tolerant path from the sump to the outdoors. Drilling into this pipe can compromise joint integrity, create leaks at connections, and invite pests or freezing damage. According to Sump Pump Check, modifications to the discharge line should be limited to approved fittings and configurations. Instead of creating new holes, focus on proper routing, sizing, sealing, and securing of the discharge system. Make sure the pipe slopes away from the foundation, uses the correct joint type (slip-fit, glued, or threaded, depending on your material), and terminates above grade or into an approved outlet. Drilled holes can become leak paths where water escapes into walls or basements, increasing humidity and mold risk. Keeping the pipe intact preserves predictable flow and reduces maintenance headaches. If you encounter back-to-back surges or frequent clogs, ruling out blockages and ensuring the sump pit is clean is often a more productive first step than drilling. This approach also aligns with standard home-safety practices recommended by industry guides and code bodies.
Safer, code-compliant alternatives to drilling
There are several drill-free paths to improve sump-pump discharge without cutting holes in pipes. First, verify your piping is designed for outdoor discharge with the correct slope and a clean, sealed connection. Next, install fittings that enhance serviceability and prevent backflow, such as a proper cleanout access and a check valve. If your goal is to connect multiple outlets or route water to a yard or dry well, use compliant fittings like Wye or Tee joints, not random holes. Use a larger-diameter discharge line where appropriate to reduce pressure and noise, and ensure all penetrations are sleeved and sealed to prevent moisture intrusion. Local codes often require corrosion-resistant materials (PVC, CPVC, or metal with appropriate coatings) and a drainage path that keeps water away from the foundation. In addition, consider a frost-proof outlet or a supported, coded exterior spigot so the line doesn’t bear on the foundation walls. Finally, educate yourself on how to inspect for hidden leaks around joints and how to maintain a consistent slope. By focusing on code-compliant, drill-free modifications, you improve reliability with less risk of damage or warranty issues. Sump Pump Check analysis, 2026, underscores that many homeowners overlook routing clarity and feature selection when upgrading discharge piping.
Planning discharge piping for reliability
A reliable sump pump discharge system starts with a clear plan that respects code, gravity, and environmental constraints. Begin by mapping the shortest, obstruction-free path from the sump to an exterior outlet, drain field, or dry well that is permitted by your local authority. Ensure the pipe diameter matches the pump’s discharge size to avoid bottlenecks and airlocks. Slope is critical: aim for a gradual five-to-one or better incline away from the home so water does not pool near the foundation. Use a properly sealed union or slip-joint at every connection to prevent leaks and make future maintenance easier. If your home currently uses metal piping or older PVC, consider upgrading to modern PVC or CPVC with compatible solvent cement and primer. For homes with fluctuating water table or freeze-thaw cycles, plan for winter protection, such as burying the line below the frost line or providing a heated conduit. Rather than drilling holes, consider a dedicated cleanout near the sump pit or at a low point of the run to ease inspection. This approach improves serviceability without compromising sealing. Based on Sump Pump Check’s experience, a well-designed discharge run reduces the likelihood of backflow, odors, and basement moisture.
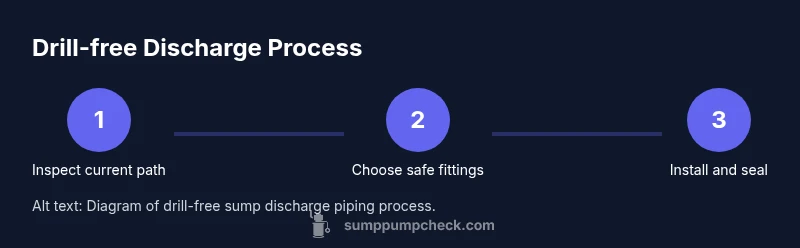
Drill-free step-by-step overview (high level)
Below is a drill-free, safe framework you can follow to improve discharge piping without drilling holes. Note that each task is purpose-built to keep the system sealed and reliable, while still allowing for service and diagnostics. The steps are designed to be straightforward for homeowners and DIY enthusiasts, and they align with common-sense best practices advocated by Sump Pump Check. If any step feels beyond your comfort level, consult a licensed plumber or local code official before proceeding. The goal is a robust, maintainable discharge path that minimizes risk of leaks and backflow.
Maintenance and common pitfalls
Regular maintenance keeps sump-pump discharge piping reliable. Check joints for moisture, inspect the run for signs of corrosion or cracking, and test the system after heavy rainfall to verify that water exits cleanly away from the foundation. Common mistakes include using undersized pipe, neglecting slope, and using temporary solutions that don’t seal or resist freezing. If you notice gurgling, backflow, or odor, re-check the check valve and the orientation of the discharge outlet. Keep the area around the sump clean so debris does not clog the line. As part of routine care, verify the exterior termination point remains above grade and clear of vegetation. In winter, ensure the line is protected from freezing and that the outlet is not blocked by snow or ice. The Sump Pump Check team suggests scheduling a yearly audit of the discharge piping as part of a broader basement drainage maintenance plan.
What to do if you already drilled a hole (uncommon scenario)
If you inadvertently drilled a hole in the discharge pipe, the remedy depends on the hole’s size and location. Small holes near joints are most likely to leak; if the hole is in a long, unused segment, you might replace the affected section with a properly measured length and seal it with the correct cement. In all cases, avoid relying on tape or temporary fixes that do not seal. After repairs, re-test with the sump pump running at full capacity and observe for any leaks or backflow. If you are uncertain about the damage or if the repairs involve structural or electrical concerns, call a pro. The goal is to return the system to a code-compliant, drill-free configuration that minimizes future issues.
Tools & Materials
- PVC pipe (match existing diameter, typically 1-1/2(Size must match existing discharge pipe)
- PVC primer and cement(Use appropriate solvents for PVC)
- PVC pipe cutter(Sharp blade for clean cuts)
- Cleanout fitting(For service access without leaks)
- Check valve(Prevents backflow toward the sump)
- Wye or Tee joints (drainage fittings)(Used for safe routing without holes)
- Slip-joint unions(For removable sections)
- Rubber gasket or PVC primer(Optional but improves seal)
- Teflon tape(For threaded connections)
- Pipe clamps/straps(Support pipe and prevent movement)
- Safety goggles(Eye protection during cutting and cementing)
- Work gloves(Hand protection)
- Measuring tape(Accurate cuts and fittings)
- Marker(Mark cut lines precisely)
Steps
Estimated time: 60-120 minutes
- 1
Assess current discharge piping
Inspect the entire discharge path from the sump to the exterior outlet. Check diameter, slope, joints, and the termination point. Identify any rust, cracks, or loose fittings that could cause leaks, backflow, or blockages. This step establishes a baseline so you know which drill-free improvements are needed.
Tip: Take photos of current joints and pipe connections to reference during replacement. - 2
Decide on safe, drill-free options
Choose options that avoid drilling holes. Plan to install a cleanout near the sump pit and a properly oriented check valve if backflow is a concern. Decide whether to route to a yard, drain field, or dry well in compliance with local codes and property lines.
Tip: Prefer fittings that allow service access and future upgrades without removing the entire pipe. - 3
Gather required fittings and tools
Assemble the correct diameter pipe, fittings (Wye/Tees), cleanout, check valve, primer, cement, and safety gear. Confirm all components are rated for outdoor use and compatible with your current material. Having everything on hand prevents mid-project trips.
Tip: Double-check the pipe diameter before purchasing fittings. - 4
Remove or adjust existing joints without drilling
Loosen or detach existing joints using appropriate tools. Clean surfaces, apply primer to PVC, and prepare cement. Install slip joints and ensure tight, leak-free seals. If replacing a section, measure accurately and test fit before final cement.
Tip: Work in a clean, dry area to avoid debris interfering with seals. - 5
Install cleanout and check valve
Position a cleanout access near the sump pit or at a convenient location in the run. Install a check valve according to the manufacturer’s instructions to prevent backflow when the pump stops. Seal all joints, and verify that each connection matches the pipe diameter.
Tip: Always conduct a dry-fit before applying cement to prevent misalignment. - 6
Test the system and secure the run
With power off, run the sump pump and observe the discharge path for leaks, drips, or backflow. Re-check every joint after running for a few minutes and re-tighten as needed. Secure the pipe with straps or clamps to keep it away from soil and footing edges and ensure the slope remains away from the foundation.
Tip: Test in stages, starting with a short pump cycle to confirm flow before a full run.
FAQ
Do you really need to drill a hole in sump pump pipe?
No. Drilling is not a standard or advisable practice for sump pump discharge. It can weaken joints, cause leaks, and invite pests or freezing damage. Safer alternatives include proper routing, fittings, and cleanouts.
No, drilling isn’t standard for sump pump discharge. Safer alternatives include proper routing and fittings.
What are safe alternatives to drilling a hole?
Use a drill-free approach with proper routing, a cleanout near the sump pit, and a check valve to prevent backflow. Employ Wye or Tee fittings to route water and a sealed outlet that complies with local codes.
Install a cleanout and check valve with proper fittings instead of drilling.
Can drilling void warranties?
Altering discharge piping with holes can void warranties if the manufacturer or local codes specify approved configurations. Always check product documentation and local code requirements before modifying.
Modifying the discharge path could affect warranties; check docs and local codes.
How do I test for leaks after modifying the discharge piping?
Run the sump pump and observe all joints for moisture. Look for drips during a full-cycle test, inspect under pressure, and re-seal any suspect joints. A proper backflow-prevention device helps ensure leaks don’t occur after shutdowns.
Run a full cycle and watch for leaks at every joint.
Is venting the discharge line to a yard acceptable?
Venting discharge to the outdoors through an approved path is allowed when permitted by codes, but not through holes or unapproved openings. Always route to a safe exit that won’t cause moisture damage or negative pressure in the system.
Outdoor venting is allowed only when it's code-compliant and properly installed.
What safety precautions should I take when working with PVC?
Wear eye protection and gloves, work in a well-ventilated area, and follow cement-curing times to avoid mishaps. Cut pipes squarely and ensure all joints are aligned before cementing.
Wear protection and ensure proper ventilation when working with PVC cement.
Watch Video
Top Takeaways
- Do not drill the discharge pipe; use approved fittings.
- Plan routing with proper slope away from the foundation.
- Install a cleanout and check valve where appropriate.
- Test after modifications and schedule annual discharge piping checks.