Sump Pump Leaking Oil: Troubleshooting Guide
Learn how to diagnose and fix a sump pump leaking oil with an urgent, step-by-step guide. Safe, practical tips to prevent basement damage and protect your home.

Oil leaks from a sump pump usually mean the motor seal or housing is failing. The quickest fix is to unplug the unit, wipe away the oil, and inspect for visible cracks or wet seals. If you confirm a leak, replace the oil seal or the pump housing; otherwise, turn the pump off and contact a qualified professional to avoid electrical hazards.
Symptoms and Safety Precautions
Oil on the floor near your sump pit is not normal. If you notice a greasy sheen around the unit or the discharge area, you may be seeing a sump pump leaking oil rather than water. This is a red flag that the motor seal or housing may be failing, and continued operation could pose electrical hazards or basement flooding. According to Sump Pump Check, oil leaks often point to a compromised seal or cracked housing, and addressing it promptly reduces risk. Before you do anything, unplug the pump and keep children and pets away from the area. Wear gloves to avoid skin contact and clean up any visible oil with absorbent rags. Do not attempt to start the pump again until you identify the source of the leak; power on can intensify damage and create a fire hazard.
Why a Sump Pump Leaks Oil
Seeing oil around a sump pump is not normal and should be treated as an urgent warning. In most models, the lubricant is sealed inside the motor, so external oil usually means a seal failure, a cracked housing, or gasket deterioration. The most common culprits are the oil seal on the motor shaft, a failing gasket, or damage from overheating in a humid basement. As seals wear, they allow oil to seep past and collect at the base or along the discharge line. Sump Pump Check analysis shows that diagnosing the exact source quickly reduces the risk of electrical short and water damage. Inspecting the area for fresh oil versus a neutral, stale odor can help distinguish a leak from residual lubricant left during manufacturing or a prior repair. Early detection makes a DIY seal replacement feasible, but larger cracks or a damaged motor often require a full pump replacement.
Immediate Checks You Can Do
Start with the basics: look for a puddle or sheen around the sump pit, and verify whether the fluid has a greasy texture or a typical water-like appearance. Check the exterior seals and the motor housing for signs of cracks, corrosion, or loose bolts. Confirm the discharge line isn’t blocked or misdirected, which can create backpressure that forces lubricant toward the housing. If you smell a petroleum-like odor or see a distinct oily film, document the area and avoid running the unit until you identify the source. Remember, oil is flammable near electrical components, so keep a safe distance from any ignition sources and always wear gloves when handling oily surfaces.
Diagnostic Flow Overview
A systematic approach helps pinpoint whether the issue is a seal, housing, or motor problem. Start with a visual inspection, then test pump operation at a low level to observe where any oil traces originate. If oil appears only when the unit runs, the seal or gland is likely failing. If oil is present when the pump is idle, external contamination or prior spills could be the cause. This section sets up a practical, step-by-step flow so you can decide between seal replacement and full pump replacement without unnecessary delays.
Safety and When to Hire a Professional
Electrical safety is paramount. If you see oil around the motor or wiring, do not attempt to power the unit. Oil contact with exposed electrical components can cause short circuits or electric shocks. If you cannot locate a clear source or the pump has visible damage, consult a licensed plumber or electrical technician. For older units, a professional assessment can prevent cascading failures and ensure your sump pit remains water-tight.
Prevention and Maintenance to Stop Oil Leaks
Regular maintenance reduces the risk of future leaks. Schedule seasonal inspections, clean the pit area, replace aged gaskets, and check for corrosion on the housing. Keep the area dry and well-ventilated, and replace the pump if the motor shows signs of overheating or loud operation. For long-term resilience, consider pairing the sump pump with a backup system and install a check valve to minimize backflow and pressure on seals.
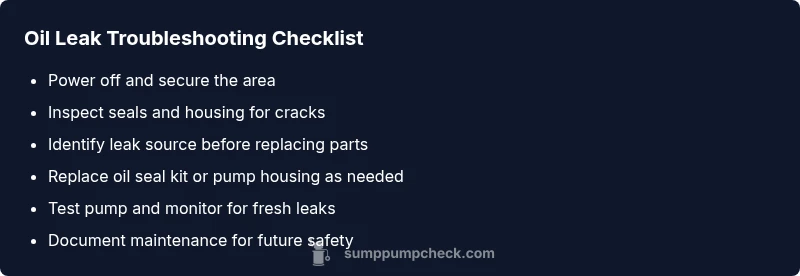
Steps
Estimated time: 60-90 minutes
- 1
Power down and secure area
Unplug the sump pump at the outlet and switch off the circuit if needed. Clear the area and place a dry tray or towels to catch any drips. Wear protective gloves and eye protection when handling oily components.
Tip: Use a non-slip mat to keep you steady on wet surfaces. - 2
Inspect exterior for damage
Visually inspect the motor housing, seals, bolted joints, and any visible cracks. Note where oil traces begin and whether they run down toward the pit or away from the unit. Do not force components apart; note looseness rather than prying.
Tip: Take photos from multiple angles to track changes over time. - 3
Verify the source of the leak
Wipe the area clean and run the pump for a short test if safe. Observe where oil is appearing first and whether it coincides with motor rotation or only sits when idle. Differentiate oil from any prior spills or residual lubricant.
Tip: Do not run if you see strong electrical odors or smoke. - 4
Decide on the repair path
If the source is a replaceable oil seal, install the kit following manufacturer instructions. For cracks or severe damage, plan for housing replacement or a new unit. If in doubt, escalate to a professional.
Tip: Keep replacement parts compatible with your model and hoist safety equipment if needed. - 5
Test after repair
Reconnect power and run the pump with a clean, dry area. Observe for any new oil traces and verify water is pumped away correctly. Re-torque fasteners if leaks appear at joints.
Tip: Allow the unit to reach normal operating temperature and recheck after 24 hours. - 6
Document and maintain
Record the work performed, parts replaced, and inspection results. Create a maintenance schedule to repeat checks every 6-12 months and after major weather events.
Tip: Keep spare seals and a common gasket set on hand for quick future fixes.
Diagnosis: Oil observed around sump pump base or discharge area
Possible Causes
- highFaulty motor shaft oil seal
- mediumCracked pump housing or gasket failure
- lowOld or degraded lubricant leaking from a damaged canister
- lowExternal contamination mistaken for internal leak
Fixes
- easyPower off the unit and perform a visual inspection for cracks and seal wear
- mediumReplace the oil seal kit or gasket depending on the model
- hardReplace the entire pump housing or unit if the housing is cracked
- mediumConsult a licensed professional for motor or major component replacement
FAQ
Why is my sump pump leaking oil?
A sump pump leaking oil usually points to a failed motor seal or cracked housing. It’s not a normal condition and requires inspection before continuing use.
Oil leaks from a sump pump are typically due to a failed seal or cracked housing. Check safety first and seek repairs.
Is it safe to run a sump pump if it's leaking oil?
No. Running a leaking sump pump can cause electrical hazards and potential basement flooding. Turn it off and investigate or call a professional.
Don’t run it—oil leaks mean possible electrical risk and damage. Get it inspected quickly.
How can I tell oil from water in the sump pit?
Oil feels slick and may have a distinct odor or color. Water is clear and watery. If unsure, stop using the pump and wipe a small area to compare.
Oil feels slick and smells different from water. If in doubt, stop and inspect.
Should I replace the pump or just the seal?
If the pump is old or the seal is badly damaged, replacing the entire unit is often more economical and reliable. For minor seal wear, a kit might suffice.
Often seal replacement is possible, but a failing pump may need replacement.
How long does a typical fix take?
A simple seal replacement can take about 1-2 hours; a full pump replacement may require several hours and professional installation.
Most DIY seal fixes take 1-2 hours; full pump replacement may need professional timing.
When should I call a professional?
If there’s extensive damage, uncertain source, or you’re uncomfortable with electrical work, hire a licensed plumber or electrician for safety.
Call a pro if the leak is large, source unclear, or electrical work is involved.
Can a sump pump leak oil indicate motor failure?
Yes, persistent oil leaks can indicate motor seal failure or internal damage that may lead to motor burnout if ignored.
Oil leaks can mean motor seal failure, which risks motor burnout if not addressed.
Watch Video
Top Takeaways
- Unplug and secure area before inspection.
- Identify oil source before choosing a fix.
- Seal replacement is easier on newer models; otherwise replace the pump.
- Maintain regular checks to prevent future leaks.