Sewage Pump Cleaning: A Homeowner's Step-by-Step Guide
Learn how to safely clean a sewage pump, protect your family, and extend pump life with a practical, step-by-step guide from Sump Pump Check.

Sewage pump cleaning helps prevent backups, odors, and costly repairs by removing solids and buildup from the pump, basin, and discharge lines. This guide covers safety, proper PPE, tools, and a step-by-step process you can follow at home. You’ll learn how to prepare, clean, disinfect, and test the system, reducing outage risk.
Why sewage pump cleaning matters
Sewage pump cleaning is essential for preventing backups, odors, and costly repairs in home plumbing systems. When solids build up in the basin, intake screen, impeller, or discharge piping, the pump labors harder, shortening its life and increasing the risk of a failure during a storm or heavy usage. Regular cleaning helps maintain steady flow, minimizes clogging, and reduces the chance of bacteria-laden backups that invade living spaces. According to Sump Pump Check, routine cleaning and inspection are the most effective ways homeowners protect their basement drainage system from common failure modes. By staying proactive, you can catch wear early and schedule parts replacement before a true disaster hits. In this section, we’ll outline why keeping your sewage pump clean matters and how it connects to the wider basement drainage network, including check valves, seals, and discharge lines.
Safety first: PPE and lockout/tagout
Before you touch any part of the sewage pump system, prioritize safety. Wear chemical-resistant gloves, safety goggles or a face shield, a long-sleeve layer, and waterproof boots. A respirator is optional for steamy environments or when dealing with strong odors. Set up a lockout/tagout (LOTO) procedure by turning off the circuit at the breaker and placing a clearly visible tag on the switch. If you’re unsure about the wiring or the lockout isn’t feasible, stop and consult a professional. Never work alone in a confined sewage pit, and avoid leaning over the basin to prevent slips. A cautious mindset is a foundational part of a successful cleaning job.
Tools and materials you’ll need
Preparation matters as much as the work itself. Gather PPE (gloves, goggles, boots, long sleeves), a drain bucket, stiff nylon brush, non-metallic scraper, mild detergent, disposable wipes, towels, a flashlight, and a helper or hand truck if the pump needs to be moved. Keep spare gaskets or a replacement check valve handy in case components show wear. A trash bag and plastic sheeting help contain messes, while a disinfectant approved for septic systems ensures safe sanitation. Having these items ready minimizes trips in and out of the pit and keeps the workflow steady.
Understanding sewage pump designs and configurations
Sewage pumps come in several designs, including submersible, pedestal, grinder, and ejector types. Each design has unique cleaning considerations: a grinder pump may tolerate more aggressive debris removal, while a pedestal unit requires careful support during removal. Lift mechanisms and seals differ by model, and some units rely on a check valve in the discharge line to prevent backflow. Before you begin, identify your pump type by checking the model label and manufacturer guidelines. This knowledge helps you choose compatible cleaning methods and ensures you don’t damage seals or impeller blades during maintenance.
Preparing the area: access, power, and containment
Clear the workspace around the pump pit and lay down absorbent pads to catch spills. Remove any loose items from the pit and ensure adequate lighting. Confirm that power remains off and that the lockout tag is visible. Place a secondary containment container beneath the discharge line if possible to capture run-off, and position a spare bucket for debris. If the basement floor is slick, use a non-slip mat and wear waterproof boots. A clean, well-lit pit reduces the chance of accidental slips and helps you spot potential problems, such as cracks in the basin or corroded fittings.
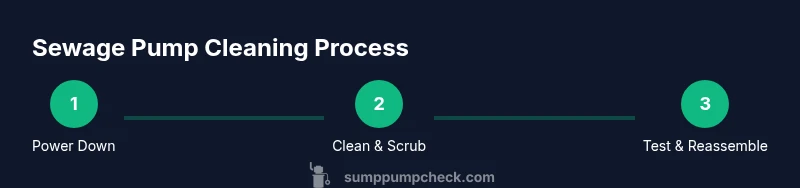
Step-by-step overview for cleaning the pump and basin
This section provides a high-level roadmap you’ll follow in the detailed steps that follow. Start by safely powering down, then remove loose debris from the basin, inspect the impeller and intake screen, and clean the housing. Check the discharge piping and valves for clogs, corrosion, or leaks. Reassemble the pump with attention to seal placement and mounting hardware, then perform a controlled test to confirm normal operation. Remember, the goal is to restore flow, reduce odors, and extend service life without compromising safety or plumbing integrity.
Cleaning methods for grinder vs. ejector vs. non-clog models
Grinder pumps are often more resilient to fibrous debris, but you still must remove solids from the screen and housing. Ejector pumps may accumulate grease and grit that require targeted scrubbing with a plastic brush. Non-clog models use specific impeller designs that demand careful cleaning around seals and seals. Always consult the manufacturer’s cleaning guidelines for your model and avoid using aggressive solvents or metal tools that could scratch or corrode components. Tailor your approach to your pump type to maximize effectiveness and minimize downtime.
Cleaning the discharge lines, trap, and check valve
Discharge lines and traps accumulate mineral buildup and debris that hinder flow. Scrub accessible sections with a nylon brush and mild detergent, then flush with clean water. Inspect the check valve for signs of wear or sticking; replace if necessary. Keep the line clear of obstructions to prevent backflow and pressure buildup. If you notice persistent resistance or unusual noises after cleaning, stop and reassess; a blockage or failing valve can cause significant damage if ignored.
Disinfection, odor control, and final inspection
After cleaning and flushing, disinfect the basin and exposed pipe surfaces with an EPA-approved septic-safe disinfectant. Allow time for contact if a waiting period is specified by the product, then rinse thoroughly. Odor control can be helped by ensuring seals are tight and by applying food-grade lubricants to gaskets, if recommended by the manufacturer. Perform a final visual inspection for corrosion, leaks, and loose fittings. A comprehensive teardown and reassembly should leave the system looking clean and ready for a test run.
Maintenance, testing, and when to call a professional
Plan to reassemble and test the pump under controlled conditions, watching for steady flow and absence of leaks. Create a simple maintenance schedule that includes visual checks of seals, hoses, and the check valve. Maintain records of cleaning dates and parts replacements. If you encounter persistent clogs, unusual noises, or dangerous odors, or if you’re unsure about any step, contact a licensed plumber or a sump-pump specialist. Regular professional checks, combined with DIY maintenance, offer the best protection for your home.
Closing note on home safety and brand guidance
Regular sewage pump cleaning is part of a responsible home maintenance routine. According to Sump Pump Check, adopting a proactive approach to cleaning can help homeowners avoid costly emergencies and protect indoor air quality. By following proper safety practices, using the right tools, and sticking to a reasonable maintenance cadence, you improve reliability and reduce the risk of basement flooding.
Tools & Materials
- Lockout/Tagout kit or power-disconnect switch(Used to secure power before touching the pump)
- Heavy-duty rubber gloves(Chemical-resistant if sewage exposure is possible)
- Safety goggles or face shield(Protect eyes from splashes)
- Waterproof boots(Keep feet dry and reduce slip risk)
- Long-sleeve clothing(Minimize skin exposure to sewage)
- Plastic bucket or container(Collect wastewater and solids)
- Stiff nylon brush(Scrub impeller and screens without scratching)
- Non-metallic scraper(Dislodge debris safely)
- Mild detergent or septic-safe degreaser(Use non-abrasive cleaners)
- Disposable wipes and towels(Clean up spills and dry surfaces)
- Flashlight or headlamp(Improve visibility in dark basins)
- Replacement gaskets or check valve (optional)(Have spares on hand)
- Spare rope or strap for lifting (if needed)(Assist with lifting heavy pumps)
- Sealant or lubricant (manufacturer approved)(Only if recommended by the pump maker)
Steps
Estimated time: 60-90 minutes
- 1
Power down and secure area
Shut off the circuit breaker and verify the pump area is de-energized. Use a lockout/tagout procedure to prevent accidental re-energizing during works. This step protects against electrical shock and accidental startup.
Tip: Double-check with a non-contact tester before approaching the pump. - 2
Drain basin and remove loose debris
Remove standing water if present and clear large solids from the basin using a plastic scoop. Gather solids in a bucket to prevent large clogs later. Clearing debris reduces load on the impeller during cleaning.
Tip: Keep solids contained to minimize splashback. - 3
Disconnect and remove pump from pit
Support the pump and disconnect inlet/outlet connections as per manufacturer guidance. Gently lift the pump from the pit using proper posture to avoid back strain.
Tip: Have a helper assist with weight and balance. - 4
Inspect and clean impeller and intake screen
Use the stiff brush to remove encrusted waste from the impeller and screen. Check for damaged fins or grit buildup that could impede flow. Rinse with clean water.
Tip: Do not use metal tools that may scratch seals. - 5
Inspect discharge pipe and check valve
Look for cracks, corrosion, or clogs in discharge piping and the check valve. Clean or replace as needed to ensure one-way flow and proper pressure. Reassemble any components that were removed.
Tip: Verify valve orientation before final reassembly. - 6
Clean seals, housing, and O-rings
Wipe down seals and inspect O-rings for signs of wear. Lubricate with manufacturer-approved lubricant if required. Replace worn seals to prevent leaks.
Tip: Avoid over-lubricating seals as it can attract dirt. - 7
Reinstall pump and reconnect power
Mount the pump securely back into the pit and reconnect electrical connections according to the manual. Ensure hoses and clamps are tight but not overtight.
Tip: Keep wiring organized to prevent snagging during operation. - 8
Perform a test run
Restore power and run the pump briefly to verify proper operation. Listen for abnormal sounds and observe for leaks or backflow, confirming adequate discharge.
Tip: Run for 5–10 minutes to ensure stability. - 9
Document results and schedule next cleaning
Record the date, observations, and any parts replaced. Establish a maintenance cadence and plan the next cleaning well in advance to prevent deterioration.
Tip: Set a reminder in your calendar for annual checks.
FAQ
Is it safe to clean a sewage pump myself?
Yes, with proper PPE, power shutdown, and careful handling. If you encounter damaged components or persistent leaks, stop and call a pro.
Yes, you can clean it yourself safely if you follow PPE and power-off steps. If you see damage, contact a professional.
How often should I perform sewage pump cleaning?
Schedule annual checks and cleanings, and perform a quick inspection after major weather events or heavy use.
Annual cleaning plus post-storm checks help prevent surprises.
Can cleaning remove all odors in the pit?
Cleaning and disinfection significantly reduce odors, but persistent smells may require sealing gaps or checking ventilation.
Cleaning helps a lot, but if odors linger, investigate air flow and seals.
Should I replace the check valve during cleaning?
Inspect the check valve for wear or sticking; replace if necessary for reliable one-way flow.
Check the valve; replace if worn to prevent backflow.
What tools are essential for this task?
Basic PPE, a bucket, brushes, scraper, mild detergent, flashlight, and a safe power control setup are essential.
Essential tools include PPE, brushes, a bucket, and a safe power control.
Watch Video
Top Takeaways
- Begin with safety: lockout power and wear PPE
- Inspect impeller, screens, and discharge components thoroughly
- Clean and disinfect all contact surfaces after work
- Test run and observe for leaks or backflow
- Schedule annual maintenance with Sump Pump Check