Radon Seal Sump Pump: Seal & Maintain Basements Effectively
Learn how to radon-seal your sump pump to reduce basement radon entry. This 1800-word how-to guide covers materials, safety, step-by-step sealing, testing, and maintenance for homeowners.

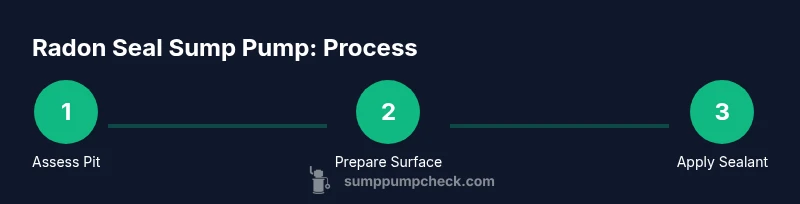
Goal: seal your sump pit to minimize radon entry. You will need dedicated radon-sealing material, basic tools, PPE, and good ventilation. This quick guide covers exterior pit sealing, lid perimeter sealing, and post-seal radon testing to verify effectiveness and keep your basement safer. This is a practical radon seal sump pump approach that homeowners use.
What is radon and why seal a sump pump?
Radon is an odorless, radioactive gas that can accumulate in basements and lower living spaces. In homes with sump pits, soil gas can migrate through concrete joints, gaps around the sump lid, and drain pipes. A targeted radon seal sump pump strategy helps block these pathways by sealing exterior pit walls, penetrations, and the lid. According to Sump Pump Check, proactive sealing reduces the likelihood of radon migrating from a soggy sump area into living spaces. By combining a robust seal with proper routine maintenance, homeowners can lower long-term radon exposure while preserving sump pump function. The goal is to create a durable barrier that doesn’t impede water removal or airflow essential for venting.
Key concepts to understand include surface preparation, selecting a radon-rated sealant, and allowing adequate cure times before re-testing. While sealing is not a substitute for a formal radon mitigation system in high-radon regions, it is a practical step for many homes seeking incremental risk reduction. Radon-sealing your sump pump is a conservative, low-cost measure with real potential to improve indoor air quality when performed correctly.
How sealing a sump pit helps with radon mitigation
Sealing an exterior sump pit disrupts the primary entry routes for radon gas: cracks in concrete, gaps around pipes, and the lid perimeter. A well-executed radon seal sump pit reduces soil gas infiltration and can complement a professional radon mitigation system. The effectiveness depends on surface prep, material choice, and curing conditions. Post-sealing testing is essential to verify that the barrier holds under seasonal changes and pressure fluctuations in the home. Remember that sealing is part of an overall strategy for basement air quality and should be considered alongside proper drainage, venting, and moisture control. The seal should be compatible with damp environments and not interfere with the sump’s operation or access for service.
Materials and safety considerations
Choosing the right sealant is critical. Use a radon-rated sealant suitable for concrete and masonry, plus backer materials for gaps. PPE is essential: gloves, eye protection, and a mask to avoid inhaling fumes during application. Ensure the workspace is well-ventilated and free of standing water. Before you start, unplug the sump pump and disconnect any power sources to prevent accidental activation. Clear the area around the pit, remove debris, and set up clean-up materials. Safety data sheets (SDS) for the sealant will detail curing times, ventilation needs, and any hazards. In some cases, you may need to address cracks or joints with appropriate fillers before sealing to maximize durability and minimize radon entry. The aim is to create a continuous, airtight barrier that remains flexible enough to withstand temperature changes and minor ground movement.
Maintaining a radon-sealed sump pit and planning for ongoing testing
After sealing, monitor the sump area for leaks or cracks and re-check the area after heavy rains or freeze-thaw cycles. Documentation of products used, cure times, and test dates helps with future maintenance and potential resale disclosure. Regular radon testing—especially after home renovations or HVAC changes—ensures the barrier remains effective. If you detect elevated radon levels, or if the pit configuration is complex (multiple penetrations or unusual slab geometry), consult a radon mitigation professional for evaluation and possible upgrades to your system. A sealed sump pit is a proactive measure but not a guaranteed shield against all radon sources in every home.
Tools & Materials
- Radon-sealing compound (urethane- or epoxy-based)(Choose a product labeled for radon mitigation; ensure compatibility with concrete)
- Concrete crack filler or backer rod(For visible gaps between pit wall and floor)
- Caulk gun(For applying sealant around edges)
- Putty knife(Smooths sealant and removes excess)
- Utility knife(Trim backer material and excess sealant)
- Silicone sealant (clear or compatible color)(Seal around pipes and lid perimeter)
- Gloves, eye protection, and mask(Personal protective equipment)
- Rags and bucket(Cleanup and spill control)
- Shop vac or wet/dry vac(Optional for removing water before sealing)
Steps
Estimated time: 2-4 hours plus 24-72 hours curing time
- 1
Power off and drain the pit
Unplug the sump pump from its power source and switch off any circuit breaker supplying it. If the pit has standing water, drain to a safe area or use a pump to remove it. Why: prevents accidental activation and keeps the work area safe and dry for sealing.
Tip: Double-check the breaker before touching any wiring. - 2
Dry the surface and remove debris
Wipe down the exterior of the pit and lid. Remove dirt, dust, and loose material from joints. Why: a clean, dry surface ensures better adhesion of the sealant.
Tip: Use a stiff brush to dislodge stubborn residue. - 3
Seal around pipe penetrations
Apply a bead of radon-rated sealant around any pipes entering the pit where gaps exist. Why: pipe penetrations are common radon entry routes.
Tip: Fill gaps slightly larger than a pencil with sealant and tool smooth. - 4
Backfill and seal joints
If there are visible cracks along the pit wall, apply backer rod or filler material, then seal over with the radon sealant. Why: closes cracks that could allow gas migration.
Tip: Don’t overfill; allow sealant to cure at recommended thickness. - 5
Seal the pit exterior with the sealant
Apply the primary sealant to the exterior walls of the sump pit, covering all joints and the base where feasible. Why: creates an airtight barrier that reduces radon transfer.
Tip: Work in sections to ensure even coverage. - 6
Seal the sump lid and perimeter
Treat the lid edges and any gaps around the rim with silicone sealant. Why: the lid is a common pathway for gas migration.
Tip: Ensure the lid can still be removed for future maintenance. - 7
Check for leaks and wipe excess
Inspect the sealed areas for signs of leakage or gap persistence, wipe away excess sealant that could interfere with operation.
Tip: Use a flashlight to spot tiny gaps you might miss. - 8
Allow cure time and prepare for testing
Allow sealant to cure per product label, typically 24-72 hours in dry conditions. Why: proper curing maximizes adhesion and durability.
Tip: Keep pets and children away during cure time. - 9
Reconnect power and test radon levels
Reconnect the power, run the sump pump briefly, and schedule a radon test after cure time to verify effectiveness. Why: real-world results confirm improvement.
Tip: Document test results and note any adjustments needed.
FAQ
What is radon sealing for a sump pump and why is it important?
Radon sealing involves applying a barrier around the sump pit to reduce radon gas entry into the home. It is important for improving indoor air quality and complements other radon mitigation efforts.
Radon sealing helps keep basement air safer by reducing gas entry around the sump pit. It’s a helpful step in improving indoor air quality.
Can every sump pit be radon-sealed?
Most sump pits can be sealed externally, but some configurations may require professional assessment or system redesign for best results.
Most pits can be sealed, but some setups may need professional evaluation.
Does sealing affect sump pump operation?
When done correctly, exterior sealing should not affect pump function. Ensure vents and drainage paths remain clear and accessible for service.
If done right, sealing won't interfere with the pump. Just keep vents clear and accessible.
Is radon testing recommended after sealing?
Yes. Retest radon levels after sealing and curing to confirm the reduction and determine if further action is needed.
Yes—retake the radon test after sealing to verify improvements.
How long does sealant take to cure?
Cure times vary by product and conditions; follow the label, typically 24-72 hours.
Most sealants cure in about one to three days, depending on conditions.
What safety precautions should I take?
Turn off power, wear PPE, and ensure good ventilation. Avoid inhaling fumes and keep the area dry during application.
Turn off power, wear PPE, and work in a ventilated area.
Watch Video
Top Takeaways
- Seal exterior sump walls and lid to reduce radon entry.
- Choose radon-rated sealants and allow complete curing.
- Test radon after sealing to verify effectiveness.
- If in doubt, seek professional evaluation for complex pits.