How to Remove a Sump Pump Cover: Step-by-Step Guide
Learn how to safely remove a sump pump cover for inspection and maintenance. This comprehensive guide covers safety, tools, steps, tips, and troubleshooting to keep your system running smoothly.

Safely remove a sump pump cover to inspect, clean, and maintain your system. Before starting, unplug the unit and shut off power to the circuit, then gather essential tools. This process protects the float switch and impeller from damage and debris, and it minimizes the risk of water exposure. Follow these steps to remove and reseat the cover correctly.
Why removing the sump pump cover safely is essential
According to Sump Pump Check, knowing how to remove the sump pump cover safely is a foundational skill for homeowners who want to inspect, clean, and maintain their sump systems without creating a bigger problem. The cover protects the interior components—especially the float switch and impeller—from debris, but it can only safeguard those parts if it is removed and reinstalled correctly. A rushed lift or a stubborn latch can dislodge the cover, bend hoses, or even tug on power connections. In this section, we’ll discuss why a controlled, careful removal is essential and how it fits into a broader maintenance plan. When you approach the job calmly, you reduce the risk of injury, spills, and damage to the discharge line. You’ll also set yourself up to identify clogs, worn gaskets, or misaligned float switches before they cause a failure. The goal is to create a safe, clean access point that you can reuse after every inspection.
Safety prerequisites and planning
Before you touch the sump pit, plan the work to minimize risk. Unplug the sump pump from its power source and turn off the circuit breaker if possible. If there is standing water, use a bucket or towel to manage drips and keep the work area dry. Wear non-slip footwear, gloves, and eye protection to guard against splashes or sharp edges. Have a helper if the pit is crowded or the cover is heavy. Clearly label the area to avoid accidental re-energizing, and keep pets or children out of reach. The more you prepare, the less likely you are to rush and injure yourself or disturb the pump’s wiring. It’s a good idea to review the manufacturer’s instructions for your model and check that the discharge hose is not kinked.
Understanding cover types and hazards
Sump pump covers come in several styles, including snap-on lids, screw-fastened panels, and hinged or clamp-style assemblies. Each type requires a different approach to removal, and some covers may conceal screws or rapid-release latches. The biggest hazards when removing a cover include abrupt movement that can loosen hoses, strain the float switch, or pull on exposed wires. If you have a metal cover, be mindful of sharp edges; a plastic cover can crack if pried too hard. By recognizing your cover type, you can choose the correct tool and technique, reducing the chance of damage or personal injury. If you’re unsure, consult the user manual or contact a professional. The goal is to access the interior without disturbing critical components.
What you will find under the cover and why it matters
Under the cover, you’ll typically find the sump pit liner, the float switch assembly, the discharge line, and various clamps or gaskets. Debris such as dirt, hair, or sediment can accumulate at the bottom, impeding water flow or triggering false alarms. Regular inspection helps you detect cracks in the pit liner, wear on the gasket seal, or corrosion on metal components. Keeping the interior clean reduces the burden on the pump and improves efficiency. If your model includes a check valve assembly, inspect its seat and clamp to ensure a tight fit. A sticky or jammed float switch can cause the pump to run oddly or fail to start when water rises.
Step-by-step overview (context before you dive into the hands-on steps)
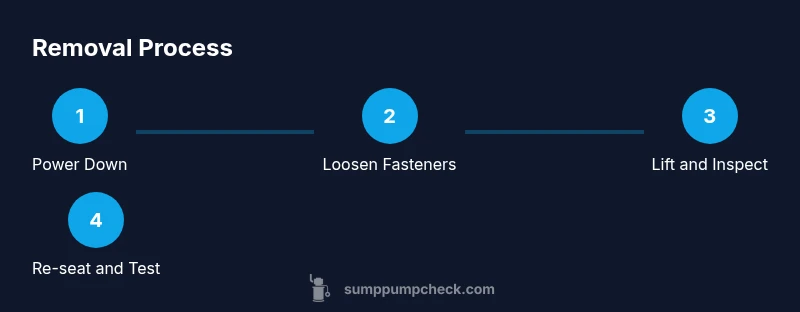
The removal process breaks down into preparation, disengagement, lifting, inspection, and reassembly. Start with power-off, then carefully release any fasteners or clamps holding the cover in place. Support the cover as you lift to avoid dropping it into the pit, and set it on a dry, stable surface while you inspect. After cleaning and testing, reseat the cover so that it sits evenly and seals against the pit rim. This overview helps you anticipate the sequence without getting bogged down in details during the actual procedure.
Common issues and troubleshooting during removal
If the cover won’t budge, check for hidden screws, stubborn clamps, or a valve hose that is pinched between the cover and the pit. If you notice a crack in the cover, or if the edge has warped, stop and replace the cover instead of forcing it back on. Screws that strip easily indicate over-tightening or older hardware—use a small amount of penetrating oil and a proper screwdriver. If you accidentally detach a float switch or wiring, label and photograph connections before reassembly so you can restore them correctly. Finally, if the pit is wetter than expected, dry the interior gradually to avoid slip hazards and water damage.
Replacing and reseating the cover after inspection
To reseat, align the cover with the pit rim and drop it gently into place. Reattach fasteners in a crisscross pattern to ensure even pressure and a uniform seal. If you loosened hoses or clamps, reposition them so they’re not kinked or stressed. Once the cover is secured, replace the discharge hose securely and run a brief test by powering the pump and watching for proper cycling. If you observe leaks or misalignment, shut off power and readjust until the seal is flush. Document any wear or replacement needs for future maintenance.
Maintenance tips after removing the cover
After you finish, take a moment to tidy the area and note any debris that requires routine cleaning. Schedule a quarterly inspection of the pit, including check of gasket seals, valve seats, and float switch function. Consider installing a simple 'removal reminder' in your home maintenance calendar to remind you to inspect the cover and interior every few months. If your area is prone to sediment buildup, you may want to add a small pre-filter or screen to reduce debris. Finally, observe whether your pump cycles smoothly and quietly; unusual noises can indicate misalignment or failing components that may require professional service.
When to call a professional
If you encounter a damaged cover, persistent leaks, or electrical concerns that you cannot safely address, don’t hesitate to contact a qualified plumber or sump-pump technician. A pro can test the float switch, inspect the seal and discharge conditions, and replace worn parts without risking your home’s electrical system. For models with critical safety features, a professional inspection can catch issues that DIY maintenance might miss. Sump Pump Check recommends annual professional checkups for older units or complex installations.
Tools & Materials
- Safety gloves(Nitrile or work gloves; grip and protect hands)
- Flashlight(Bright, preferably with extra batteries)
- Screwdrivers (Phillips and flathead)(Various sizes to match fasteners on your model)
- Pliers(For clamps and hoses)
- Bucket or tray(Catch drips; optional but helpful)
- Towel or rag(Dry surface and wipe spills easily)
- Voltage tester(Optional safety check for exposed wires)
- Step stool or stable platform(If the pit is deep or the top is hard to reach)
- Replacement cover hardware(Only if you’ve identified damaged screws or clamps)
Steps
Estimated time: 20-35 minutes
- 1
Power down and secure the area
Power off the sump pump at the outlet, then switch off the circuit breaker if accessible. Confirm the pump will not auto-start when the cover is removed. Move cords and hoses away from your workspace to prevent snagging.
Tip: Use a flashlight to verify no hidden wires; keep power off until you’re ready to re-energize. - 2
Disconnect and release the cover fasteners
Locate all screws, latches, or clamps holding the cover in place. Use the appropriate screwdriver or pliers to loosen and remove them without forcing. Support the edge of the cover as you free it so it does not drop into the pit.
Tip: Take a picture of any wiring or hose connections before loosening to aid reassembly. - 3
Gently lift and remove the cover
With the fasteners removed, lift the cover straight up using both hands, keeping it level to avoid dropping debris into the pit. If the cover sticks, work slowly and check for hidden fasteners you might have missed.
Tip: Keep the cover supported to prevent sudden drops that could damage components. - 4
Inspect and clean the interior
Place the cover on a dry surface and inspect the pit for debris, sediment, and wear on seals. Wipe down surfaces, remove obstructions, and note any components that look worn or corroded.
Tip: Do not use sharp tools near the float switch or wiring; be gentle with hoses and clamps. - 5
Re-seat the cover and reconnect components
Align the cover with the pit rim and lower it evenly. Reattach fasteners in a crisscross pattern to ensure an even seal. Reconnect hoses and clamps without kinked lines or strained fittings.
Tip: Ensure a uniform seal around the rim before proceeding to test. - 6
Test the pump and finalize maintenance
Power the unit back on and run a brief test cycle. Check for leaks, abnormal noises, and proper cycling. If anything seems off, shut off power and reassess the alignment or worn parts.
Tip: Document wear or replacement needs for future maintenance.
FAQ
Do I need to unplug the sump pump before removing the cover?
Yes. Always unplug the pump from its power source and switch off the circuit if accessible before attempting to remove the cover. This prevents electrical shock and accidental operation while you work.
Yes—unplug the pump and switch off the circuit to stay safe while you remove the cover.
Can I remove the cover if there is water in the pit?
If there is standing water, drain a small amount with a bucket or towel and dry the area before removing the cover. Don’t force the cover if it sits in water; address water first to avoid splashing.
Yes, but drain the water first to reduce slipping and protect components.
What should I do if screws are stripped or clamps are stubborn?
Apply a small amount of penetrating oil and use the correct screwdriver to avoid further stripping. If a fastener remains stuck, do not pry aggressively—this can damage the cover or pit. Consider replacing hardware or consulting a pro.
You can try penetrating oil and the right screwdriver; if it won’t budge, call a pro.
How do I know the cover is reseated properly?
The cover should sit flush with the pit rim with no gaps. Reattach all fasteners in a crisscross pattern to ensure even pressure and testing the seal by running a quick pump cycle.
Make sure the cover sits evenly with no gaps and run a quick test.
When should I replace the sump pump cover?
Replace the cover if it is cracked, warped, or no longer seats properly. Damaged covers can allow debris in or cause improper operation.
Replace a damaged cover to protect components and ensure a proper seal.
Watch Video
Top Takeaways
- Power off before handling the cover
- Inspect interior for debris and wear
- Reseat the cover evenly for a proper seal
- Test the pump after reassembly to confirm proper operation