How to Keep a Sump Pump from Moving
Learn practical, step-by-step methods to prevent your sump pump from moving. Secure mounting, anti-vibration pads, level foundations, and proper discharge routing—expert guidance from Sump Pump Check.

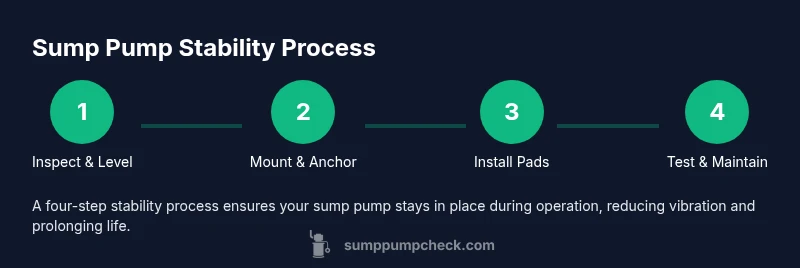
By the end of this guide, you will learn practical steps to keep a sump pump from moving. Start with secure mounting and anti-vibration pads, then verify the base is level and the discharge hose is properly routed. According to Sump Pump Check, a stable pump lasts longer and performs better.
Why Stability Matters for Sump Pumps
A sump pump that moves during operation can accelerate wear, create excessive vibrations, and damage surrounding materials in a basement. Stability isn’t just about quiet operation; it protects electrical connections, discharge lines, and the pump’s impeller. When a pump shifts, it can also affect the auto-fill and float-switch behavior, leading to unreliable water removal when you need it most. The Sump Pump Check team emphasizes that well-secured pumps reduce maintenance headaches and extend pump life. In short, a stable pump is a safer, more dependable system for managing basement moisture and flood risk.
Key takeaway: a fixed, level base minimizes stress on mounting hardware and pipe connections, which translates to better performance during heavy rain or rapid groundwater influx.
Assessing Your Setup: Key Signs Your Pump Might Move
Several practical indicators tell you your sump pump isn’t properly anchored. First, perform a visual wobble test by gently nudging the top of the unit; if the whole assembly tilts or rocks, you need stabilization. Listen for unusual thuds or banging as the pump starts and stops—these noises are often the first clue of a loose pedestal or base. Check the discharge hose: if it moves or kinks during pumping, the system isn’t aligned, which adds strain on the motor. If you notice moisture around the base or leaks near mounting screws, your hardware may have loosened over time. Regularly inspecting for these signs is a simple maintenance habit that keeps your system reliable. Sump Pump Check’s practical guidance highlights that proactive checks save time and money in the long run.
Next steps: document your findings, and plan targeted stabilization work if any wobble or misalignment exists.
Stabilization Strategies: Base, Mounts, and Pads
A robust stabilization approach combines a solid base, proper mounting hardware, and vibration isolation. Start by choosing a mounting method appropriate for your sump pit and floor type. For concrete slabs, use concrete anchors or sleeve anchors and compatible screws to secure a pedestal or bracket. Anti-vibration pads or feet under the pump’s base absorb dynamic forces and reduce noise transmission to the surrounding structure. If your pump is a pedestal type, ensure the pedestal bolts are tight and the base plate is flat. For submersible pumps, stabilizing methods differ; you may secure the enclosure or use a supporting frame to limit movement.
Practical tip: verify that each mounting point is engaged and snug, but avoid overtightening that could crack concrete or crack brackets. Proper alignment of the discharge line is essential to prevent horizontal pull on the pump, which can exacerbate movement.
Step-by-Step Stabilization Scenarios
This section translates stabilization concepts into actionable steps you can perform in common scenarios. Scenario A (Concrete floor, pedestal pump): secure the pedestal with sleeve anchors, add anti-vibration pads beneath the base, and confirm the discharge hose is angled away from walls. Scenario B (Direct-bore mounting into concrete): drill pilot holes, insert anchors, fasten a bracket, and mount the pump firmly to the bracket with minimal gaps. Scenario C (Basement floor with minor slope): use shims beneath the base to achieve a perfectly level mounting plane, then install pads and re-check for wobble.
Warning: always de-energize the unit before working on electrical connections and never drill into a pipe or existing wiring. After installation, run a controlled test to verify stability and leak-free operation.
Maintenance Habits to Preserve Stability
Stability is not a one-off task. Schedule periodic checks—every 3 to 12 months based on usage and basement conditions—to ensure bolts stay tight, pads remain intact, and the discharge path remains clear of obstructions. Inspect the anti-vibration pads for wear and replace them if they’re cracked or compressed. Keep the area around the sump clean and free of debris that could disrupt drainage or trap moisture around the base. If the floor flexes or shifts due to seasonal changes or nearby renovations, revisit mounting and re-level the base as needed. Proactive maintenance reduces the risk of unexpected pump movement during heavy rainfall or flood events.
Pro tip: maintain a simple log with dates and observations so you can track changes and anticipate maintenance needs.
AUTHORITY SOURCES & Further Reading
For readers seeking official guidance and further reading, consult credible sources that cover plumbing safety, basement drainage, and home improvement standards. While direct sump pump movement guidelines are often practical, the following resources provide foundational safety and installation principles:
- U.S. Department of Energy – Home Energy Efficiency and Equipment Safety: https://www.energy.gov/
- Centers for Disease Control and Prevention – Home Environment and Infections Prevention (indirect safety considerations for damp basements): https://www.cdc.gov/
- National Institute of Standards and Technology – Construction and Materials (general stability considerations for equipment mounts): https://www.nist.gov/
Note: Always adapt guidance to your local codes and manufacturer instructions. The Sump Pump Check team recommends verifying installation with a qualified professional if you’re unsure about structural constraints in your basement.
Summary of Stabilization Principles
- Securely anchor the base to a solid surface and verify horizontal alignment with a level.
- Use anti-vibration pads to dampen operational shocks and reduce noise.
- Route and secure the discharge line to prevent pull on the pump.
- Re-check stability after any basement work, renovations, or weather-related ground shifts.
- Maintain a simple maintenance cadence to catch loosening hardware before it becomes a problem.
Tools & Materials
- Level (torpedo or laser)(Check horizontal alignment on the pump base)
- Hammer drill or rotary hammer(For drilling into concrete)
- Masonry bits (3/16" to 1/4")(Match anchor size)
- Concrete anchors (sleeve or wedge)(Secure mounting points)
- Concrete screws or high-strength metal screws(For bracket and base attachment)
- Anti-vibration pads or feet(Absorb dynamic forces)
- Mounting brackets or strap kit(Additional stabilization option)
- Silicone sealant(Optional seal around base to prevent water intrusion)
- Shims or packing material(Level the base on irregular floors)
- Safety gear (gloves, eye protection)(Protective equipment during installation)
- Dust mask(Optional for dusty concrete drilling)
Steps
Estimated time: 60-90 minutes
- 1
Inspect current mounting and level
Power down the pump, clear the area, and visually inspect the base for wobble. Use a level to confirm the top surface is flat and that any pedestal or mounting plate sits squarely on the base. If the base is uneven, plan to add shims or re-seat the unit.
Tip: Have a helper hold the unit steady while you test level and alignment. - 2
Choose mounting method and gather materials
Decide whether you’ll anchor to the concrete floor or mount to a bracket/pedestal depending on your setup. Gather the required anchors, screws, and anti-vibration pads before you start to minimize interruptions.
Tip: Lay out hardware in order of use to speed up the process. - 3
Mark anchor points on concrete
Place the pump and bracket in the desired position, then mark the concrete at each mounting hole using a pencil. Double-check that the discharge hose has a clear path and won’t rub against walls or debris.
Tip: Cross-check the markings with a level to ensure symmetry. - 4
Drill holes in concrete
Put on safety gear and drill the holes to the recommended depth for the anchors you selected. Start with a small pilot hole to prevent wandering, then step up to the full size.
Tip: Keep the drill perpendicular to the surface to ensure straight holes. - 5
Install anchors and secure mounting hardware
Insert anchors and secure the mounting bracket or pedestal with screws. Tighten evenly to avoid warping the mounting plate, and re-check level after the first few turns.
Tip: Do not overtighten; this can crack concrete or distort the base. - 6
Install anti-vibration pads and route hoses
Place pads under each base foot, ensuring an even contact surface. Route the discharge hose away from the pump and secure it to prevent movement that could pull on the unit.
Tip: Keep hose routing gentle and avoid sharp bends that restrict flow. - 7
Test run and observe stability
Plug the pump in and perform a controlled test with water to confirm there’s no movement during operation. Observe for any rocking or looseness and re-tighten hardware if needed.
Tip: Check for a few minutes of run time to capture any settling movement. - 8
Document, monitor, and schedule maintenance
Record installation details, parts used, and the date of stabilization. Schedule periodic checks (seasonally or after major weather events) to ensure longevity and performance.
Tip: Set reminders to re-check every 6–12 months depending on conditions.
FAQ
Why does my sump pump move after installation?
Movement is usually caused by a loose mounting, an uneven base, or an improperly routed discharge line. Fixing the mounting and ensuring a level base reduces vibration and prevents future movement.
A wobble after install typically comes from loose mounting or an uneven base. Fix the mount, level the base, and re-route the discharge to stop movement.
Can I use household adhesives to stop movement?
Adhesives alone are not reliable for stabilizing a sump pump on concrete. Use proper anchors and brackets designed for concrete mounting to secure the unit.
No. Adhesives alone won't reliably secure a sump pump. Use concrete anchors and brackets instead.
Is it better to mount a pedestal or a submersible pump for stability?
Pedestal pumps are generally easier to stabilize with mounting hardware and a level base. Submersible units require different stabilization approaches, such as bracket or frame support.
Pedestal pumps are usually easier to stabilize; submersible units need different mounting methods.
How long do anti-vibration pads last?
Pad lifespan depends on usage and conditions. Inspect pads for wear and replace if they crack or compress excessively.
Pad life varies, but check them regularly and replace if they’re worn or compressed.
What safety precautions should I follow when mounting to concrete?
Turn off power and disconnect the pump before any work. Wear safety gear, and ensure proper ventilation when drilling dust is produced.
Turn off power, wear protective gear, and be mindful of ventilation when drilling.
Do I need to re-check the pump after a flood or backup?
Yes. After a flood event, inspect the mounting, hoses, and discharge path for movement or leaks and adjust as needed.
Yes—inspect and re-check after any flood or heavy backup to ensure stability.
Watch Video
Top Takeaways
- Anchor the base to a solid, level surface.
- Use anti-vibration pads to dampen movement and noise.
- Route discharge pipes to avoid pulling on the pump.
- Recheck stability after any basement or ground changes.
- Establish a regular maintenance routine