How to Replace a Basement Sump Pump: Step-by-Step Guide
Learn how to replace a basement sump pump with a clear, safety-first process—from selecting a replacement to testing after install—to protect your basement from flooding.

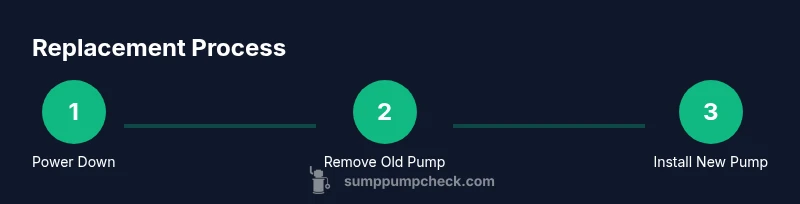
Goal: Replace basement sump pump with a new unit and restore reliable water removal. You’ll learn how to select a compatible replacement, prepare the pit, disconnect the old pump, install the new unit (submersible or pedestal), connect the discharge line and check valve, and test the system for proper operation.
Understanding Replacement Options: Submersible vs Pedestal
Choosing between a submersible or pedestal sump pump affects installation, maintenance, and long-term reliability. A submersible unit sits inside the pit and is quieter, often easier to seal, and can handle deeper pits. A pedestal pump mounts above the pit, typically cheaper and easier to service, but may be noisier and require more headroom. The best choice depends on pit size, water volume, and how you use the space in your basement. The Sump Pump Check team notes that compatibility with the existing pit, outlet height, and electrical supply should drive your decision. Consider whether you want to simplify maintenance with a top-mounted float or invest in a modern floatless switch for fewer mechanical parts. No matter which type you choose, ensure the unit is rated for continuous duty and that the basin can accommodate the model's base and intake. If you’re replacing an older unit, check for corrosion on the pit rim and inspect the discharge path for blockages. Planning now saves headaches when the next rainstorm hits.
Sizing, Flow, and Pit Compatibility
Sizing a replacement sump pump correctly is essential to prevent repeat failures and to keep water moving through the system efficiently. Start by measuring the pit diameter and depth to ensure the new unit fits comfortably, then check the pump’s flow rating (gallons per minute, or GPM) at a given head height. If your basement experiences heavy rainfall or frequent groundwater intrusion, you’ll want a higher GPM model and possibly a backup option. Also verify that the discharge outlet aligns with your existing pipes and exterior drainage path. The brand guidance from Sump Pump Check emphasizes selecting a pump whose power and intake align with the pit’s dimensions, which reduces vibration, noise, and wear. If you have a long discharge run, consider a pump with a bit more head pressure to maintain performance across the path to the outside yard or storm sewer. Remember: a replacement should not only fit the pit but also integrate smoothly with your home’s drainage plan and electrical setup.
Safety and Electrical Considerations
Electrical safety is non-negotiable when replacing a basement sump pump. Always disconnect power to the circuit at the breaker before any work near water, and verify the power is off with a non-contact voltage tester. A GFCI-protected outlet is strongly recommended or required by many codes for basement installations. Check that the outlet is at a safe distance from the pit and that cords and plugs are kept dry. Inspect your existing wiring and conduit for wear; damaged insulation must be replaced. If the pump is hard-wired, it may require professional assistance to reroute power safely and to install proper strain relief. The goal is a secure, dry, and compliant electrical connection that prevents shorts and avoids shock hazards. Brand guidance from Sump Pump Check stresses following local code requirements and ensuring a dedicated, protected circuit for the sump pump.
Pit Access and Preparation
Before installation, clear the pit area of debris, tools, and any obstructions. Remove the old unit carefully to avoid damaging pit walls or existing piping. If the pit has a liner or mortar crumbling, repair it so the new pump sits firmly and seals correctly. Clean all surfaces and dry the area to facilitate a good seal with the new gasket. Measure the base of the new pump to confirm clearance around the sides of the pit and between the pump and pit walls. If your pit has a built-in stand or mounting plate, ensure the new unit can be secured without interference. Proper pit preparation reduces vibration, extends pump life, and simplifies subsequent maintenance.
Discharge Piping, Check Valves, and Backflow Prevention
The discharge path must consistently move water away from the home’s foundation. Install a PVC or ABS discharge pipe with a gentle slope (typically around 1/4 inch per foot) toward the outdoors or appropriate drainage. A check valve or backflow preventer should be installed to prevent water from returning to the sump pit. Use the correct fittings and clamps, and seal all joints with PVC cement or silicone sealant intended for wet environments. Align joints to avoid leaks and ensure the pipe does not rest on the pump outlet, which can crack the outlet over time. If your old discharge pipe is cracked or blocked, replace it during the pump replacement. A proper discharge system reduces dampness around the foundation and protects basement surfaces.
Testing, Calibration, and Maintenance After Replacement
Once installed, reconnect power and perform a controlled test. Pour water into the pit to raise the float and ensure the pump activates and discharges effectively. Confirm that the water exits the exterior drain or storm line and that there is no leakage at joints. Listen for unusual noises or excessive vibration and adjust mounting if needed. Program any floats or alarms according to the manufacturer’s instructions, ensuring that high-water alerts function properly. Establish a simple maintenance routine: inspect the discharge path, check for corrosion, test monthly during heavy rain periods, and replace worn components as needed. Keeping a routine will extend the life of the replacement and reduce the chance of sudden failure.
Common Pitfalls and How to Avoid Them
Common mistakes include undersizing the pump for the pit, skipping a check valve, or neglecting a proper discharge slope. Another frequent error is failing to secure the pump and discharge piping, which leads to movement, leaks, and noise. Improper wiring, neglected GFCI protection, and running a pump tied into an older circuit can create electrical hazards. To avoid these issues, double-check compatibility, verify all connections with a test, and follow the manufacturer’s installation instructions. If in doubt, consult a licensed plumber or an electrician with sump-pump experience to ensure a safe and code-compliant replacement.
Tools & Materials
- New sump pump (submersible or pedestal)(Choose model that fits pit diameter and height; verify GPM and continuous-duty rating)
- Check valve(Prevents backflow into pit; install on discharge line above the pump outlet)
- Discharge pipe (PVC/ABS)(Match pipe size to pump outlet; route to outdoors or approved drainage)
- PVC primer and cement(For secure, watertight pipe joints)
- Pipe clamps and fittings(Secure joints; keep pipe supported to prevent stress on pump outlet)
- GFCI-protected outlet or dedicated circuit(Electrical safety; ensure outlet is rated for damp environments)
- Electrical conduit or strain-relief kit(Protect and secure the power cord; minimize cord exposure to water)
- Silicone sealant(Waterproof seal around joints and fittings)
- Adjustable wrench(Tighten fittings without damaging threads)
- Pliers (channel-lock)(Grip fittings and clamps firmly during installation)
- Screwdrivers (Phillips and flat)(Mounting hardware and wire terminals)
- Safety gear (gloves, goggles)(Protect hands and eyes when dealing with water and components)
Steps
Estimated time: 60-120 minutes
- 1
Power down and assess pit
Turn off the circuit breaker feeding the sump pump and unplug or disconnect the unit. Confirm no power is present with a non-contact tester. Remove any loose debris from the pit to provide a clean work area.
Tip: Lock out and tag the circuit if working with a shared panel to avoid accidental energizing. - 2
Disconnect and remove old pump
Carefully detach the discharge line and any electrical connections. If the pump is heavy, use another person or proper lifting equipment. Take photos of wiring and hose connections to guide reassembly.
Tip: Label wires and hoses before removal to simplify reinstallation. - 3
Prepare pit and select replacement
Ensure the pit is clean and dry. Confirm pit dimensions and select a replacement pump that matches the outlet location and capacity requirements. Inspect pit walls for damage and repair as needed.
Tip: If in doubt, choose a slightly higher capacity unit to handle peak inflows. - 4
Install new pump and mount
Place the new pump in the pit, ensuring it sits level and that the intake aligns with the pit. Secure the pump as per the manufacturer’s instructions and connect mounting hardware.
Tip: Check clearance around the unit to avoid contact with pit walls during operation. - 5
Attach discharge piping and check valve
Connect the discharge pipe to the pump outlet and install the check valve in the correct orientation to prevent backflow. Glue joints with PVC cement and tighten clamps securely.
Tip: Slope the discharge line away from the foundation to prevent standing water near the slab. - 6
Reconnect power and test
Route the power cord through strain relief and connect to a GFCI outlet. Reapply power and perform a test by simulating rainfall: add water to the pit until the float rises and the pump activates. Observe discharge and check for leaks.
Tip: Always test with the area dry and have a towel handy in case of minor drips. - 7
Calibrate alarms and finalize
Set any high-water alarms or float thresholds according to the manufacturer. Confirm all fasteners are tightened and the area is clear of tools. Document maintenance and test dates for future reference.
Tip: Keep a simple maintenance log to track replacement cycles. - 8
Cleanup and restart
Remove tools, dispose of old parts properly, and wipe down the area. Re-check the discharge path for accuracy and ensure there are no lingering leaks.
Tip: Store spare O-rings and gaskets with the new pump for future maintenance.
FAQ
What size sump pump do I need when replacing basement sump pump?
Select a pump whose GPM rating matches your pit size and typical inflow. If in doubt, choose a model with a higher head-capacity that fits the pit and ducting without crowding the space.
Choose a pump with a GPM that matches your pit size; if unsure, pick a higher-capacity model that still fits the pit.
Can I replace a sump pump myself, or do I need a professional?
Many homeowners can replace a sump pump themselves if they have basic plumbing and electrical skills, but working around water and electricity increases risk. If wiring or code compliance is uncertain, consult a licensed professional.
You can DIY if you’re comfortable with plumbing and electrical work; otherwise hire a pro.
Should I replace the discharge pipe or just the pump?
Replace the discharge piping if it’s cracked, blocked, or undersized. A new, properly sloped pipe improves drainage and reduces backpressure on the pump.
Replace damaged discharge piping and ensure proper slope for best results.
What maintenance should I perform after replacing?
Test monthly during rain, inspect for leaks, check the check valve every 6-12 months, and clear debris from the pit. Keep logs of maintenance for future reference.
Test the system monthly and keep a maintenance log.
Is a battery backup worth it?
A battery-backed sump pump can provide protection during power outages, which is especially important during heavy rain events when you’re most at risk of basement flooding.
Yes, a battery backup helps during power outages.
What are common installation pitfalls to avoid?
Avoid undersizing, skipping the check valve, and failing to secure the discharge pipe. Incorrect electrical connections and non-GFCI outlets are also hazards.
Avoid undersizing and skip the check valve; secure the discharge and use a GFCI outlet.
Watch Video
Top Takeaways
- Choose a replacement that fits the pit and drainage path.
- Install a check valve to prevent backflow and maintain efficiency.
- Verify discharge slope and exterior routing to avoid flooding or backwash.
- Test comprehensively and establish a maintenance routine.