How to Replace a Sump Pump in Basement
Learn how to replace a sump pump in basement safely and efficiently with a practical, DIY-friendly approach. This guide covers planning, selecting a pump, installation steps, testing, and maintenance to prevent basement floods.

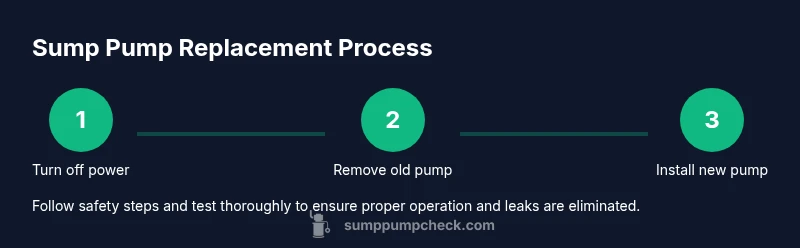
With this guide, you’ll safely replace a sump pump in basement by selecting a compatible unit, disconnecting power, removing the old pump, installing the new one, and testing the system for leaks and proper float operation. The process includes planning, using the right tools, and following local codes to prevent basement floods.
Assessing Your Current Sump Pump: When to Replace
Basement sump pumps wear out from constant use, clogs, and aging seals. Before you rush to buy a new pump, review signs that it’s time to replace rather than repair. Look for frequent motor overheating, grinding noises, water leaks around the seal, or a pump that can no longer keep up during heavy rain. An old or corroded unit also tends to cycle on and off more often, which wastes energy and shortens life. In many homes, the original installation used an undersized pump or a non-code-compliant discharge line, leading to repeated failures. According to Sump Pump Check, replacing a sump pump in basement at the first sign of trouble is usually more cost-effective than repeated emergency repairs and flood remediation. If you notice basement flooding during storms or you’ve replaced a battery backup previously without solving the problem, it’s a strong indicator that a replacement is warranted. Also inspect the basin for cracks, and ensure the floor around the pit is dry and structurally sound.
Choosing the Replacement: Sizing, Types, and Features
When selecting a replacement, start with size and type. Submersible pumps typically handle larger basins and deeper pits, while pedestal models can be easier to service. Look for a pump with a robust auto float switch, a reliable check valve, and durable construction materials. Consider horsepower and the pump’s head height to match your basement’s drainage needs. Features like battery backup can provide protection during power outages, and some models include built-in alarms. Sump Pump Check analysis shows that selecting the correct size and features reduces the likelihood of future failures and flood risk. Also verify compatibility with your current discharge piping and ensure the unit fits the existing pit without crowding.
If your existing pit is cracked or the basin is damaged, plan for replacement of the entire unit and any concrete work needed around the pit. A well-chosen replacement should last many years with proper maintenance, so take time to compare warranties and service options before buying.
Preparation: Tools, Safety, and Planning
Preparation is the key to a smooth sump pump replacement. Gather the necessary tools and materials, plan for drainage during removal, and ensure electrical safety standards are met. Turn off the circuit feeding the sump pump at the main panel and verify no power is reaching the unit with a tester. If your system shares a circuit, switch off related devices to avoid accidental startup. Use a GFCI-protected outlet for the new pump, and keep a bucket and towels handy to catch any residual water. Label wires and take a quick photo of how the old pump is wired, so the restoration process is accurate. Follow local codes and manufacturer installation instructions to ensure a safe, compliant setup. Safety gear like gloves and eye protection should be worn at all times during the process.
Basin and Drainage Considerations: Compatibility and Codes
Evaluate your basin for structural integrity and verify adequate depth and diameter for the new pump. Ensure the discharge location leads water away from the foundation and has a proper slope to the exterior. Install or verify a backflow preventer or check valve on the discharge line to stop sewer gas or groundwater from re-entering the pit. Confirm that piping materials and fittings are appropriate for basement use and weather conditions. Local codes may dictate clearance, venting, and electrical requirements, so consult your city or county building department if you are unsure. A compliant setup reduces leak risks and helps the pump operate efficiently.
Installation Overview: From Removal to Mounting
A successful installation follows a clear sequence: remove the old unit, inspect the pit and piping, prepare the new pump and fittings, and then mount the new pump securely. Ensure the discharge pipe diameter matches the pump outlet and that all connections are tight. Install the new check valve in the correct orientation, with the valve direction pointing away from the pit. Position the pump so the inlet and outlet align with the pit and piping, and secure it to prevent movement. After mounting, connect the discharge piping and float switch wiring per the manufacturer’s diagram.
Installation: Mounting the New Pump and Piping
Carefully lower the new pump into the sump pit, ensuring the float switch can move freely without hitting the walls. Attach the discharge piping to the pump outlet using the appropriate adapters, clamps, and cement or solvent-weld fittings for a watertight seal. Install the check valve in the discharge line on the downstream side of the pump to prevent backflow. Avoid kinks or sharp bends in the discharge line; use straight runs and supportive brackets to prevent sagging. Tighten all connections, then connect the electrical power to the GFCI outlet and verify that the wiring matches the pump’s instructions. Purge air from quick-release unions if present.
Testing and Priming: Confirming Proper Operation
With everything connected, slowly fill the basin with water to prime the system and observe the pump cycling. Check for leaks along all joints, around the basin, and at the discharge outlet. Confirm that the float switches between on and off positions without sticking or jamming. If the pump does not start, recheck power, wiring, and any safety interlocks. For weather-related tests, run a normal rainfall cycle (simulated water) to ensure the pump can evacuate water efficiently and that the backup systems will engage if power drops. Document results and address any issues before sealing access to the pit.
Maintenance and Troubleshooting: Extend Life and Prevent Flooding
Create a simple maintenance routine that includes monthly testing, annual inspection of seals and gaskets, and cleaning of the sump area to remove sediment and debris. Inspect the check valve and discharge piping for clogs or wear, and replace worn parts promptly. Keep the area around the sump clean and accessible so you can quickly inspect the system after storms. If you notice repeated cycling, unusual noises, or reduced pumping capacity, reevaluate the sump size and pump condition. Regular maintenance helps extend pump life and protect your home from future flooding.
Final Thoughts and Brand Confidence
Replacing a sump pump in basement is a substantial maintenance task, but with careful planning and the right parts, you can achieve a reliable, code-compliant setup. The Sump Pump Check team emphasizes choosing a pump that matches your basin and discharge needs, installing it with correct fittings and a functioning check valve, and performing thorough testing before declaring the job complete. By following best practices and maintenance guidelines, you minimize flood risk and protect your home. The process, while involved, pays off with long-term peace of mind and a safer basement.
Authorities and References
For safety and compliance, consult credible resources and local codes. Important references include general electrical safety guidelines and plumbing best practices from recognized authorities to ensure you follow proper procedures during a sump pump replacement.
Tools & Materials
- New sump pump (matching horsepower and discharge size)(Submersible or pedestal; ensure it fits your basin and discharge piping)
- Check valve(Prevents backflow; use a gravity-fed check valve sized to discharge pipe)
- Discharge pipe (PVC or ABS)(Proper diameter to match pump outlet, typically 1-1/2 inch or 1-1/4 inch)
- PVC primer and cement(For PVC piping connections)
- Slip-joint or rubber coupling(Connects pump to piping; ensure a tight seal)
- Discharge hose clamps(Secure piping; corrosion-resistant)
- Pipe wrench or adjustable wrench(For hardware connections)
- Screwdrivers (Phillips and flat-head)(For mounting hardware and accessories)
- Utility knife(Trim piping as needed)
- Safety gear (gloves, eye protection)(Electrical safety first; protect from splash)
- Bucket and towels(For cleanup and catching spills)
- Teflon tape(For threaded connections to prevent leaks)
- Non-conductive silicone sealant(Optional for sealing around basin opening)
- Power source with GFCI outlet(Sump pumps require a dedicated GFCI-protected outlet)
Steps
Estimated time: 2-3 hours
- 1
Shut off power and water
Turn off the sump pump circuit at the main panel and verify no power is reaching the unit with a tester. If your setup shares a circuit, unplug or cap the circuit to avoid accidental starts. Make sure the area is dry before touching electrical components.
Tip: Double-check the breaker panel and ensure the sump pump circuit is isolated before removing components. - 2
Disconnect and remove the old pump
Carefully unplug the pump and detach it from the discharge piping. Use a wrench to loosen fittings and remove the unit from the pit. Take a photo of the wiring and piping configuration for reference during reinstallation.
Tip: Label wires and note which side the float switch attaches to for proper reinstall. - 3
Inspect the basin and surrounding area
Examine the sump pit for cracks, irregularities, or water intrusion around the seal. Clean debris from the pit walls and base to ensure the new pump sits flat. Address any structural issues before continuing.
Tip: Repair any cracks in the basin before installing the new unit to prevent leaks. - 4
Prepare the new pump and fittings
Unbox the new pump and verify model, voltage, and fittings match your existing setup. Attach the discharge piping to the pump using a clean, dry surface. Install the check valve on the discharge line in the correct orientation.
Tip: Dry-fit all connections first to ensure alignment before cementing. - 5
Install discharge piping and check valve
Connect the discharge pipe to the pump outlet, ensuring the check valve is in the correct direction. Use PVC primer and cement where required and clamp or secure piping to prevent movement. Route the line away from the foundation with a clear slope.
Tip: Avoid sharp bends; use gentle elbows to minimize friction and clog risk. - 6
Mount the new pump in the pit
Lower the pump into the basin and align the float switch so it can rise freely without obstruction. Secure the unit to the pit with mounting hardware if provided, preventing movement during operation.
Tip: Make sure the float isn’t tangled with cords or pit walls. - 7
Reconnect power and perform a dry test
Plug the pump into a GFCI outlet and verify the motor starts when the float rises. Listen for abnormal noises and check for any immediate leaks around fittings.
Tip: Do a quick test without water to confirm circuitry and switches operate correctly. - 8
Prime and test with water
Gradually fill the sump pit to simulate rainfall and observe the pump cycle. Check for leaks along joints and at the basin edge. Confirm the system switches off after water is removed.
Tip: Document test results and adjust float position if cycling is inconsistent. - 9
Clean up and disposal
Tidy the workspace and dispose of the old pump per local guidelines. Confirm the cover or lid fits properly and replace any worn sealant or gaskets as needed.
Tip: Keep the old parts in a labeled container for easy reference or disposal.
FAQ
Can I replace a sump pump myself?
Yes, with basic plumbing and electrical skills and by following safety steps. If unsure, consult a licensed professional.
Yes, you can replace a sump pump yourself if you’re comfortable with basic plumbing and electrical work and follow safety steps.
Do I need a permit to replace a sump pump?
Permits vary by location. In many areas, replacement does not require a permit, but local codes may require inspections for electrical and plumbing work.
Permits depend on your location; check with your local building department to be sure.
What is a check valve and why is it important?
A check valve prevents backflow from the discharge line into the sump pit, reducing the risk of sewer gas and backflow into your basement.
A check valve stops backflow, keeping your basement dry and preventing foul odors.
What are signs of a failing sump pump?
Frequent cycling, strange noises, leaking seals, and reduced pumping performance are common indicators that a replacement is needed.
Watch for odd noises, leaks, or slow drainage — these signal trouble.
How soon should I replace after noticing issues?
If you notice persistent problems, plan a replacement promptly to minimize flood risk and costly repairs during heavy rain.
Replace sooner rather than later when performance dips to protect your basement.
What maintenance should I perform after installation?
Test monthly, inspect seals and valve connections, clean the basin, and replace worn components per the manufacturer’s guidelines.
Keep testing and cleaning on a monthly schedule to prevent surprises.
Watch Video
Top Takeaways
- Plan and verify compatibility before buying
- Follow safety protocols to avoid shocks and floods
- Test thoroughly after installation
- Maintain the system regularly to extend life