When to Install a Sump Pump: A Practical Guide for Homeowners
Learn how to recognize flood risk, determine timing, and prepare for installation of a sump pump. This guide covers risk indicators, system types, permits, and maintenance with practical steps for homeowners.

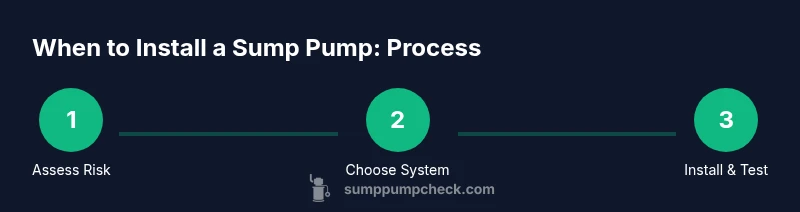
This guide helps you decide exactly when to install a sump pump, how to assess flood risk, and the steps to prepare. You’ll learn risk indicators, system options, permits, and maintenance practices to protect your basement. If you notice repeated basement flooding, damp walls after rain, or high humidity, start planning installation now.
Understanding When to Install a Sump Pump
A sump pump is designed to move water away from your home's foundation before it causes flooding or dampness. The best time to install is before a major flood event, but many homes add one after repeated incidents. The decision hinges on measuring risk, not guessing. According to Sump Pump Check, homeowners in flood-prone regions that experience frequent rainstorms or rapid snowmelt benefit most from early installation. If you notice water pooling in the basement after heavy rain, damp walls, or visible efflorescence on masonry, it's a sign you should plan for a sump pump. Proactively installing a sump pump can limit mold growth, reduce damage costs, and preserve structural integrity over time. In addition to flood risk, consider your home's landscaping and drainage: poor grading or downspouts that drain toward the foundation increase the need for a sump pump. Think of installation as an insurance policy, not a luxury, especially in older homes with less favorable drainage.
Key Risk Indicators That Signal the Need
Several clear warning signs indicate that a sump pump may be warranted. Recurrent basement flooding after storms or rapid snowmelt is a primary trigger. Persistent dampness, musty odors, or white mineral deposits on walls (efflorescence) also suggest ongoing moisture intrusion. If your yard sits higher than your basement floor or if the ground around your foundation tends to hold water, the risk rises. Cracks in the basement walls or floor can widen under hydrostatic pressure, giving groundwater an easier path inside. Even if you rarely see standing water, a home with poor grading, leaking gutters, or downspouts directed toward the foundation should be evaluated for a sump pump upgrade. The Sump Pump Check team notes that proactive planning reduces emergency repairs and protects structural integrity over time.
Assessing Your Basement’s Flood Risk
Begin with a simple moisture check: a humidity meter or subtle damp spots reveal hidden moisture that can fuel mold. Look for water stains, efflorescence, warped or bowed walls, and foundation cracks that deepen after rain. Track rainfall levels and snowmelt patterns in your area; if those events regularly coincide with basement dampness, installation becomes more compelling. Consider the size of your basement, the frequency of water ingress, and how quickly the existing drainage handles entering water. A professionally performed sump pump assessment can confirm whether a pump will be the cost-effective solution or if improvements in grading, downspouts, or drainage are needed first. Sump Pump Check’s analysis shows that addressing upstream drainage often reduces the sizing and cost of the pump you ultimately choose.
Seasonal Considerations and Timing
Timing matters for both cost and protection. In areas with heavy spring rain or rapid snowmelt, installing a sump pump ahead of the season can prevent flood damage and mold growth. Summer can also bring intense thunderstorms that overwhelm inadequate drainage, while fall rains can reveal leaks before freezing temperatures set in. If your climate experiences long dry spells followed by sudden rainfall, plan for the pump’s discharge to avoid creating pooling near the foundation. Local conditions, not the calendar, should drive the decision. The goal is to minimize the window of vulnerability when groundwater levels are naturally higher or when meltwater increases water flow toward your foundation.
Choosing the Right Sump Pump System
Choose a system that matches your basement’s needs without oversizing. Submersible pumps, for example, are quiet and easier to hide, while pedestal units can be more accessible for maintenance. Consider whether you want a primary pump only or a system with battery backup for power outages. Sizing factors include expected water load, pit size, and cycle frequency. In many cases, a properly sized pump with a backflow-preventing check valve and a reliable discharge path is sufficient, but in flood-prone areas a backup option adds resilience. Work with a retailer or plumber who can help you select a model with a robust warranty and ease of maintenance. The Sump Pump Check team recommends opting for a model that prioritizes reliability and serviceability.
Pre-Installation Readiness: Permits, Codes, and Electrical
Before you begin, check local building codes and permits. Some jurisdictions require a permit for sump pump installation, while others focus on discharge location and electrical safety. Plan for a dedicated 120V circuit, GFCI protection, and weatherproof connections to reduce risk. If you’re replacing an old system, verify that the existing electrical panel can handle a new addition and confirm clearance for service. Secure a discharge route that avoids backflow toward storm drains or neighbor properties. Proper labeling and access ensure future maintenance is straightforward. The time you invest in planning lowers the chance of costly rework after installation.
Pit Placement, Discharge Options, and Drainage
Choose a central location for the sump pit where it can collect water efficiently without interfering with foot traffic or utilities. The discharge line should head to a exterior wall or drainage area that slopes away from the foundation. Use a check valve to prevent backflow and ensure a clean seal around connections. If the outdoor path crosses hardscape or garden beds, consider routing under a deck or along a wall with protection from freezing temperatures. Ensure the exit point is above grade so runoff does not re-enter the home during heavy rain. A well-planned discharge path reduces the pump’s cycling and extends its life.
What to Expect During Installation
Installation typically involves excavating a pit, placing the sump basin, mounting or inserting the pump, routing the discharge pipe, and connecting the electrical supply to a grounded circuit. A functional test mimics rainfall to confirm the pump starts, reaches full flow, and shuts off when water is cleared. If a backup pump is included, configure the switch to start during a power outage. Expect some noise and vibrations during initial operation; you can mitigate this with proper mounting and a level base. Have a professional review any part of the work if you encounter unusual drainage patterns.
Maintenance after Installation and Longevity
Regular maintenance ensures reliability. Test the pump monthly by pouring a few gallons of water into the pit and listening for the switch. Clean the inlet screen and remove debris quarterly. Inspect the discharge line for leaks or blockages, and verify the check valve seals properly. Schedule an annual professional inspection to confirm electrical connections and overall pump health. If you opted for a battery backup, test it at least twice per year and replace the battery as recommended by the manufacturer. Consistent care extends the life of your system and reduces the risk of unexpected failures.
Common Myths About Sump Pumps Debunked
Myth: A sump pump is a cure-all for basement flooding. Reality: It handles water that has already entered the space; good grading and drainage remain essential. Myth: All pumps are the same. Reality: Pumps vary in capacity, reliability, and maintenance needs, so selecting the right model matters. Myth: Sump pumps require frequent repairs. Reality: Routine maintenance and protective components reduce failures. Myth: A backup pump is unnecessary in mild climates. Reality: Outages can happen anywhere; backups protect during storms and power disruptions. By debunking these ideas, you’ll be better prepared to plan and protect your home.
Quick Start Checklist for Homeowners
Use this quick-start guide to begin planning: first, assess flood risk and identify vulnerable areas in the basement; second, check local permit requirements and the need for a dedicated electrical circuit; third, choose the pump type and backup option; fourth, plan the pit position and discharge route; fifth, assemble tools and materials, and finally schedule a professional inspection and regular maintenance.
Tools & Materials
- Sump pump unit(Choose a submersible or pedestal unit sized for your needs; ensure a warranty.)
- Sump pit(Install a properly sized pit in the basement floor with a level base.)
- Discharge pipe (PVC)(Run to exterior wall or storm drain; ensure a clear slope away from the foundation.)
- Check valve(Prevents backflow into the pit after pumping.)
- Dedicated electrical circuit and GFCI outlet(A dedicated 120V circuit with GFCI protection is recommended.)
- PVC cement and primer(For reliable, leak-free pipe connections.)
- Sealant/caulk(Seal around the pit rim and entry points to prevent leaks.)
- Shovel, level, and basic hand tools(For excavation, leveling, and alignment.)
- Battery backup sump pump (optional)(Adds protection during power outages.)
- Discharge path accessories (optional)(Extensions or adapter fittings for challenging routes.)
Steps
Estimated time: 2-4 hours
- 1
Assess space and safety
Identify the best pump location, ensure dry access, and shut off the electrical circuit you’ll use. Check nearby utilities and plan a clear path for maintenance. This step reduces surprises during installation.
Tip: Turn off the dedicated breaker and verify no voltage with a test tool. - 2
Prepare the pit location
Clear debris, level the floor, and mark the discharge route. Verify clearance for the pump and smooth routing for the discharge pipe.
Tip: Use a level and chalk lines to ensure perfect alignment. - 3
Install the sump pit
Dig or prepare the pit hole, place the basin, and ensure the base is solid and level. Secure the pit as required by local codes.
Tip: Check that the pit edges are flush with the floor surface. - 4
Set up the discharge line
Attach the discharge pipe to the pit outlet, route it to the exterior, and ensure a continuous slope away from the foundation.
Tip: Install a check valve in the line to prevent backflow. - 5
Install the pump and electrical
Lower the pump into the pit, connect to the discharge pipe, and plug into a GFCI-protected outlet. Keep wiring dry and accessible.
Tip: Do not power the pump until all plumbing is leak-tested. - 6
Test and finalize
Fill the pit with water to trigger the float switch and observe the pump cycle. Verify no leaks and adjust float settings if needed. Configure backup options if included.
Tip: Test monthly to ensure reliable operation.
FAQ
How do I know if I need a sump pump?
If your basement floods after heavy rain or snowmelt, or shows persistent dampness, a sump pump is likely beneficial. Consider risk indicators and consult a professional if unsure.
If your basement floods after rain or snowmelt, or stays damp, you probably need a sump pump. Consider your risk factors and consult a pro.
What’s the difference between a primary sump pump and a battery backup?
A primary sump pump handles normal water flow; a battery backup activates during power outages to maintain protection during storms.
A backup kicks in when the power fails, keeping protection during outages.
Can I install a sump pump myself?
DIY installation is possible for experienced homeowners, but electrical and plumbing work often requires a licensed professional to meet code.
You can DIY if you have plumbing and electrical skills; otherwise hire a pro.
What maintenance does a sump pump require?
Test monthly, clean the inlet screen quarterly, inspect the discharge path, and schedule annual professional checks for reliability.
Test it monthly and keep the discharge path clear; annual professional checks help.
Is a check valve necessary?
Yes. A check valve prevents backflow into the pit after pumping, reducing repeat water entry.
Yes—backflow prevention is essential.
Do I need a permit to install a sump pump?
Permits vary by location. Check local building codes and apply if required before work begins.
Check your local rules; permits are sometimes required.
Watch Video
Top Takeaways
- Assess flood risk early and plan before purchase.
- Choose a pump type and backup options based on needs and climate.
- Ensure electrical safety and a proper discharge path.
- Follow local codes, permits, and maintenance schedules.
- Test regularly to prevent surprise failures.