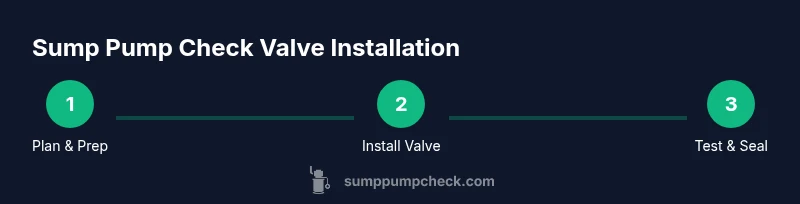
Sump Pump Check Valve Installation: Step-by-Step Guide
Learn how to install a sump pump check valve with a step-by-step approach, safety tips, and maintenance guidance from Sump Pump Check. Prevent backflow, protect your basement, and extend pump life with proper installation.

Learn how to install a sump pump check valve to prevent backflow and protect your basement. This guide covers required tools, valve types, and a safe, code-compliant installation. According to Sump Pump Check, a properly installed check valve reduces backflow risk and extends pump life, with testing tips after installation.
Why a check valve matters for sump pumps
According to Sump Pump Check, a properly installed check valve prevents backflow into the basement during power outages and heavy rainfall. This section explains how a check valve works, why it matters for safeguarding your home, and how backflow can damage your sump pump and surrounding structure. You’ll learn the basic physics of one-way flow, what happens when a valve fails, and how a valve choice influences system performance. Real-world examples show how even a small installation error can negate benefits, emphasizing careful alignment and secure connections. By understanding these concepts, you’ll be prepared to select the right valve and install it correctly to protect your living space.
A check valve is designed to allow water to flow out of the sump pump toward the discharge line while preventing it from flowing back into the pit. If the valve fails or is installed incorrectly, water can back up, causing the pump to work harder, wear out faster, or fail during a storm. Selecting the right valve means considering pipe size, material, and the height of the discharge run. Budget-friendly options exist, but reliability should guide your choice. Always plan for future maintenance by choosing a valve that is easy to inspect and replace if needed.
From a homeowner’s perspective, the payoff is straightforward: fewer basement flooding episodes, reduced risk of water damage, and longer pump life. The Sump Pump Check team emphasizes deliberate planning, clean piping, and secure, leak-free joints as cornerstones of a successful install. If you keep the valve accessible and clearly labeled, you’ll make future checks faster and safer for yourself or a professional you hire.
Tools & Materials
- Sump pump check valve (spring-loaded or swing-style)(Choose size to match your discharge pipe (commonly 1-1/2"). Ensure compatibility with existing fittings.)
- PVC pipe sections (correct diameter for your piping)(Have extras in case you need a small adapter or alignment piece.)
- PVC cement and primer(Select cement appropriate for PVC pipes used in your system.)
- PTFE tape (Teflon tape)(For threaded connections on metal components.)
- Pliers and adjustable wrench(For tightening fittings without over-torquing.)
- Bucket, towels, and rags(Contain water and keep work area clean.)
- Silicone sealant or gasket (if required)(Use only where manufacturer specifies a sealant.)
- Marker or tape(Mark orientation and cut lines for accuracy.)
Steps
Estimated time: 60-90 minutes
- 1
Power down and drain the area
Unplug the sump pump and switch off the dedicated circuit to prevent electric shock. Use a bucket to catch residual water and dry the area so you can work safely. Confirm that the system is de-energized before touching any electrical components.
Tip: Always double-check with a non-contact voltage tester before handling the pump. - 2
Plan valve location and measure pipe
Identify a reachable section of discharge pipe close to the pump outlet. Measure the pipe diameter and verify whether you need a 1-1/2" or 1-1/4" valve. A dry-fit with a placeholder piece helps ensure proper alignment before cutting.
Tip: Keep the discharge line straight to avoid extra stress on fittings. - 3
Remove old valve or elbow
If replacing an existing valve, carefully disconnect it without damaging the pipe. Use the wrench to loosen fittings and have towels ready for any spilled water. Dispose of old components properly.
Tip: Inspect the old discharge area for cracks or corrosion that could affect the new valve. - 4
Select and test the valve type
Choose a valve type that fits your pipe size and space constraints. Ensure the valve’s flow arrow points toward the discharge direction. Do a quick dry-fit to confirm clearance and alignment before final installation.
Tip: Spring-loaded valves are reliable but check for debris that could cause sticking. - 5
Prepare pipe ends and seal
Clean and deburr pipe ends, then apply primer and cement to the PVC connections as required. If using threaded connections, wrap PTFE tape around the male threads before tightening.
Tip: Avoid over-applying cement—use a thin, even coat for a clean seal. - 6
Install the valve and secure connections
Attach the valve inline with the discharge pipe, ensuring it sits in the correct orientation. Tighten all fittings hand-tight, then snug with a wrench without over-torquing. Check that there are no kinks and that water can flow freely.
Tip: Support the pipework during tightening to prevent misalignment. - 7
Test for leaks and backflow
Re-energize the system and run the pump to clear the line. Look for drips at joints and inspect for any backflow when the pump turns off. If you notice leaks, tighten fittings or reapply sealant as needed.
Tip: Watch the discharge end to ensure water exits smoothly without siphoning back. - 8
Finalize and document
Label the valve location for future maintenance and note the installation date. Store any spare parts in a labeled container. Keep your maintenance log updated for easy reference during future inspections.
Tip: A clear log speeds up future repairs and helps with code compliance. - 9
Restore power and monitor
Turn the circuit back on and observe the system for a full cycle. Confirm no leaks remain and monitor performance over the next few rain events. Schedule a routine maintenance check as part of your home upkeep.
Tip: Set a reminder to inspect every 6–12 months depending on usage.
FAQ
What is the purpose of a sump pump check valve?
A sump pump check valve allows water to exit the discharge line while preventing it from flowing back into the sump pit. This protects the pump from backflow pressure and reduces the risk of basement flooding.
A check valve lets water out but stops it from coming back in, protecting your basement from floods.
What types of check valves are available for sump pumps?
Common options include swing-style and spring-loaded inline check valves. Swing valves are simple and cheap but may close slower; spring-loaded valves close quickly and resist backflow, though they can stick if debris accumulates.
There are swing-style and spring-loaded check valves, each with pros and cons for different setups.
Can I install a check valve myself?
Yes, with basic plumbing tools and careful adherence to sizing and orientation. If your system uses metal pipes or unusual fittings, you may prefer professional help to ensure a proper seal and code compliance.
You can install it yourself if you’re comfortable with basic plumbing, but seek help for complex pipes.
How do I test a newly installed check valve?
Run the sump pump and watch for backflow when the pump stops. Inspect joints for leaks and verify that water exits only in the discharge direction.
Run the pump, then check for backflow and leaks to confirm the valve works correctly.
What are common mistakes to avoid when installing a check valve?
Misorienting the valve, skipping leak testing, using improper sealants, or placing the valve in a cramped or inaccessible spot can all cause failures.
Avoid misorienting the valve and skip testing, or you’ll risk backflow or leaks.
How often should I replace a sump pump check valve?
Replacement timing depends on usage and environment; inspect for wear or stiff operation during routine maintenance and replace if performance declines.
Check and replace if the valve becomes stiff or leaks over time during maintenance.
Watch Video
Top Takeaways
- Check valve prevents backflow and protects the basement
- Choose valve type that fits pipe size and space
- Install with proper orientation and secure seals
- Test thoroughly after installation and maintain regularly