Liberty Sewage Pump Installation: Step-by-Step Guide
Step-by-step Liberty sewage pump installation for homeowners. Learn model selection, pit setup, discharge piping, wiring, testing, and maintenance safety tips.

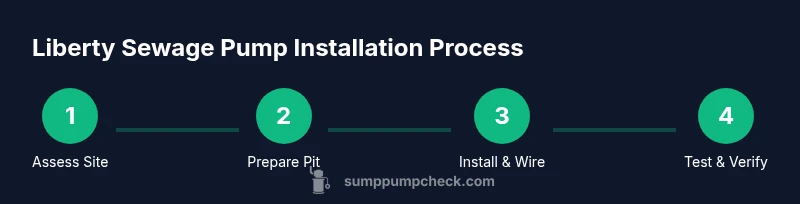
By following this Liberty sewage pump installation guide, you will select the right pump, prepare the pit, run the discharge, and complete safe wiring and testing. This step-by-step approach covers basins, check valves, and maintenance checks, with safety reminders for DIY installs. According to Sump Pump Check, meticulous prep reduces leaks and failures.
Why Liberty Sewage Pump Installation Requires Care
Installing a Liberty sewage pump is a critical home improvement project that directly affects your basement health, odor control, and overall drainage reliability. Liberty pumps are designed for wastewater handling, but improper installation can lead to backflow, clogs, or premature seal failure. The job involves correct sizing, pit preparation, proper discharge routing, and code-compliant electrical connections. For homeowners and DIY enthusiasts, approaching Liberty sewage pump installation with a clear plan reduces risk and protects family health. According to Sump Pump Check, choosing the right pump and following a proven installation sequence dramatically lowers leaks and service calls. This guide walks you through the planning, selection, and safe execution, so you can complete the project with confidence and avoid common pitfalls. We'll cover recognizing load needs, evaluating pit geometry, and coordinating with local authorities to ensure your setup meets code and warranty requirements.
Tools & Materials
- Liberty sewage pump (appropriate model)(Rated for anticipated wastewater flow and with a reliable automatic float switch.)
- Sump pump basin/pit(Deep enough for the chosen Liberty model; ensure smooth interior and proper seating.)
- Discharge piping (PVC/ABS, 1-1/2 to 2 inches)(Corrosion-resistant, with adapters for exterior connection as allowed by code.)
- Check valve(Prevents backflow; install upstream of any bends in the discharge line.)
- Union or slip couplings(Eases pump removal for maintenance.)
- PVC cement and primer(For secure, long-lasting pipe joints.)
- Teflon tape(Seal threaded connections to prevent leaks.)
- Electrical: GFCI outlet, conduit, wiring (AWG 12/14)(Dedicated 120V circuit; follow local electrical code.)
- Waterproof connectors and strain relief(Protects electrical joints from moisture and movement.)
- Tools: Screwdrivers, pliers, pipe wrench, hacksaw, tape measure(A well-organized toolbox speeds installation.)
- Shovel or digging tool(Prepare the pit area and path for piping.)
- Personal protective equipment (gloves, safety glasses)(Safety first when handling sewage-related components.)
- Pit lid or cover(Optional but recommended for debris protection and safety.)
- Labeling materials(Mark lines and components for future maintenance.)
Steps
Estimated time: 2-4 hours
- 1
Assess site and power availability
Power off the circuit and locate the pit area. Check clearance around the basin, verify floor is level, and confirm a dedicated circuit is available for the pump. Document distances to discharge points and any potential obstructions in the pit area.
Tip: Take photos and measurements before removing any components; it helps with reassembly and inspections. - 2
Gather tools and materials
Lay out all tools and parts in a prepared workspace. Verify that the Liberty pump and basin components match the measured pit and that you have the correct discharge piping and fittings on hand.
Tip: Organize parts by task group (pumps, piping, wiring) to prevent last-minute scrambles. - 3
Prepare the pit and basin
Clean the pit, inspect the basin seating surface, and place the pit in position with even footing. Ensure the basin sits level and that there is clearance for the pump’s inlet and float mechanism.
Tip: Clear any debris and check for cracks or rough edges that could damage seals. - 4
Install discharge piping and check valve
Attach the discharge pipe from the basin toward the intended exterior or sewer connection, ensuring a clean run with minimal bends. Install the check valve to prevent reverse flow and seal joints with primer and cement as needed.
Tip: Use a slope that promotes drainage away from the pump and foundation. - 5
Install pump in pit and connect float switch
Lower the Liberty pump into the basin, align the inlet with the pit, and connect the float switch or sensor per the manufacturer’s instructions. Ensure there is unrestricted float movement.
Tip: Verify there’s no snagging or obstruction that could cause false triggers. - 6
Run electrical wiring and secure connections
Route wiring in a moisture-protected conduit, connect to a GFCI-protected circuit, and ground the system as required by code. Use waterproof connectors and strain relief, and avoid wiring inside the pit or in contact with wastewater.
Tip: Double-check that all connections are tight and protected from moisture. - 7
Fill pit and prime system
Fill the pit around the pump to the recommended level and ensure the pump is properly seated. Prime any lines if required by the manual and verify there are no leaks at joints.
Tip: Minimal, controlled filling helps prevent air pockets that can hinder priming. - 8
Test operation and set up auto mode
Power up and run a full cycle to verify activation, auto-switch operation, and discharge flow. Set the control to automatic mode and confirm stable operation under simulated load.
Tip: Observe for abnormal noises, leaks, or vibration and address promptly.
FAQ
Do I need a permit for Liberty sewage pump installation?
Permit requirements vary by municipality. Many jurisdictions require a permit or inspection for new pump installations and backflow prevention. Check with your local building department before starting.
Permit requirements vary by city, so check with your local building department before starting.
Can I install this pump myself, or should I hire a professional?
If you are comfortable with basic plumbing and electrical work, a careful DIY installation is possible. However, sewage pumps involve wastewater and electrical work, so consider professional help if you’re unsure.
DIY is possible for confident homeowners, but consider a pro for complex electrical or code concerns.
What maintenance does the Liberty sewage pump require post-installation?
Regular maintenance includes inspecting seals, cleaning debris, testing the float switch, and verifying the discharge line for obstructions. Schedule checks every 6-12 months and follow the manufacturer’s service guide.
Keep up with regular seal checks and cleaning to prevent failures.
Which factors determine the pump size I should choose?
Pump size is determined by anticipated wastewater load, fixture count, and vertical distance to discharge. Match the model’s flow and head rating to your home’s needs; undersizing causes frequent cycling.
Size your pump based on your load and discharge distance to avoid cycling.
What electrical requirements are essential for installation?
Use a dedicated 120V circuit with GFCI protection. Ensure proper grounding and moisture-proof connectors. Do not bypass safety devices or wire directly to damaged outlets.
Make sure you have a dedicated GFCI circuit and proper grounding.
Watch Video
Top Takeaways
- Choose the right Liberty model based on load.
- Prepare pit and discharge path before wiring.
- Use a GFCI-protected circuit and proper grounding.
- Test thoroughly after install before relying on the system.
- Schedule regular maintenance to prevent failures.