Installing an Outdoor Sump Pump: A Step-by-Step Guide
Learn how to install an outdoor sump pump with a practical, step-by-step approach. This guide covers planning, safety, tools, installation, testing, and maintenance to protect your home from water intrusion.

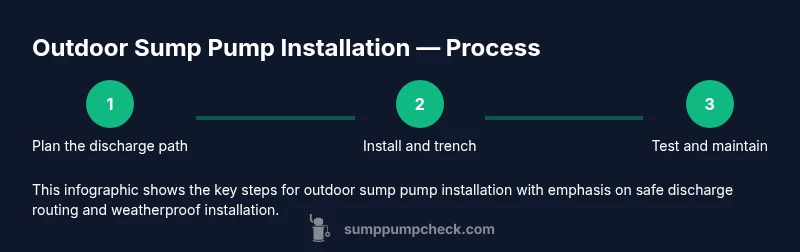
By the end of this guide, you will be able to install an outdoor sump pump that protects your foundation and prevents basement flooding. This quick answer outlines essential steps, safety caveats, and required tools to get the job done right. Follow the step-by-step section for details, including trenching the discharge path and testing the system.
Why outdoor sump pumps matter
According to Sump Pump Check, installing an outdoor sump pump is a proactive defense against groundwater intrusion in climates with heavy rainfall or melting snow. An outdoor sump pump collects water from exterior drainage systems (surface water or French drains) and discharges it away from the home's foundation. This protects basement walls, reduces hydrostatic pressure, and minimizes the risk of basement flooding during storms or rapid snowmelt. In many homes, the outdoor system also doubles as a backup when interior sump pumps fail. When sizing and placing the outdoor unit, you consider the local water table, soil drainage, and the slope of the yard. The goal is to keep water moving away from your house, not toward it. For DIYers, there are practical steps to install an outdoor sump pump safely and efficiently, with attention to electrical safety, weatherproof components, and an unobtrusive discharge path. The planning phase should also address whether you’ll need a small trench or a surface routing path, and how you’ll secure the discharge so it doesn’t become a trip hazard or a source of noise in your yard.
Planning, sizing, and permits
Before you buy anything, measure the area, study the soil, and estimate the typical water load your yard handles during peak rain events. Sizing an outdoor sump pump involves a balance: choose a pump with a flow rate appropriate for your drainage area, but not so large that it operates constantly in light rain. Check local codes to see if permits or inspections apply to exterior drainage work, especially if you’re modifying the landscape or altering grading around the foundation. Start by sketching the discharge route, keeping it downhill and away from sidewalks, windows, and utility access. If you have a French drain or a catch basin, plan how the water will enter the pump and how you’ll vent or cover the system to minimize odors and debris entry.
Safety, codes, and discharge design
Electrical safety is non-negotiable for outdoor sump pump installation. Use a GFCI-protected outlet, weatherproof enclosure, and heavy-duty outdoor-rated power cord. Ground fault protection reduces the risk of electrical shock when working near damp soil. Check your local codes for drainage discharge requirements; many areas require the water to be directed away from the foundation and not into storm drains, sewers, or neighbor’s property. Design the discharge line with a gentle slope (about 1/4 inch per foot) to prevent standing water, and install a check valve to prevent backflow. Place the discharge outlet in a location where it won’t freeze or become a nuisance to neighbors, and consider a decorative or buried routing option to keep it out of sight while maintaining accessibility for maintenance.
Selecting components and tools
Choose an outdoor-rated sump pump with a weatherproof housing and a built-in float switch. A submersible pump is common for outdoor pits, but pedestal pumps can work in dry wells. Include a check valve to prevent backflow, and select 1-1.25 inch PVC or reinforced discharge hose compatible with your pump outlet. You’ll need PVC primer and cement, pipe straps, gravel or crushed stone for bedding, and a trenching tool or shovel. Ensure you have a GFCI outlet or a dedicated outdoor circuit, plus a weatherproof enclosure for any electrical connections. Keep extras like hose clamps, sealant, and a spare check valve on hand in case you need to reseal joints.
Common mistakes and how to avoid them
One frequent mistake is undersizing the discharge path or failing to slope the line, which leads to standing water near the foundation or backflow. Another pitfall is burying electrical connections or placing the pump in a location prone to freezing; both shorten lifespan and create safety hazards. Avoid running the discharge pipe into living spaces or under fences where lawn maintenance could damage the line. Finally, skipping testing after installation can leave hidden leaks or poor seals undetected; always test with simulated rain and verify that water is expelled away from the house.
Maintenance, testing, and long-term care
Regular maintenance extends the life of an outdoor sump pump. Test the pump monthly by pouring water into the sump pit to trigger the float switch and confirm active discharge. Inspect the discharge path for blockages, cracks, or signs of freezing and repair as needed. Clean debris from intake screens and ensure the check valve remains properly oriented and free of leaks. During winter, insulate exposed piping and keep the discharge outlet clear of ice. A simple maintenance schedule, with quarterly checks, helps prevent failures during heavy rains.
Tools & Materials
- Outdoor-rated sump pump (submersible preferred)(Weatherproof housing; ensure GFCI-protected outlet is available)
- Discharge piping (PVC 1-1.25 inch or reinforced hose)(Choose smooth interior for better flow; include elbows as needed)
- Check valve(Prevents backflow and reduces cycling noise)
- Sump pit or dry well liner(If using a dry well, ensure it’s compliant with local codes)
- Gravel or crushed stone(Bed and surround the pit for drainage and stability)
- PVC primer and cement(For strong, leak-free pipe joints)
- Pipe straps and fasteners(Secure piping to prevent movement in heavy rain or wind)
- GFCI outdoor outlet or weatherproof power supply(Electrical safety is essential; avoid extension cords where possible)
- Shovel or trenching tool(For trenching and trench depth control)
- Tape measure and marker(Useful for planning discharge path length and slope)
- Pipe insulation or tape for winter(Keep discharge line from freezing in cold climates)
Steps
Estimated time: 1-3 hours
- 1
Plan the discharge path
Survey the site and map a route that exits away from the foundation, doors, and windows. Mark the target area where water will discharge, ensuring it slopes away from the house.
Tip: Use flags or spray paint to visualize the path before digging. - 2
Select pump and verify electrical
Choose an outdoor-rated pump with weatherproof housing. Install a GFCI-protected outlet or use a weatherproof, dedicated outdoor circuit to power the unit safely.
Tip: Avoid long outdoor extension cords; a dedicated circuit reduces tripping and voltage drop. - 3
Dig the pit and trench the discharge
Dig a shallow pit for the pump and trench the discharge line following the planned route. Keep the trench shallow enough to maintain a consistent slope and avoid future digging accidents.
Tip: Maintain a minimum slope of about 1/4 inch per foot to prevent pooling. - 4
Install check valve and secure piping
Attach the check valve near the pump outlet and connect the discharge line with clamps and primer/cement as needed. Securely strap pipes to prevent movement.
Tip: Position the valve to minimize air pockets and ensure easy drainage away from the foundation. - 5
Connect power and perform a test run
Plug in the pump and run water into the pit to trigger the float switch. Confirm water exits the discharge path and does not backflow toward the house.
Tip: Do a full dry-run test first, then perform a rain-simulated test outdoors. - 6
Bury and conceal the system
Cover the trench and pit with soil or landscaping materials, keeping the discharge outlet above grade and accessible. Ensure there are no trip hazards or exposed wiring.
Tip: Consider grading the area with gravel for a neat, durable finish. - 7
Finalize and establish a maintenance routine
Create a simple maintenance schedule: monthly checks during wet seasons and quarterly inspections the rest of the year. Note any signs of wear or leakage and address promptly.
Tip: Mark the date on a calendar to remind you to test and inspect regularly.
FAQ
What size sump pump do I need for outdoor use?
Outdoor use typically requires a pump sized to match the drainage area and expected water load. Choose a unit with a reliable flow rate and weatherproof construction. If in doubt, start with a mid-range model and assess performance after the first heavy rain.
Choose a pump with a reliable flow rate and weatherproof build; start with a mid-range model and adjust if needed.
Do I need an intake drain or a dry well?
An intake drain or trench system can channel groundwater to the outdoor sump pump. A dry well provides a staging area for water before discharge. Both require proper sizing and local code compliance.
An intake drain helps collect water to the pump; a dry well stores water before discharging it away from the home.
Can I bury the discharge line?
Discharge lines can be buried if allowed by local codes, but they must remain accessible for maintenance and not direct water into foundations, basements, or neighbors’ properties.
Buried lines are sometimes permitted, but ensure accessibility and proper drainage away from the house.
Is it safe to connect to the home electrical system?
Yes, but only through a weatherproof, GFCI-protected outlet or a dedicated outdoor circuit. Do not run pumps on indoor circuits or extension cords exposed to the elements.
Use a weatherproof outlet with GFCI protection; avoid indoor circuits or exposed cords.
Do outdoor sump pumps require a check valve?
A check valve prevents backflow and reduces cycling. Install it on the discharge line as close to the pump outlet as possible for best performance.
Yes, install a check valve near the outlet to stop backflow and cut down cycling.
How often should I test my outdoor sump pump?
Test monthly during wet seasons and after major rainfall events. Regular testing helps confirm proper operation and catch issues early.
Test once a month in rain season and after heavy rain to ensure it runs correctly.
Watch Video
Top Takeaways
- Plan your discharge path before digging
- Use an outdoor-rated pump with weatherproof housing
- Install a check valve and GFCI-protected power
- Test the system after installation and regularly maintain
- Keep discharge point away from foundations and entrances