How to Replace a Sump Pump Battery: DIY Guide for Homeowners
Learn how to replace a sump pump battery with step-by-step instructions, safety tips, and maintenance advice to keep your backup system ready for outages.

Learn how to replace sump pump battery to keep your backup pump ready during outages. This guide covers when to replace, what battery types fit common systems, and a safe, step-by-step process. No prior experience required, but you should have basic tools and know safety basics.
Why replace sump pump battery matters
Replacing the sump pump battery is a critical maintenance task that ensures your backup system will operate when the power goes out. A healthy battery provides reliable power to your sump pump, helping prevent basement flooding during storms. By staying proactive and replacing worn or failing batteries, you reduce the risk of a sudden sump pump failure when you need it most. This guidance from Sump Pump Check emphasizes practical steps and conservative safety practices so homeowners can handle the task with confidence.
Signs your sump pump backup battery is failing
Look for slow charging indicators, frequent discharge warnings from the charger, or a battery that cannot hold a charge after several cycles. If your backup pump seems slower during simulated tests or outages, it’s a red flag signaling the need for battery attention. Corrosion on terminals, swollen battery cases, or a cracking/softening seal also suggests retirement. Regular visual checks are a simple, early defense against unexpected failures.
How to choose the right replacement battery
Most sump pump backup systems use a 12-volt battery in a sealed enclosure. You’ll commonly encounter lead-acid or AGM (absorbed glass mat) options, with lithium variants gaining popularity for longer life and faster recharge. When selecting a replacement, verify compatibility with your model’s size, terminal type, and the hold-down bracket. Avoid overpaying for features you won’t use, and prefer batteries with solid warranty terms and local availability.
Safety first when working with sump pump batteries
Batteries can leak corrosive acid and release hydrogen gas. Always work in a well-ventilated area, wear safety glasses and insulated gloves, and keep sparks or flames away. Disconnect power to the sump pump and charger before touching battery terminals. If you notice damage or corrosion, pause the replacement and address safety before proceeding.
What you’ll need to get ready
Before you start, gather a screwdriver (Phillips and flathead), a wrench or pliers, the correct replacement battery, Battery terminal cleaner, a clean rag, safety gear, and a small brush for terminals. Have a plan for disposing the old battery according to local regulations. Keep a camera or note handy to document terminal orientation for the reassembly.
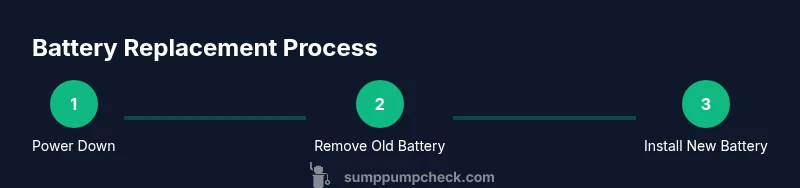
Replacing the battery: step-by-step overview
This section provides a structured workflow you’ll follow in the detailed steps that come next. The aim is to minimize downtime and ensure a solid connection between the new battery, terminals, and the charger. A clean workspace, clear labeling, and careful handling help prevent mistakes. Always confirm the new battery matches your sump pump’s electrical specifications.
Replacing the battery: key actions to ensure a solid connection
Ensure the new battery sits securely in the hold-down bracket and that all terminal connections are snug and clean. Apply a small amount of terminal grease or anti-corrosion spray to prevent future corrosion. Re-check polarity before reconnecting any cables and confirm the charger is set to the correct voltage for the battery type.
Testing the system after replacement
Reconnect the power supply and run a controlled test to verify the backup battery feeds the sump pump correctly. Simulate a minor outage by briefly cutting the power and observing the pump activation. If your system includes a float switch, test its trigger to ensure it starts promptly. Document the test results for future reference.
Battery disposal and recycling guidelines
Do not discard old batteries with regular trash. Take the battery to an approved recycling center or a hazardous-waste facility. Clean the battery compartment to remove any residue and store the old battery in a safe location away from kids and pets until disposal. Proper disposal protects the environment and complies with local regulations.
Maintenance and replacement scheduling
Create a simple maintenance calendar that includes quarterly visual checks, a semi-annual battery test, and an annual evaluation of battery performance. Keeping a log helps you spot gradual degradation and plan replacements before a failure occurs. Regular maintenance also improves overall system reliability.
Final checklist before a storm season
Confirm the backup battery is installed correctly, the charger is functioning, and the battery is holding a charge. Confirm the hold-down bracket is secure and that there are no loose cables. Review the water table and sump conditions in your area, and ensure a mop-up plan is ready in case of a power outage.
Tools & Materials
- Screwdriver set (Phillips and flathead)(Philips #2 for most brackets)
- Wrench or pliers(For securing terminals)
- Replacement 12-volt backup battery(Match size to holder)
- Battery terminal cleaner or brush(Remove corrosion before reconnect)
- Safety goggles(Protect eyes from splashes or debris)
- Work gloves(Insulated and chemical-resistant)
- Rag or towels(Mop up any spills)
- Multimeter (optional)(Check voltage if you have one)
- Old battery disposal bag or container(Transport old battery safely)
Steps
Estimated time: 45-60 minutes
- 1
Power down & prepare
Turn off the primary power to the sump pump and unplug the charger. This eliminates the risk of short circuits while you work. Open windows or ensure the area is ventilated to avoid gas buildup.
Tip: Pro tip: take a quick photo of current wiring before disconnecting any cables. - 2
Locate the backup battery
Find the battery compartment in the sump pump area. Confirm the model and confirm the battery type matches your replacement. Remove any bracket or hold-down hardware as needed.
Tip: Pro tip: keep screws organized in a labeled container. - 3
Disconnect old battery
Disconnect the negative terminal first, then the positive. Keep moves deliberate to avoid accidental contact with metal tools. Place the old battery in a safe disposal bag.
Tip: Pro tip: wear safety gloves to protect against acid contact. - 4
Remove and inspect
Take out the old battery and inspect terminal posts for corrosion or damage. Clean the posts with the terminal brush. If corrosion is present, lightly treat with terminal cleaner before connecting the new battery.
Tip: Pro tip: wipe moisture from the area to prevent slippage during installation. - 5
Install new battery
Place the new battery in the holder, reconnect positive first, then negative. Ensure all cables are snug and the terminals clean. Reattach the hold-down bracket securely.
Tip: Pro tip: verify polarity with a quick visual check before powering on. - 6
Reconnect & power on
Reconnect the charger and restore power to the sump pump. Allow the new battery to reach a full charge according to the manufacturer’s guidelines.
Tip: Pro tip: keep the charger in a well-ventilated area to avoid heat buildup. - 7
Test the system
Trigger a test by simulating a power outage and observing the pump’s response. Ensure the backup battery powers the pump reliably and the float switch activates properly.
Tip: Pro tip: document test results for your maintenance log. - 8
Complete and clean up
Return any hardware, clean the area, and store tools. Dispose of packaging and the old battery according to local regulations.
Tip: Pro tip: remove any moisture from the floor to prevent slips.
FAQ
Do I need to disconnect power to replace the battery?
Yes. Disconnecting power minimizes risk of shocks and sparks. Always follow the manufacturer’s safety instructions and ensure the area is well ventilated before handling the battery.
Yes. Turn off power and unplug the charger to stay safe while replacing the battery.
What type of battery should I use for my sump pump backup?
Most backups use a 12-volt sealed lead-acid or AGM battery. Check your pump model for compatibility and terminal type before purchasing.
Most backups use a 12-volt sealed lead-acid or AGM battery; check your model for compatibility.
How often should I replace a sump pump battery?
Inspect the battery regularly for signs of wear and test the backup battery annually or after severe outages. Replace when charging or running performance declines.
Test the backup annually and replace when performance declines.
Can I replace the battery myself or should I hire a pro?
DIY is feasible for standard setups if you follow safety steps and use the right tools. If you’re unsure about wiring or bracket fit, a professional service is a safer choice.
DIY is possible if you follow safety steps; otherwise, hire a pro.
What are signs of a bad battery besides not holding a charge?
Be aware of corrosion on terminals, a swollen case, or a battery that cannot reach full charge. These indicate replacement is needed and potential safety risks.
Look for corrosion, swelling, or inability to hold a charge as warning signs.
How should I dispose of an old sump pump battery?
Take the old battery to a recycling center or hazardous waste facility. Do not dispose of it with regular trash.
Recycle the old battery at an appropriate facility; do not throw it away.
Watch Video
Top Takeaways
- Replace the backup battery promptly when wear is evident.
- Use the correct battery type and verify compatibility.
- Test the system after replacement to confirm operation.
- Follow safety gear and disposal guidelines for batteries.
- Maintain a replacement schedule to avoid outages.