Pro Series 2200 Sump Pump Battery Replacement: A Practical Guide
Learn how to perform pro series 2200 sump pump battery replacement safely with a clear, step-by-step approach. This guide from Sump Pump Check covers battery selection, installation, testing, and maintenance.

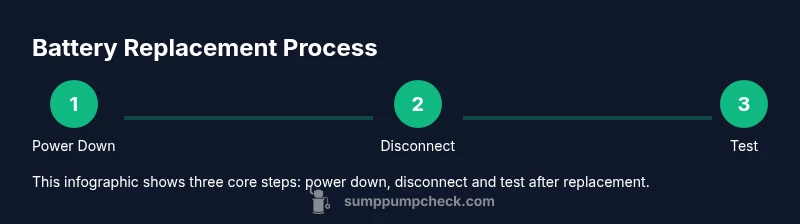
Learn how to perform a battery replacement for the Pro Series 2200 sump pump. This quick guide shows how to identify the right battery, safely disconnect the old unit, install a fresh battery, and test the system. You’ll need basic hand tools, a compatible 12V AGM or lead-acid battery, and a dry, ventilated workspace.
Why battery replacement matters for the Pro Series 2200
As a homeowner, understanding the importance of timely battery replacement for the Pro Series 2200 sump pump is critical. A healthy battery ensures your backup system kicks in during power outages and heavy rainfall, protecting your basement from flooding. According to Sump Pump Check, regular battery maintenance extends system life and reduces unexpected downtime. Pro series 2200 sump pump battery replacement is not optional maintenance; it’s a core part of keeping your sump-pump setup reliable. In practice, a well-maintained battery pack can mean the difference between a dry basement and a costly water event. This section frames why battery health should be routinely checked and how replacement timing aligns with seasonal risk.
Battery basics for sump pumps
Sump pumps rely on 12-volt batteries to provide backup power when mains fail. The two most common types are sealed AGM (absorbent glass mat) and flooded lead-acid batteries. AGM batteries offer maintenance-free operation and better resistance to vibration—useful in basements where the unit may be mounted on uneven surfaces. Flooded batteries tend to be less expensive but require proper venting and regular water top-ups. When selecting a battery for a Pro Series 2200, verify compatibility with the model’s connector type and size, and confirm the battery’s cold-cranking amps (CCA) rating matches the unit’s requirements. Always choose a battery with a reputable warranty and ensure it’s stored upright and upright and secured to prevent movement during operation.
Choosing the right replacement battery
For pro series installations, aim for a 12V deep-cycle AGM or lead-acid battery that fits the housing and terminal layout of your Pro Series 2200. AGM batteries are preferred for DIY homeowners due to their lower maintenance and spill-proof design. Check the manufacturer’s manual for recommended amp-hour (Ah) ratings and ensure the battery dimension, terminal type, and terminal positions align with the unit. When possible, select a battery with a higher CCA rating than the minimum requirement to provide reliable cold-weather performance. If you’re unsure about compatibility, contact the manufacturer’s support or a qualified technician. Remember: using a non-compatible battery can lead to poor performance or damage to the unit.
Safety considerations before replacement
Battery work in basements requires attention to personal safety and chemical hazards. Wear eye protection and chemical-resistant gloves. Work in a well-ventilated area to avoid inhaling any fumes if you’re dealing with flooded lead-acid batteries. Keep a battery-insulated mat or tray to catch any spills. Disconnect power to the sump pump and remove any conductive jewelry to prevent accidental short-circuits. Never place tools on top of the battery, and avoid leaning directly over the terminals. If you notice corrosion on terminals, clean it with a damp baking-soda solution and a non-metal brush after you disconnect the battery.
Pre-replacement inspection and diagnostics
Before removing the old battery, inspect the current battery’s label for voltage and date of manufacture and check the backplate for any signs of swelling or damage. Use a voltmeter to measure resting voltage; a healthy lead-acid battery typically shows around 12.6V when fully charged. If the battery reads significantly lower or shows visible damage, plan to replace it. Verify the Pro Series 2200’s battery compartment remains clean, dry, and free of debris. Document the existing wiring and take photos so you can reassemble correctly. If you’re replacing a flooded cell battery, ensure you have adequate ventilation and a plan to refill electrolyte if required.
Installing the battery inside the Pro Series 2200
Place the new battery into the housing with the correct orientation so that terminal posts align with the unit’s connector harness. Connect the positive terminal first, then the negative terminal to minimize the risk of a short circuit. Ensure all connectors are snug, and reinstall any retaining clips or straps that secure the battery. If your unit uses a battery tray or spacer, reinstall it to prevent movement during operation. Use dielectric grease or terminal protectant spray to reduce corrosion on exposed metal components. Confirm there are no loose wires or pinched cables that could affect the battery’s performance.
Post-install testing and charging
With the battery connected, restore power to the sump pump and perform an initial test run to verify that the backup system engages properly. If the unit has a built-in self-test, trigger it and observe the indicators. Allow the battery to reach a full charge—most AGM batteries require several hours under a trickle charger. Monitor voltage during charging; once at around 12.6V or higher (as per your battery type), the unit should be ready for operation. If you’re using a smart charger, verify there are no fault codes. Keep an eye on temperature; a warm or hot battery during charging warrants a pause and review of connections.
Maintenance and long-term care
Establish a routine for periodic checks: inspect battery terminals for corrosion, verify the unit’s test run success, and confirm the backup battery remains within its warranty window. Schedule annual or seasonal checks depending on local climate and basement humidity. Replace aging batteries proactively—many manufacturers recommend replacement every 3–5 years, though actual life depends on usage and temperature. Store spare batteries in a cool, dry location away from heat sources. Keep a maintenance log noting the replacement date, model, Ah rating, and test results.
Common mistakes to avoid
Avoid mixing battery chemistries or attempting to reuse an old battery wired to a new one. Do not bypass safety features or skip the unit’s manual procedures; this can void warranties and create electrical hazards. Never install a battery with damaged terminals or swelling casing. Avoid over-tightening terminal nuts, which can damage posts and connections. Do not work on the unit if there is standing water near the work area, and never operate the sump pump with an open battery compartment.
Disposal and warranty considerations
Dispose of old batteries at approved recycling centers. Lead-acid batteries are highly recyclable, and many local municipalities provide take-back programs. Check warranty terms before replacement—some manufacturers require using approved battery models to retain coverage. Keep receipts and model numbers in your maintenance log for future warranty claims. If the unit is under warranty, contact the manufacturer or your installer for guidance on battery compatibility and service procedures.
Tools & Materials
- 12V AGM or lead-acid replacement battery(Choose a sealed AGM for maintenance-free use or a flooded lead-acid if venting is available; confirm compatibility with Pro Series 2200 model.)
- Safety gloves(Nitrile gloves recommended; eye protection advised during handling.)
- Screwdriver set (Phillips and flat-head)(Include #2 Phillips and small flat head; ensure drivers have insulated handles.)
- Wrench or socket set(Common sizes range from 6mm to 12mm depending on terminal nuts.)
- Multimeter or voltmeter(Optional but helpful to verify resting voltage before and after replacement.)
- Insulated pliers(Useful for safely handling connectors and avoiding shorts.)
- Terminal protector spray or dielectric grease(Reduces future corrosion on exposed terminals.)
- Maintenance manual or compatibility chart(Have the Pro Series 2200 manual handy for model-specific guidance.)
Steps
Estimated time: 60-75 minutes
- 1
Power down and unplug the unit
Turn off the main power to the sump pump and unplug the unit. If you have a secondary power source or a battery backup switch, ensure it is also disconnected. This prevents any accidental startup while you’re handling the battery.
Tip: Take a quick photo of the wiring layout before disconnecting to aid reassembly. - 2
Open battery access and locate the battery
Remove any covers or panels to access the battery compartment. Confirm you’re looking at the backup battery, not a primary power cell. If the unit is mounted, support the housing to avoid movement as you work.
Tip: Ensure the workspace is dry and well-lit; use a flashlight to inspect terminals closely. - 3
Disconnect negative then positive cables
Loosen and remove the negative terminal first to avoid short circuits, then disconnect the positive terminal. Keep track of which cable goes where to simplify reattachment. Do not let the wrenches touch both terminals at the same time.
Tip: Use a non-metal tool to pry if terminal clamps are tight; avoid metal jewelry during this step. - 4
Remove the old battery
Lift the battery from its tray and place it on a non-conductive surface. Check for any signs of swelling, damage, or leaking, which would require immediate disposal. Do not tilt or rock the battery excessively to prevent spills.
Tip: If the battery is heavy, use a small dolly or helper to prevent strain. - 5
Install the new battery
Place the new battery in the same orientation as the old one, ensuring compatible terminal positions. Reconnect the positive terminal first, then the negative. Tighten clamps evenly without over-tightening.
Tip: Double-check that the battery is seated securely to prevent movement during pump operation. - 6
Reconnect power and secure wiring
Reattach any covers or panels, reattach all wires, and ensure none are pinched. Restore power to the unit and verify the indicators or display show normal status. If you have a charger, begin a controlled charge.
Tip: Apply dielectric grease to terminals to minimize future corrosion. - 7
Run a test and verify battery health
Run a self-test if available or trigger a test mode to confirm proper engagement of the backup system. Check for erratic noises or abnormal vibrations. If the test fails, recheck connections and voltage readings.
Tip: Monitor for warm components during the initial test; if anything seems abnormal, shut down and inspect again. - 8
Finalize with charging and documentation
Allow the new battery to reach full charge, following the charger’s indicated duration. Record the battery model, date of install, and test results in your maintenance log for future reference. Schedule the next replacement window based on manufacturer recommendations.
Tip: Keep the charger indoors away from moisture and extreme temperatures to maximize battery life.
FAQ
Do I need a licensed electrician to replace the backup battery on a Pro Series 2200?
Generally, battery replacement can be a DIY task if you follow safety steps and disconnect power completely. If you encounter complex wiring or uncertain ratings, consult a qualified technician or the manufacturer.
You can usually replace it yourself if you stay safe and follow the manual; otherwise consult a technician.
Can I use any 12V AGM battery for replacement?
Use a 12V battery that matches the unit’s terminal layout and capacity requirements. AGM is often preferred for maintenance-free operation, but ensure compatibility with your Pro Series 2200.
Choose a 12V AGM that fits the terminals and is compatible with your model.
How do I know when a replacement is needed?
If resting voltage is consistently low, if the unit fails to engage during tests, or you see swelling or leakage, replacement is warranted. Regular testing helps catch issues early.
Low voltage or failures during test indicate replacement is due.
Is it safe to replace a battery in a basement sump pump?
Yes, with proper ventilation, PPE, and dry surroundings. Keep liquids away from electrical outlets and ensure the area is well-lit and dry before starting.
Yes, but make sure you’re in a safe, dry, well-ventilated area.
What about disposing of old batteries?
Recycle old batteries at approved centers; many municipalities offer take-back programs for lead-acid and AGM batteries. Do not dispose of them in regular trash.
Recycle old batteries at approved centers; don’t trash them.
Will replacing the battery affect the warranty?
Warranty terms vary by manufacturer. Use approved battery types and follow official replacement procedures to avoid voiding coverage.
Follow the official procedure to keep warranty intact.
Watch Video
Top Takeaways
- Identify battery type and compatibility before replacement
- Follow safety protocols to prevent chemical exposure or shorts
- Install with correct orientation and secure mounting
- Test thoroughly and document the maintenance activity
- Plan future replacements to maintain backup reliability