Lift Sump Pump Safely: DIY Maintenance Guide
Learn how to lift a sump pump safely for maintenance with a step-by-step guide, essential tools, safety tips, and practical troubleshooting from Sump Pump Check.

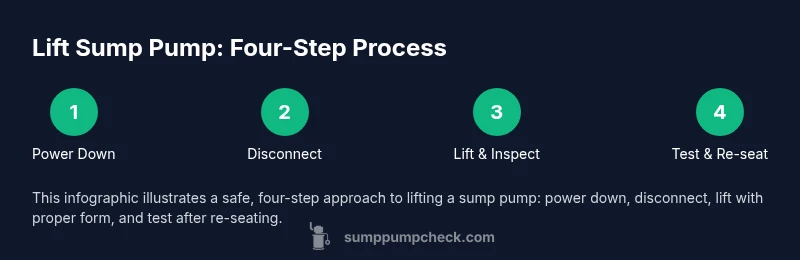
By following this guide, you will lift a sump pump safely for routine maintenance. It covers planning, power-off steps, proper lifting technique, how to inspect seals and float switches, and how to re-seat and test the unit after reinsertion. You'll know exactly which tools you need and how to coordinate with a helper. The approach is practical, repeatable, and designed for DIY homeowners.
Why lifting a sump pump is a maintenance task
Lifting a sump pump is a common maintenance activity that lets you clean the pump housing, inspect seals and the float switch, and verify the discharge path for leaks or blockages. When done correctly, lifting gives you a clear view of the pit, helps you reseat the pump with a fresh gasket, and reduces the likelihood of hidden wear turning into a failure during a heavy rain. According to Sump Pump Check, regular maintenance and safe handling reduce the risk of clog-related failures and backflow issues. The goal is to create a dry, accessible workspace, identify any corrosion or wear, and perform a minimal-risk reseat that restores proper operation. The exact steps can vary by model, but the core principles—power-down, stable support, clean connections, and a careful lift—are universal. If corrosion, a cracked housing, or a damaged float switch is observed during the lift, plan for replacement rather than reassembly. Document the process with photos to track wear over time and communicate with a professional if you decide to replace components later.
Safety first: planning and precautions
Before you touch the pump, plan the lift around safety. Power off the circuit breaker feeding the sump pump and unplug if accessible. Wear safety goggles and gloves, and ensure the area around the pit is dry. Use a helper for stabilization and lifting, especially if your unit is heavy or located in a cramped space. Place a bucket or basin to catch any residual water and keep towels or rags handy for cleanup. Keep a clear exit path and avoid twisting the spine while lifting. Never attempt a lift if you are unsure about the electrical connections or if you notice exposed wiring. Sump Pump Check Analysis, 2026 notes that a cautious, well-planned approach minimizes risk and protects your home from water damage.
Tools and materials overview
Having the right tools prepared before you start saves time and reduces risk. A basic toolkit for lifting a sump pump includes safety goggles, gloves, a non-contact voltage tester, a bucket for water, towels for spills, a helper for lifting, and basic hand tools (screwdriver or pliers) to detach hoses or clamps if needed. If you anticipate replacing seals, have a replacement gasket kit on hand. A dry, well-lit area improves visibility and reduces errors. This section is a quick reminder that the full Tools & Materials list is available in the dedicated block below, but you should confirm you have the essentials before you begin. By preparing properly, you minimize surprises during the lift.
Step-by-step overview (high level)
The following steps outline a safe, repeatable approach to lifting a sump pump for maintenance. You’ll learn how to safely power down, access the unit, disconnect piping, lift with proper form, inspect components, re-seat, and test the system. Each step emphasizes safety, control, and a methodical check of seals and fittings. For most homes, this process takes about an hour, depending on pit access and pump model. Stay organized, document changes with photos, and keep a clear workspace to prevent accidents.
Step 1: Prepare the area and power down
In a dry, well-lit space, turn off the circuit breaker feeding the sump pump and unplug the unit if possible. Use a non-contact voltage tester to confirm there is no live current near the pump or its electrical outlet. Clear the pit area and surrounding floor of debris and items that could slip or drop into the water. Place a bucket to catch residual water and have towels ready for any splashes. If you have a helper, brief them on their responsibilities and signaling for assistance. A calm, deliberate approach reduces risk during the lift.
Step 2: Disconnect discharge piping and any fittings
Carefully detach the discharge hose or piping from the pump outlet. If a check valve is present, remove or loosen it so the pump can be moved without backflow. Cap or plug the open outlet to prevent water from splashing or leaking into unintended areas. Take photos of the connections before removal so you can replicate them during reassembly. Keep track of screws or clamps by placing them in a labeled container. This step minimizes surprises when you re-seat the pump.
Step 3: Loosen mounting hardware and lift the pump
Loosen mounting bolts or screws that secure the pump to the pit or stand. With a stable stance and a straight back, lift the pump slowly using your legs, not your back. If the unit is heavy, use a partner to share the lift. Support the base to prevent tipping during the ascent. Maintain control of the pump to avoid dropping it into the pit. Clear communication with your helper is essential for a smooth lift.
Step 4: Inspect, clean, and check seals
Once the pump is out, inspect the gasket or seal at the base for cracks or erosion. Remove any debris from the pump housing and the pit floor. Check the float switch for proper movement and ensure the impeller turns freely. Wipe down surfaces with a dry cloth and keep metal parts dry to prevent rust. If you notice corrosion, replace the seals or consider a full pump replacement depending on the model and condition.
Step 5: Re-seat, reconnect piping, and secure
Lower the pump back into the pit and align it with the mounting hardware. Reattach the discharge piping and any clamps, ensuring a watertight fit. Reinstall the check valve if used, and confirm all fasteners are snug but not overtightened. Restore power and reconnect the unit to the electrical supply if it was unplugged. Check the wiring and ensure there are no loose connections or exposed conductors. A careful re-seat reduces the chance of leaks and backflow.
Step 6: Test operation and finalize maintenance
With everything reconnected, restore power and run the pump to verify proper operation. Observe for leaks around seals, gaskets, and hose connections. Listen for unusual noises and watch the float switch to ensure it cycles correctly with rising water. If you see leaks or smoke or if the unit seems unstable, power down immediately and reassess. Document the maintenance steps and keep notes for your next service window.
Maintenance reminders and best practices
Schedule regular maintenance checks, ideally annually, and after severe weather, to ensure the sump pump remains reliable. Keep the pit clean and free from debris that can hamper the impeller. Maintain a simple checklist for quick reviews, including power-off verification, seal integrity, float switch function, and discharge piping condition. The more consistent your maintenance routine, the lower your risk of unexpected failures.
Tools & Materials
- Non-contact voltage tester(Verify power is off to the sump pump outlet and switch.)
- Safety goggles(Protect eyes from splashes and debris.)
- Gloves(Keep hands safe when handling electrical and metal parts.)
- Safety boots or sturdy closed-toe shoes(Prevent slips on wet surfaces.)
- Bucket or basin(Catch residual water during lift.)
- Towels or rags(Dry work area and clean spills.)
- Screwdriver or nut driver(Detach hoses/clamps if needed.)
- Pliers (slip-joint)(Loosen clamps or fittings.)
- Replacement gasket or seal (optional)(Have on hand if reseating requires a seal change.)
Steps
Estimated time: 60-90 minutes
- 1
Power down and verify no voltage
Turn off the circuit breaker feeding the sump pump and unplug if accessible. Use the voltage tester to confirm the area is de-energized. This prevents shock and arcing while you work.
Tip: Double-check the main power switch and test around the pump housing. - 2
Prepare the area and secure helpers
Clear the space, place a bucket for water, lay towels on the floor, and set up good lighting. Brief your helper on signals and roles to keep the lift controlled and safe.
Tip: Have a phone nearby in case of emergency. - 3
Disconnect discharge piping
Carefully detach the discharge hose and remove any check valve if present. Cap the outlet to prevent backflow and take photos of the setup for accurate reassembly.
Tip: Label hoses/clamps so you return to the original layout. - 4
Loosen mounting hardware and lift
Loosen the mounting screws or bolts, then lift the pump slowly using your legs while your helper supports the opposite side. Keep the pump level to avoid straining the seal.
Tip: Keep your back straight and avoid twisting the torso. - 5
Inspect seals and clean
Examine the base gasket for wear or cracks, remove debris from the pit, and check the float switch for free movement. Wipe surfaces dry and inspect the impeller housing as you go.
Tip: Document wear with photos for future reference. - 6
Re-seat and reconnect
Lower the pump back into the pit, align the mounting, and reattach the discharge line and clamps. Ensure a watertight seal at all connection points.
Tip: Don’t overtighten fittings to avoid cracking seals. - 7
Test run
Restore power and run the pump. Watch for smooth cycling, leaks, and proper water removal. If issues appear, power down and reassess the setup.
Tip: Have towels ready to catch any initial drips. - 8
Finalize maintenance
Record the maintenance activity, set reminders for annual checks, and tidy the workspace. Store tools and replace any worn components as needed.
Tip: Create a simple checklist for next year.
FAQ
Is it safe to lift a sump pump while it’s still connected to power?
No. Always shut off power at the breaker and unplug the unit before handling it. Use a voltage tester to confirm no power is present.
Always shut off power and unplug before handling the pump.
What signs indicate my pump needs replacement rather than a lift-and-clean?
If the pump is loud, stalls, leaks, or the impeller shows visible wear, replacement is often a better option than repeated lifting.
Listen for noise, leaks, or wear; replacement may be necessary.
How often should I lift a sump pump for maintenance?
Inspect and lift at least once a year, or whenever you notice reduced pumping performance or unusual noises.
Check it annually or when performance drops.
What tools are essential for lifting a sump pump?
Safety gear, a non-contact voltage tester, a bucket, towels, and basic hand tools to detach hoses or clamps.
Have safety gear, a tester, a bucket, towels, and basic tools.
Can I lift a sump pump by myself, or should I hire a pro?
If you have a dry, accessible space and basic comfort with electrical work, a careful DIY lift with a helper is feasible. For large units or uncertain conditions, hire a pro.
DIY with help if you’re comfortable with basic electrical work; otherwise hire a pro.
What safety steps are most critical during the lift?
Power off first, keep the area dry, maintain a stable stance, and use proper lifting form to protect your back.
Power off, stay dry, and lift with proper form.
Watch Video
Top Takeaways
- Plan and power down before touching the pump.
- Lift with proper form to protect your back.
- Inspect seals, float switch, and discharge fittings.
- Test operation and schedule annual maintenance.