Is It Okay for My Sump Pump to Be Dry? An Urgent Troubleshooting Guide
Urgent guide to diagnose why a sump pump is dry, with safe steps, common causes, and prevention tips to protect your basement. Quick checks, a diagnostic flow, step-by-step fixes, and professional help guidance.

Is it ok for my sump pump to be dry? In most cases, dryness means the pump isn’t actively handling water right now, but it isn’t inherently dangerous. The quickest fix is to verify power, settings, and discharge paths, and to watch for unexpected water rise. If the basement could flood or the water level is rising, stop using the pump and seek professional help. This guide from Sump Pump Check walks you through safe, practical steps to diagnose and prevent future dryness.
Is it ok for my sump pump to be dry? Understanding the core question
If you’ve noticed your sump pump housing or pit appears dry when it should be active, you’re asking a common, urgent question: is it ok for my sump pump to be dry? The short answer is that dryness by itself isn’t automatically dangerous, but it is a red flag that deserves quick investigation. The question from homeowners often comes with a sense of urgency: will the basement flood if the pump isn’t actively pumping water? The reality is more nuanced. A dry pump can mean it’s not needed right now, or it can indicate a problem with power, the float switch, or the discharge line. In many cases, a dry pump can still be safe if the groundwater isn’t rising, but you should not ignore it. The Sump Pump Check team emphasizes proactive checks to determine whether you’re dealing with a harmless pause or a developing failure. In this guide we’ll walk through the practical steps to assess dryness safely, remedy common causes, and prevent future dryness.
Common causes of a dry sump pump
A dry sump pump can result from several conditions. Power issues are common: a tripped breaker, a blown fuse, or an unplugged outlet will stop pumping even if water is present elsewhere. The float switch can fail or become stuck, preventing the unit from starting when water rises. A blocked discharge line or a misaligned check valve can stop water from leaving the pit, making dryness feel like a non-issue even if water exists in the pit culprit sources. Another frequent factor is a sump pit that is unusually empty due to seasonal drought or minimal groundwater influx, which isn’t technically dangerous but may mask a problem if a heavy rain event hits. Finally, improper pump sizing or a worn impeller can reduce the pump’s ability to move water during a surge, leading to dryness during critical moments.
Immediate checks you can do in minutes
Start with the basics to rule out simple causes. First, verify the power: check the outlet, inspect the cord for damage, and confirm the GFCI has not tripped. Next, listen for the pump when water is present and ensure the float switch moves freely—clear any debris from the pit that could impede motion. Check the discharge pipe for kinks or blockages and inspect the check valve for proper operation. If you have a backup battery or a secondary pump, test it in place to compare performance. Finally, confirm the sump pit contains water and that the pit is sized appropriately for your basement’s typical groundwater load. If any of these checks reveal an issue, address it before the next heavy rain event.
How dryness relates to basement flooding and drainage
Dryness in a sump pump doesn’t always imply the basement is safe. A dry pump may indicate no current water load, but that can change rapidly if rainfall intensifies or groundwater rises. Drill down on drainage capability: poor dam or yard grading, clogged gutters, or blocked drainage pipes can all back up water into the pit when it rains, causing a later surge that overwhelms an already compromised pump. Even if the pump seems dry today, ensure the discharge path leads away from the home’s foundation and that the exterior drainage is functioning. Regularly inspecting the sump pit, drain tiles, and backup options is essential to prevent sudden basement flooding during storms.
Diagnostic flow overview for the dryness symptom
A dry pump can stem from multiple root causes. Start by confirming power at the outlet and testing the pump with a known water source. If power is fine, inspect the float mechanism and wiring for wear. If the float and wiring are good, trace the discharge line for clogs or backpressure. If all physical components check out but dryness persists, evaluate groundwater patterns and consider seasonal changes. Document each finding so you can share details with a technician if needed.
Step-by-step fixes for the most common cause
If the most likely cause is a stuck float switch, you can address it by cleaning the switch cage, freeing any debris, and ensuring the float can move freely. For a discharge blockage, safely remove any obstruction and verify that the outlet leads away from the foundation. If the outlet or breaker is at fault, reset or replace the circuit as needed, following safety guidelines. For a low-water condition, ensure that the pump is correctly positioned and the switch is compatible with the pit size. If you suspect wear or sizing issues, avoid attempting major repairs yourself and seek professional guidance.
Safety first: warnings and best practices
Always turn off power before inspecting electrical components. Do not run water through the system for testing if you’re unsure about drainage pathways. Wear eye protection when handling debris in the pit, and avoid standing in water near electrical sources. If you smell burning plastic or notice scorched wiring, discontinue testing immediately and call a licensed plumber or electrician. Remember that working near sump pits involves both water and electricity, so safety is non-negotiable.
Maintenance to prevent dryness in the future
Establish a routine: test the sump pump monthly, clean debris from the pit quarterly, and replace worn parts as needed. Keep gutters clear and ensure downspouts direct water away from the foundation. Consider a backup system for heavy rainfall weeks and schedule professional inspections annually to assess pump capacity and pit integrity. Regular maintenance reduces the risk of an unexpected dry condition during storms and helps protect your basement from future water damage.
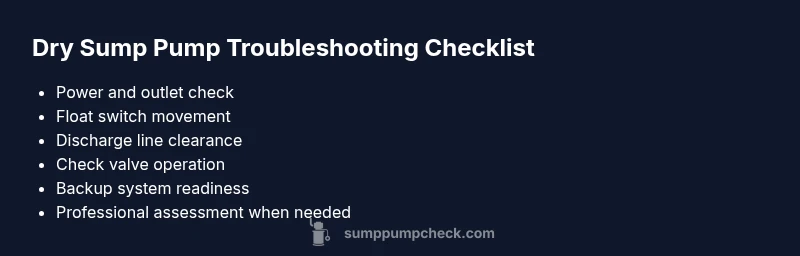
Quick-reference troubleshooting cheat sheet
- Confirm power, outlet, and switch operation
- Inspect float movement and remove debris
- Check discharge line and valve for blockages
- Test backup options and confirm separate power sources
- If any step reveals a problem you can’t safely fix, contact a professional
- Re-test after completing fixes to confirm dryness is resolved
Steps
Estimated time: 25-40 minutes
- 1
Check power and outlet health
Ensure the sump pump is plugged in and the outlet has voltage. Verify the breaker or GFCI hasn’t tripped. If the outlet is dead, reset the breaker or replace the outlet as needed. This step eliminates the most common cause of dryness.
Tip: Test the outlet with a simple lamp to confirm power before touching the pump cord. - 2
Inspect float switch and cage
Open the pit and observe the float’s movement. Remove debris that may obstruct lift. Ensure the float rises freely as water fills the pit. A sticky float is a frequent cause of a dry pump.
Tip: Gently shake the float to confirm it moves without binding. - 3
Examine discharge path and check valve
Trace the discharge pipe from the pump to outside the home. Look for kinks, bends, or a blocked opening. Verify the check valve is properly installed and not stuck.
Tip: Pour a small amount of water into the pit to test if the pump activates and water is expelled through the discharge. - 4
Prime and test the pump
If you’ve cleared blockages and the pump still doesn’t start when water rises, perform a controlled test by adding water to the pit to trigger the switch. Listen for the motor and watch the water exit the discharge.
Tip: Only perform a test if your area is safe and dry enough to avoid electrocution. - 5
Evaluate the need for backups
If the primary pump struggles during heavy rain, consider a battery backup or secondary pump. Backups reduce the risk of basement flooding when the main unit fails.
Tip: Backups require separate power sources; ensure they are compatible with your system. - 6
Know when to call a professional
If the pump runs but no water moves, or you smell burning plastics, stop troubleshooting and contact a licensed plumber or electrician. Complex electrical or pump-sizing issues require expert assessment.
Tip: Document what you observed and any tests you ran to share with the pro.
Diagnosis: Dry sump pump in operation with little to no water entering the pit
Possible Causes
- highPower issue (outlet, breaker, or switch failed)
- mediumFloat switch stuck or damaged
- mediumDischarge line blocked or valve malfunction
- lowInsufficient groundwater inflow or inappropriate pit size
Fixes
- easyReset the breaker, replace blown fuse, and verify the outlet is live
- easyClean/inspect the float and test movement; free any debris in the cage
- easyUnblock the discharge line and replace faulty check valve if necessary
- mediumReplace faulty float switch or recalibrate system for pit size
- hardConsult a professional for pump sizing or pump replacement if issues persist
FAQ
Why is my sump pump dry when I expect it to be pumping water?
A dry pump usually means there is no current water load or a fault in the system. Start with power and float checks, then inspect the discharge path. If the problem persists after these basics, consult a professional to avoid basement flooding.
A dry pump often just means there’s no water load right now, but it can also point to power, float, or discharge issues. Start with the basics and call a pro if needed.
Can a dry sump pump cause basement flooding later?
If the dryness hides a blockage or a faulty check valve, a heavy rain can overwhelm the system later. Regular checks help ensure the pump will respond when water rises.
A dry pump can still fail when water arrives, so keep up with checks and maintenance.
Should I run a dry sump pump to test it?
Testing a dry pump is acceptable with caution, but avoid forcing water through hidden lines. Use a controlled test only if you can safely observe the discharge path.
Testing is okay, but be careful and ensure safety first.
When is it essential to replace rather than repair the pump?
If the pump is old, frequently jammed, or undersized for your drainage needs, replacement is often more reliable than repeated repairs.
If it’s old and unreliable, replacement is usually best.
How often should I test my sump pump?
Test during dry periods and before storm seasons to establish a baseline and catch issues early.
Test it regularly, especially before storms.
Can I install a backup sump pump myself?
Backup pumps involve electrical work and proper wiring; if you’re unsure, hire a professional to ensure safe, code-compliant installation.
Backup pumps can be DIY, but electrical work is risky—better to hire a pro.
Watch Video
Top Takeaways
- Identify cause quickly with basic power checks
- Inspect and free the float mechanism
- Clear discharge path and verify valve function
- Consider a backup pump for storm reliability
- Professional help is advised for sizing or electrical concerns