Sump Pump for Flooding: Installation, Maintenance, and Troubleshooting
Learn how to prevent basement flooding with a properly sized sump pump. This step-by-step guide covers sizing, installation, maintenance, and troubleshooting for homeowners.

You can prevent basement flooding by choosing and installing a proper sump pump system, sizing it to your home's needs, and connecting it to a reliable power source and discharge line. This guide covers installation, maintenance, and troubleshooting to keep water out of your living space. Key prerequisites include a dry well or pit, a properly sized pump, a check valve, backup power options, and a maintenance plan to test monthly.
Introduction to Sump Pump for Flooding
Flooding in basements is a common problem in many climates. A properly chosen and installed sump pump for flooding can dramatically reduce water damage and preserve your home's structure. According to Sump Pump Check, homeowners who install a dedicated sump pump with correct sizing and discharge planning see fewer flood events and less secondary damage after storms. The Sump Pump Check team found that most failures come from undersized pumps, improper discharge routing, or missing maintenance. This guide explains how to assess your needs, select the right pump, install it correctly, and maintain it so your basement stays dry even during heavy rainfall.
When you start, focus on two essentials: a pit (sump) that collects groundwater and a pump that moves that water away from your foundation. The goal is to keep the collected water from reaching living spaces or causing hydrostatic pressure on basement walls. The choices you make about size, power, and backup options will influence how well your system handles extreme weather years. Throughout this article you’ll hear practical tips, real-world examples, and actionable steps you can follow today.
How Sump Pumps Work
A sump pump serves as a water evacuation system for basements and crawlspaces. Groundwater collects in a basin (the sump) below floor level and a float switch or electronic sensor activates the pump when water rises to a preset height. The impeller propels water into a discharge pipe that leads away from the foundation. A check valve on the discharge line prevents backflow, which can re-fill the pit during heavy rains. In flooded conditions, a second, backup pump or a battery-powered unit can provide redundancy if the primary unit loses power. In the broader context of flood prevention, a properly functioning sump pump for flooding reduces damage, shortens cleanup time, and lowers warranty risk for finishes and furnishings.
Sizing and Choosing the Right Pump
Sizing a sump pump correctly is one of the most important steps for effective flood protection. Homeowners should evaluate the anticipated water inflow, pit size, and the height water must be pumped to reach the outlet. Most residential setups use a pump with a balance between power and reliability, commonly ranging from half to one horsepower depending on basement size and local rainfall. Rather than chasing the largest unit, aim for a pump that maintains a healthy set of margins during peak wet-season conditions. Consider a backup option for power outages and ensure the pump has a reliable control system that starts automatically when water rises. Remember to verify that your discharge path is clear and complies with local codes.
Installation Essentials: Pit, Valve, and Discharge
Proper installation begins with a correctly sized sump pit. A typical pit should be wide enough to seat the chosen pump and deep enough to accommodate the sump’s intake while leaving room for the float mechanism. Install a check valve on the discharge line to prevent backflow and reduce cycling. The discharge must lead away from the foundation, ideally outdoors or into a French drain, with a path that avoids re-entering the home or leaking onto sidewalks. Use the appropriate primer and cement to seal joints and ensure a watertight fit. Finally, mount the pump securely and connect the power supply with a GFCI outlet to reduce shock risk in damp environments.
Backup Power and Redundancy
A reliable backup system is essential for flood protection, especially in areas prone to power outages during storms. Options include a battery backup sump pump or a water-powered backup that activates if the primary unit fails. Battery backups should be sized to run the pump for an extended period, and you should periodically test the backup under load to confirm readiness. If your home already has a standby generator, you can integrate it with the sump pump circuit to maintain operation during outages. Always store backup equipment in a dry, accessible location and replace batteries per manufacturer recommendations.
Maintenance and Troubleshooting
Regular maintenance is the best defense against pump failure. Check for unusual noises, leaks, or signs of wear during routine inspections. Test monthly by adding a small amount of water to the pit to verify the float activates and the pump runs. Clean the pit of debris, inspect the discharge path for blockages, and confirm the check valve seals properly. Troubleshooting common issues—like a pump that runs but does not discharge or one that fails to start—often involves checking electrical connections, floats, and blockage-free impellers. Keep spare parts on hand, and refer to your pump’s manual for model-specific guidance.
Common Pitfalls and Safety Precautions
Avoid undersized pumps, improper discharge routing, and skipping routine testing. Do not attempt to service electrical components when the area is wet; always disconnect power first. Ensure the sump cover is in place to minimize odors and prevent objects from falling into the pit. When in doubt, consult a licensed plumber or electrician, especially if modifications involve electrical work or plumbing code compliance. Taking these precautions helps ensure your sump pump for flooding performs reliably when storms arrive.
Cost Considerations and ROI
Initial costs include the pump unit, pit work, discharge piping, and backup power setup. Ongoing costs cover electricity usage, maintenance supplies, and occasional part replacements. While a DIY installation can save money, a professional installation reduces the risk of errors that could lead to costly water damage. Think about ROI in terms of reduced flood-related repairs, minimized downtime, and protection of valuable belongings. In many cases, homeowners see the value of a properly installed sump pump over several years of service.
Real-World Scenarios and Quick Checks
Consider a home with a historical springtime flood risk or frequent heavy rainfall. A robust sump pump setup can dramatically cut water intrusion. Do quick checks after heavy rain: verify that the pump starts automatically, listen for odd noises, and inspect the discharge area for proper water flow. If you notice repeated short cycling or loss of prime, it may indicate a need for a larger unit, better venting, or a larger discharge line. These checks help ensure the system is prepared for the next storm.
Tools & Materials
- Sump pump (submersible or pedestal)(Choose based on pit size, noise tolerance, and vertical space.)
- Check valve for discharge line(Prevents backflow into the sump; essential for continuous operation.)
- Discharge pipe (1-1/2 to 2 inch diameter, PVC or ABS)(Directs water away from the foundation; avoid reentry.)
- GFCI-protected power outlet(Electrical safety in damp environments is critical.)
- Backup power option (battery-backed pump or water-backed pump)(Provides operation during power outages.)
- PVC primer and cement (optional for rigid joints)(Creates a robust, watertight connection.)
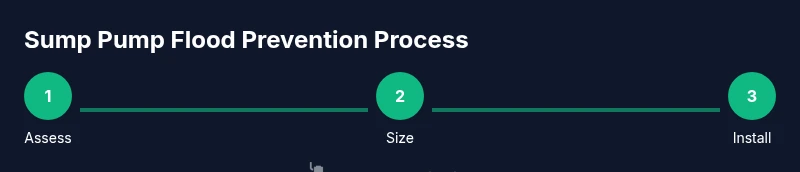
Steps
Estimated time: 2-6 hours
- 1
Assess needs and size
Evaluate basement area, anticipated water inflow, and pit capacity to determine the appropriate sump pump size. Consider head height, local rainfall patterns, and whether you’ll need a backup system.
Tip: Document your baseline water exposure in a quick sketch to guide pump sizing. - 2
Choose pit location and prepare
Select a location with easy access for maintenance and sufficient clearance. Remove debris from the pit and verify the floor around the pit is solid and dry.
Tip: Keep a water seal or cover to prevent odors and debris from entering the pit. - 3
Install check valve and discharge pipe
Attach the check valve on the discharge line, ensuring it seals properly. Route the pipe to a exterior outlet or drainage area, avoiding re-entry points.
Tip: Use strain relief where the pipe exits walls to minimize movement and leaks. - 4
Place and secure the sump pump
Set the pump in the pit and make sure the float switch can move freely without obstruction. Level the unit and verify there is no wobble.
Tip: Seal the perimeter of the pit with appropriate sealant to minimize seepage. - 5
Connect power and test auto start
Plug the pump into a GFCI outlet and set it to auto. Pour water into the pit to trigger the float and confirm automatic operation.
Tip: Never work on electrical connections with the area wet; use dry hands and dry tools. - 6
Install backup power
Set up a battery backup or connect to a generator if appropriate. Test backup under load to verify it can run the pump during outages.
Tip: Place backup equipment in a dry, accessible location; replace batteries every 3–5 years. - 7
Test full system and seal joints
Run a full system test by simulating a flood event and observe water flow, valve sealing, and safe discharge. Inspect joints for leaks and reseal as needed.
Tip: Keep a maintenance log with dates and observations for future troubleshooting. - 8
Develop maintenance schedule
Set monthly tests, annual professional inspection if possible, and keep spare parts on hand. Maintain a simple checklist for ease.
Tip: Include battery checks and float switch tests in your monthly routine. - 9
Review local codes and permits
Ensure discharge piping complies with local drainage codes and has any required permits. If in doubt, consult a licensed professional.
Tip: Missing permits or code violations can nullify insurance coverage after a flood.
FAQ
What size sump pump do I need for flooding prevention?
Choosing the right size depends on your basement area, expected water inflow, and pit capacity. A unit that's too small will run constantly or fail during heavy rain, while an oversized pump can waste energy and wear components faster.
For flooding protection, size matters. Match the pump to your space and water inflow to avoid constant running or underperformance.
Can I install a sump pump myself or should I hire a pro?
A basic DIY install is possible for confident homeowners with plumbing and electrical skills. However, incorrect sizing, improper discharge routing, or electrical work can lead to significant damage. When in doubt, hire a licensed professional.
You can do it yourself if you’re comfortable with plumbing and electrical work; otherwise, a pro helps ensure safe, code-compliant installation.
What backup power options protect my sump pump?
Battery backups and generator interties provide power during outages. Battery backups are common for residential basements and should be tested monthly.
Backups keep your sump pump running during storms when power is out.
How often should I test my sump pump?
Test monthly to confirm auto-start and discharge flow. Conduct a more thorough annual check with a professional if possible.
Test it every month and have a yearly professional check.
What features matter beyond the pump itself?
Look for a reliable float switch, an integrated check valve, and alarm options to alert you to failures or flooding events.
Float switches, check valves, and alarms help prevent surprises during storms.
Do I need permits for discharge piping?
Local codes may require specific discharge routing or permits. Check with your city or a licensed plumber to confirm requirements.
Check local codes on discharge piping and permits to stay compliant.
Watch Video
Top Takeaways
- Choose proper pump size based on basement needs.
- Install with a reliable discharge path and check valve.
- Maintain monthly tests and backups for reliability.