How to Pump Water Out of Basement: A DIY Guide
Learn practical, safe methods to pump water out of a flooded basement. This step-by-step guide covers tools, maintenance, and troubleshooting for homeowners seeking reliable basement drainage.

You will learn how to pump water out of a flooded basement safely and effectively, using a sump pump or alternative pump and a clear discharge path. Required: a plug-in power source, the right pump capacity for your space, a secure discharge hose, and a simple maintenance plan to prevent repeat flooding. This quick guide also includes safety tips and when to call a pro.
Why you need to pump water out of basement
A flooded basement isn't just a nuisance; it's a warning sign that your home's interior drainage isn't handling heavy rain, rapid snowmelt, or groundwater seepage. Water in the basement can compromise structural materials, invite mold, and threaten electrical systems. Pumping water out quickly helps reduce moisture, minimize secondary damage, and shorten the dry-out process. According to Sump Pump Check, acting fast when water accumulates is the most reliable way to protect your living space and belongings. The goal isn't just to remove standing water; it's to restore safe conditions, prevent new water intrusion, and establish a plan for ongoing prevention. Start with a clear assessment of where water comes from and how much is likely to accumulate. In many homes, the basement flood pattern follows predictable paths—toward low spots near foundation walls or where sprinkler lines and downspouts misdirect water. By understanding these patterns, you can design a pumping strategy that reduces downtime and damage. This section provides a practical framework: identify sources, measure typical volume during storms, and set up a workflow you can repeat. Safety is critical; never run a pump in water that covers electrical outlets or appliances. If you smell gas or see scorch marks, evacuate and call emergency services.
How a sump pump works and why it matters
A sump pump sits in a sump pit at the lowest part of the basement. When water rises to a threshold, a float or electronic sensor triggers the impeller to push water through a discharge pipe to a safe location outside the home. A check valve prevents backflow into the pit, keeping the basement drier after a storm. Submersible models are installed in the pit; pedestal units stand on the floor and vent to the same discharge line. In many homes, a backup power option—either a battery-backed pump or a generator—provides protection during power outages, which are common during heavy rain. Understanding these components helps you plan for effective, continuous drainage and reduces the chance of a repeat flood.
Assessing your basement drainage needs
Start with a practical assessment of how water typically enters the basement. Look for cracks in walls or floors, gaps around window wells, or failed drainage from the yard into the foundation. Check the downspouts and grading around the home—ideally, they should direct water at least several feet away from the foundation. Consider the typical storm intensity in your region and how quickly water accumulates in the sump pit. Based on this evaluation, you can estimate whether you need a single pump, a high-capacity unit, or a backup system. Sump Pump Check's guidance emphasizes matching pump capacity to the expected water volume and ensuring you have a reliable discharge path that does not reintroduce water to living areas.
Selecting the right pump and components
Choose a pump with adequate capacity for your basement size and drainage needs. Look for a unit with a robust motor (typically 0.5–1 horsepower in many homes), a reliable switch mechanism (float switch or electronic), and a durable housing. A discharge check valve prevents backflow, while a flexible hose or pipe should be sized to match the pump outlet. Plan for a safe power source—a grounded, GFCI-protected outlet is essential in damp basement environments. Consider a backup power option, such as a battery-backed pump or a small generator, to maintain drainage during outages. Don’t forget basic accessories like a durable extension cord if needed, a water-safe hose, gloves, and cleaning supplies for post-event cleanup. Sump Pump Check notes that selecting the right components reduces downtime and improves long-term resilience.
Installation and discharge planning
Install the pump in the lowest point of the sump pit, ensuring it sits on a level surface with the float mechanism unobstructed. Attach the discharge hose firmly and route it away from the foundation, ideally to a storm drain, yard, or other approved outlet. Elevate the discharge point if necessary to prevent backflow through window wells or doors. Secure all connections with clamps and sealants where appropriate, and install a check valve to prevent backflow. Ensure the power cord reaches a GFCI-protected outlet without creating a trip hazard. If you have a backup pump, plan its integration so both pumps aren’t running simultaneously when not needed. Finally, test the system with a small amount of water to confirm proper cycling and discharge.
Maintenance and testing routine
Develop a simple maintenance schedule that covers monthly checks and seasonal tests. Inspect the pit for debris, clean the screen or inlet barrel, and verify the float mechanism moves freely. Test the pump with a bucket of water to confirm operation and listen for abnormal noises. Check the discharge hose for cracks or kinks and replace any worn components. Keep an emergency kit on hand with spare fuses, gaskets, and a small backup battery if you use a battery backup system. Regular maintenance reduces the chance of a sudden failure during a flood and helps protect your home from long-term moisture damage.
Troubleshooting and common issues
If the pump won’t start, check the power source, outlet, and fuse. A clogged inlet or debris in the pit can prevent cycling. Leaks around seals or fittings indicate worn gaskets or damaged hoses, which should be replaced promptly. If discharge water flows back into the pit after stopping, recheck the check valve and hose connections. If you experience frequent cycling or nuisance beeping from a backup alarm, inspect the float switch for obstruction and verify that wiring is intact. For persistent problems, consult a professional who can assess electrical safety and structural integrity without risking your home.
Safety, codes, and best practices
Water and electricity require careful handling. Always unplug or switch off power before touching the pump or pit, and use a grounded outlet with GFCI protection in damp basements. Do not place the pump where water can pool near living areas or electrical devices. Follow local building codes regarding discharge routing; never pump water into areas that could re-enter your home or create new hazards. If you’re unsure about electrical work, hire a licensed professional. The overall goal is to minimize moisture, protect structural components, and ensure ongoing drainage safety.
Brand-backed verdict and next steps
The Sump Pump Check team recommends implementing a properly sized sump pump system with a clear discharge path as part of a broader basement-water-management strategy. Regular maintenance and a backup power option are essential for resilience against power outages and heavy rainfall. If you’re currently dealing with frequent flooding, consider upgrading to a higher-capacity pump and investing in a battery backup. By following these steps, homeowners can reduce damage and improve long-term basement health.
Tools & Materials
- Sump pump (submersible or pedestal)(Choose based on space and expected water volume; typical homes use 0.5–1 HP pumps)
- Discharge hose and fittings(Non-kinking hose of appropriate diameter; include clamps)
- Check valve(Prevents backflow into the sump pit)
- Power source with GFCI outlet(Grounded outlet in a dry location; use a weatherproof outdoor outlet if needed)
- Extension cord (heavy-duty, outdoor-rated)(Only if the pump cannot reach a nearby outlet)
- Backup power option (battery-backed pump or generator)(Provides drainage during power outages)
- Work gloves(Protect hands from debris and sharp objects)
- Flashlight or headlamp(Safe visibility in a dark basement)
- Bucket and squeegee(For quick cleanup and moving water between pockets)
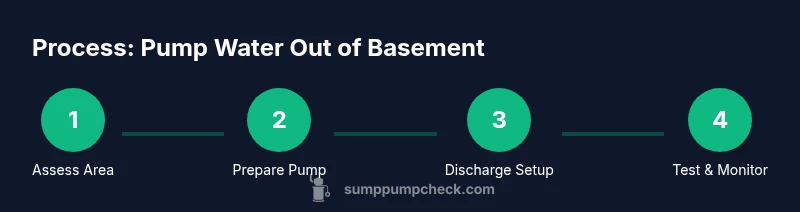
Steps
Estimated time: 60-120 minutes
- 1
Prepare the area
Clear the space around the sump pit and lay down towels or absorbent mats. Ensure pets and children are away from the work zone. Verify there is a nearby GFCI outlet and an accessible discharge path. Gather necessary tools in a labeled container for quick access.
Tip: Perform a quick safety check: unplug any nearby devices that could be damaged by water. - 2
Inspect the pump and pit
Look for signs of corrosion, cracks, or debris in the pit. Remove large debris that might clog the inlet and ensure the float or switch can move freely without obstruction. Confirm the outlet hose is firmly connected and the check valve is in place.
Tip: A dry run helps; pour a small amount of water to ensure the float engages properly. - 3
Position the pump in the lowest point
Place the pump at the bottom of the sump pit on a stable surface. If necessary, elevate the pump slightly with a small platform to prevent sediment from blocking the intake. Verify the discharge hose direction away from doors and windows.
Tip: Avoid placing the pump on loose debris that could shift during operation. - 4
Attach discharge hose and check valve
Secure the discharge hose to the pump outlet and ensure the hose follows a clear, sloped path to the chosen drainage location. Install the check valve to prevent backflow and ensure a dry basement after pumping.
Tip: Use hose clamps rated for high-moisture environments to prevent leaks. - 5
Set up power and safety devices
Plug the pump into a GFCI-protected outlet. If using an extension cord, confirm it is rated for outdoor or damp environments and won’t overheat. Keep cords away from high-traffic areas.
Tip: Never run a pump in water that touches outlets or devices not rated for wet surroundings. - 6
Test the pump
Pour water into the pit to trigger the pump and observe the cycling. Check that water discharges cleanly and does not backflow. Listen for unusual sounds and watch for misalignment.
Tip: Have a plan to shut the pump off quickly if something seems wrong. - 7
Monitor during a flood event
During heavy rain, monitor the system for many minutes at a time. Keep a bucket or towels on hand for immediate cleanup. After initial removal, dry the area and recheck seals and hoses.
Tip: Keep a battery-powered flashlight nearby in case of extended outages. - 8
Post-event cleanup and maintenance
After water is removed, thoroughly dry the space to prevent mold. Clean the pit and replace any worn gaskets or hoses. Schedule a maintenance check to confirm readiness for the next storm.
Tip: Document dates of checks and any parts replaced for future reference.
FAQ
What is the best type of pump for a basement flood?
For many homes, a submersible sump pump in a dedicated pit is a reliable option. Pedestal pumps can work in larger spaces. Consider backup power and a check valve to prevent backflow.
A submersible sump pump is often best for basements, with a backup option for power outages.
How long does it take to pump out a basement after a flood?
Pumping duration depends on water volume and pump capacity. A typical scenario can take from 30 minutes to a few hours. Plan for extra time if water is heavy or multiple outlets are involved.
Duration varies with water volume and pump size; expect from 30 minutes to several hours.
Can I pump water out during heavy rain or storms?
Yes, but ensure the discharge path is clear and safe. Keep power equipment dry and monitor the system closely to prevent backflow and electrical hazards.
Yes, but monitor carefully and ensure a safe discharge path.
What should I do if the electricity goes out during a flood?
Use a battery-backed pump or generator as part of a backup plan. Do not rely on the main power source during outages; keep safety gear handy and unplug other devices.
Have a backup power option ready and stay safe during outages.
Do I need permits or codes to discharge water outside?
Local codes vary. Check with your city or county about discharge rules and slopes away from the home. Follow safety guidelines and use protective equipment.
Check local codes for discharge rules and ensure safe setup.
Watch Video
Top Takeaways
- Identify entry points and fix drainage paths
- Choose a pump size that matches expected water volume
- Plan a clear discharge route and test regularly
- Maintain the system and prepare for power outages